Fluffy vegan chocolate mousse with aquafaba
Fluffy vegan chocolate mousse with aquafaba

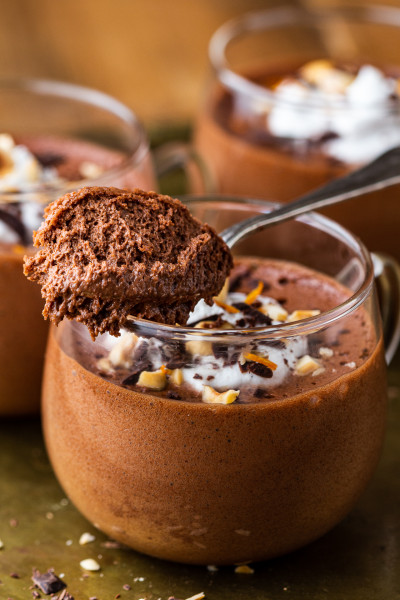
I’m so excited to bring this simple yet indulgent vegan chocolate mousse with aquafaba recipe to you, guys. As I’ve already mentioned in my previous posts, ever since I’ve read about the brilliant invention of aquafaba ‘egg whites’, I’ve been massively obsessed with it.
I’m part of an inspiring Facebook group solely dedicated to making things with aquafaba and I can tell you that every single person who tries to whip chickpea water like egg whites has the same reaction – that of amazement mixed in with excitement.
It’s because it’s a blooming genius invention. It opens up so many possibilities, not only for vegans, but also for people with egg allergies.
Who would have thought that something as basic as whipped chickpeas (most beans, in fact) cooking water can yield such amazing results. To make sure I have not gone mad and this thing doesn’t, in fact, taste vile, I made this mousse twice while a couple of our omnivorous friends were staying with us. Not only did they LOVE the dessert, but when I was making it the second time, they watched me whip up the chickpea water into stiff peaks as they couldn’t quite believe that it is as simple as it sounds. They were so impressed and vowed to make this dessert once they get home. It’s the best compliment I could have wished for.
For the sceptics amongst you, let me re-assure you, this dessert DOES NOT taste of chickpeas at all. If I hadn’t just told you what’s in it, you would have thought that it’s an indulgent chocolate mousse, just like your grandma used to make. Go on, try it for yourself – you’ll want to shout from the rooftops about it.
PS: you may also like one of these aquafaba-based mousses instead:
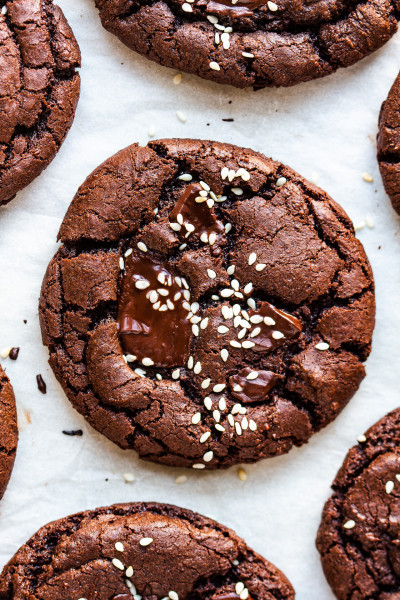
Vegan hazelnut mousse

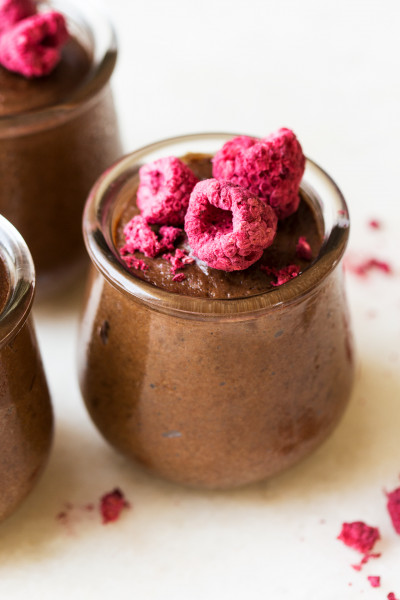
Vegan raspberry mousse – 4 WAYS
Peanut butter caramel chocolate mousse

Vegan peanut butter mousse
Healthy vegan chocolate mousse
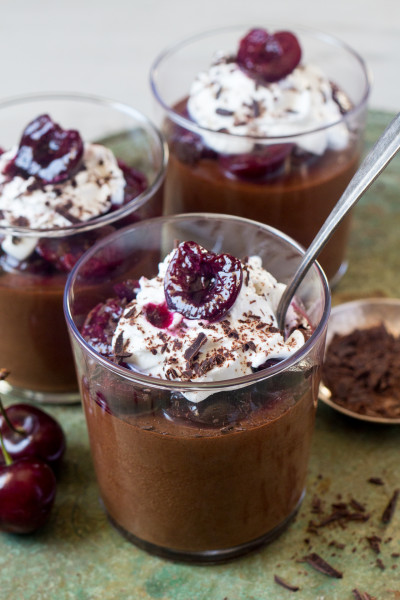
Vegan black forest chocolate mousse
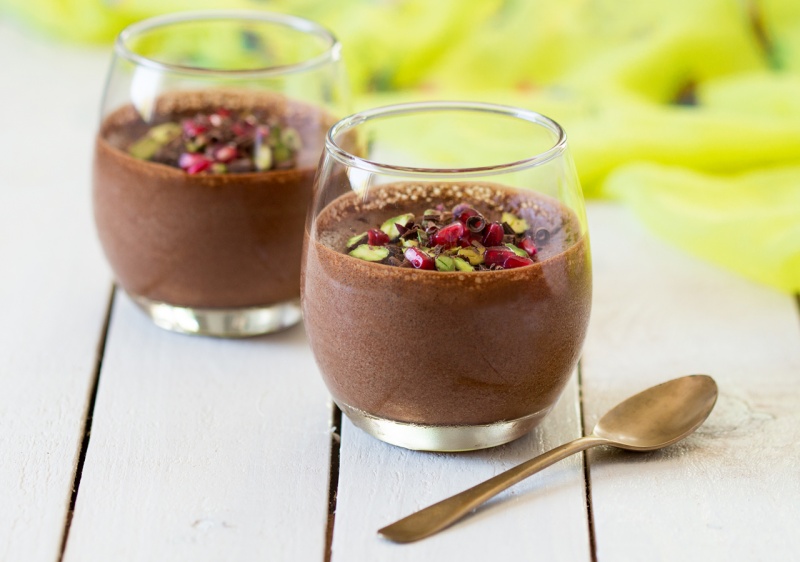
- ¾ cup / 180 ml (room temp) aquafaba (from low-sodium canned chickpeas OR home cooked)
- 1 tsp lemon/lime juice or scant ½ tsp cream of tartar
- 140 g / 5 oz dark 70% cacao vegan chocolate
- 10 g / 2 tsp coconut oil (to help with chocolate seizing)
- 25 g / 2 tbsp caster (superfine) sugar (optional, adjust to taste)
GARNISH (optional)
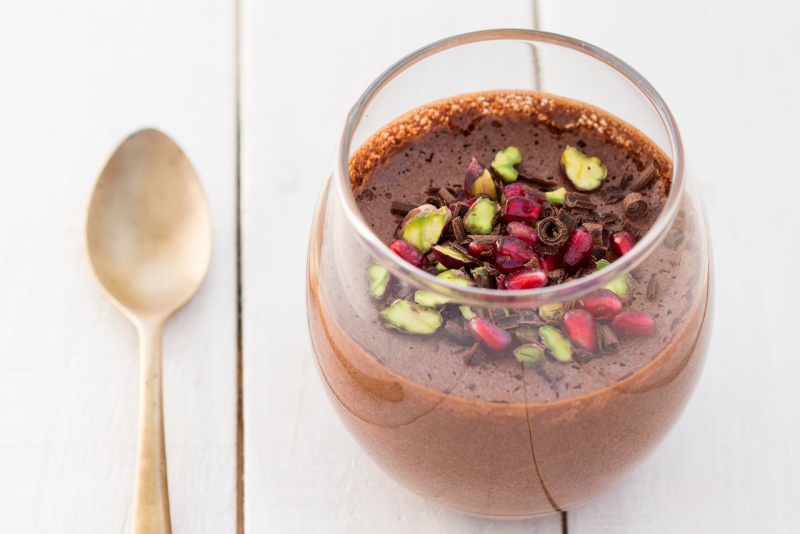
- 1 tbsp chocolate shavings
- a handful of pomegranate seeds
- a handful of chopped pistachios
-
This recipe contains a step-by-step VIDEO (see above).
- Place broken up chocolate and coconut oil in a glass or metal bowl suspended over a water bath. Make sure the bowl with chocolate does not touch the water underneath. The key to success is not to overheat the chocolate and to be gentle with it – it’s a temperamental ingredient.
- Allow the water to come to a simmer slowly. Once it does, turn the heat off and allow the chocolate to melt in the residual heat.
- Once chocolate looks melted, give it a slow and gentle stir. Take the bowl with chocolate off the heat and allow it to cool down – you want it as cool as possible but still liquid.
- Once chocolate is almost cool, drain room temperature chickpea water (aquafaba) into large glass bowl. The bowl and the utensils you’ll use to whip aquafaba need to be completely grease-free as even the tiniest grease residue can prevent aquafaba from reaching stiff peaks.
- Add acid (lemon/ lime juice or cream of tartar) to the chickpea water to stablise the aquafaba – it helps to reach stiff peaks.
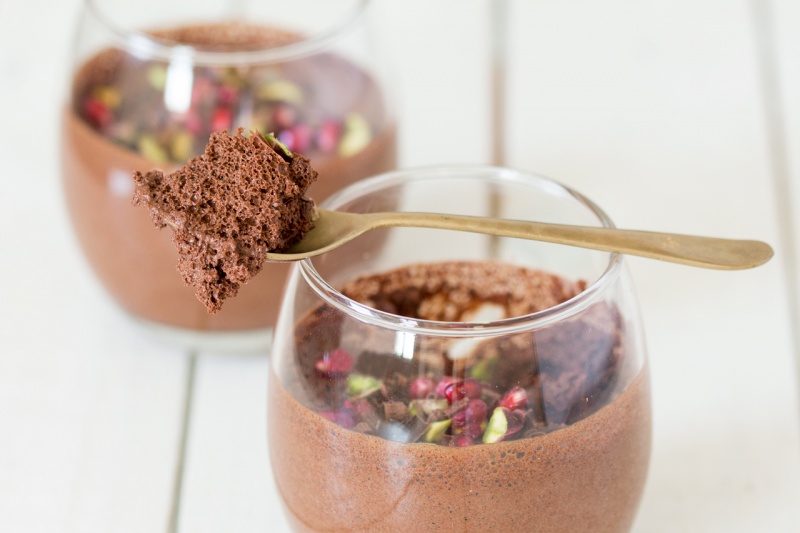
- Using an electric egg whisk, whip chickpea water into stiff peaks – this is SUPER important as otherwise your mousse will deflate completely once the chocolate has been added. The best way to check if you have achieved stiff peaks is to invert the bowl with whipped aquafaba. If aquafaba slides down even a tiny bit, you are not there yet – keep on whipping until it does not move at all. I use an old, hand-held whisk and it takes me about 8 minutes to get stiff peaks. If you are a lucky owner of a stand mixer, it will happen quicker. The good news is that (as opposed to egg whites) aquafaba cannot be overwhipped.
- Once you reach stiff peaks, start adding sugar, bit by bit, whipping the whole time. If sugar has caused the stiff peaks to perish, whip the mixture until you get stiff peaks again. Caster (also known as superfine) sugar or icing sugar work well, other sugars are known to make aquafaba deflate.
- Check that the chocolate has cooled down sufficiently – it should not be warm to the touch or else chocolate is likely to seize and you will end up with grainy mousse.
- Gently and gradually fold a portion (approx. a third) of melted chocolate into whipped aquafaba – using a silicone spatula and a gentle folding motion. Continue adding the chocolate to the aquafaba in two-three more batches until all of it has been incorporated. Do not worry if your fluffy mixture deflates a bit once all of the chocolate has been added – that’s perfectly normal – but you should still see plenty small bubbles in the mixture. By the time you’ve added all of your melted chocolate, the mousse MAY have more of a pourable than spoonable consistency – that’s ok.
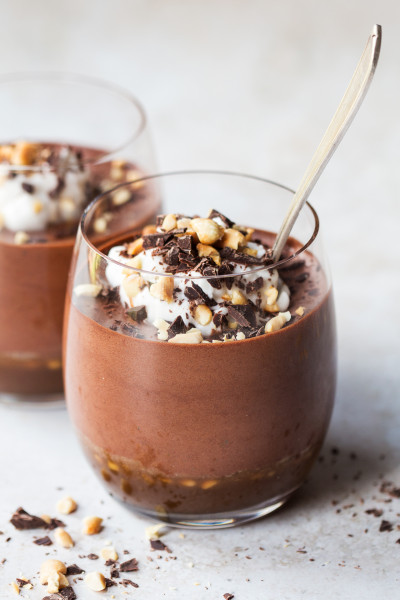
- Divide the mixture between 4 glasses. Gently stir the mixture between putting it into individual glasses as a bit of melted chocolate tends to drop to the bottom sometimes. Once in glass, give the mousses a gentle stir with a toothpick to ensure the mixture sets evenly.
- Put glasses into the fridge overnight for the mousse to set.
Here are some common reasons WHY CHOCOLATE TENDS TO SEIZE:
– being exposed to heat for too long
– being exposed to too intense heat (I therefore do not recommend using microwave to melt it)
– stirring too much or too quickly
– due to coming into contact with even a drop of water
– due to a thermic shock between ingredients (aquafaba needs to be as close in temperature to the chocolate as possible)
– sometimes it seizes for to apparent no reason at all…
To minimise the risk of CHOCOLATE SEIZING:
– melt the chocolate slowly and using as little heat as possible (switch the heat off once the water barely starts to simmer)
– stir gently and as little as you can get away with
– make sure aquafaba and melted chocolate are at similar temperatures
– you could add a splash of plant milk or plant creamer (like Oatly or full fat coconut milk) to the bowl with unmelted chocolate and allow them to come to temperature together, then mix gently to create a ganache prior to incorporating into whipped aquafaba. This will ensure that the chocolate does not seize when it comes into contact with aquafaba, BUT it does sometimes seize when plant milk/creamer is being stirred into the chocolate and the only way to rescue a mixture like that is to stir in some boiling water, which will make the mousse less stiff and more watery.
PS: you may also like one of these aquafaba-based mousses instead:

Sorry for the delay in replying - first I was sick then I had a nightmare renovation on my hands. I am delighted to hear that you enjoyed the taste of this mousse. I must say I am puzzled as to what happened. My first thought was that the chocolate must have seized but you would definitely be aware of that when folding the chocolate as that's when it happens and it's very apparent. Anyway, if it seized you would have solid particles of chocolate suspended in the mousse so not quite what you describe. Hmm, how about trying to make this version (just the mousse on its own). In that recipe I use coconut cream which minimises the risk of the chocolate seizing. Chocolate is temperamental so please don't be discouraged, it may take a few tries but I am confident you'll nail it. Ania
This recipe is wonderful, and it worked at first time. It was fluffy, creamy and super tasty.
I used this chocolate Moser Roth 70% cocoa, and omitted coconut oil by accident, and it still worked. Thank you for additional notes and tips on how to make this desert😊
Aquafaba is more akin to egg whites rather than cream, but yes it grows in volume, I would say more than 3 times (10 times in my guess). Hope this helps. Ania
Thy
It makes 4 servings and yes, you can print the recipe - there is a print button above the list of ingredients, right hand side. Ania
Not sure what I did, but the cooled mousse seemed to have small chips of chocolate (not grainy as others have mentioned). If I knew what I did, I would do it again!
about 70% as sweet as "table sugar", allulose is an almost perfect substitute for regular sugar. It does not break down when heated, like some substitute sweeteners, causes less digestive issues than sugar-alcohols like erythritol and it even caramelizes like regular sugar. Plus, you can easily powder the granular stuff in food processor. And don't believe the rumor that it causes cancer...not at all proven.
My question is: Have you tried freezing this mousse as an ice cream substitute? Others have claimed that freezing an aquafaba whip is a good ice cream alternative that remains scoopable when frozen, and does not have gritty ice crystals even without using an ice cream freezer. I am trying to create a wholesome ice cream alternative that could actually replace a meal, by blending in silken tofu into the whip, using allulose to reduce carbs to the lowest level possible, & reducing the fat level to dietary ADR. Imagine being able to sit down to a huge bowl of tasty smooth ice cream (instead of a regular meal) without guilt, malnutrition or an enormous caloric intake, or a "sugar spike"..
Thanks for your input about allulose, I am sure readers would find it helpful. Yes, I have tried freezing it but as slightly different version - this one - which contains higher fat ratio (coconut cream) and yes, I remember it being really nice to eat, not icy. Since you are planning to make quite a few substantial changes, you'll need to experiment to answer your question though. Hope it come out well. Ania
Thank you for the very clear recipe
I would not make it four days in advance - I mean it will be okay to eat (provided your aquafaba was fresh when you made it) but it will dry out by day 4 I imagine, 2 days would be better. Hope this helps. Ania
Would I be able to make this using allulose/BochaSweet as my sweetener and keto chocolate chips melted with avocado oil? Also, I would like to make a filling for a Swiss chocolate roll, would this work or do I have to add gelatin? Thank you for any advice.
Unfortunately, I have no experience of using the sweeteners you mention or keto chocolate chips but it's worth a try. I think it may be too liquid initially (it starts off quite liquid and then it sets) to use in a Swiss roll. You could set it first and then pipe in I suppose but it still may need a bit more fat (melted vegan butter or coconut oil added to the melted chocolate before combining with aquafaba) to be the correct consistency. Hope this helps. Ania
I stipulate low-sodium aquafaba as some people are super senstive to salt or try to avoid it, but to be completely honest salt and chocolate are a great pairing. A bit of salt is often added to chocolate desserts to dial up their 'chocolateness' so I would not worry. I think you will barely be able to detect it in the finished product. Hope this is reassuring and thank you will enjoy this mousse. Ania
A question for next time: can I cool the finished mousse in a box / large bowl in the fridge instead of the personal containers, to make it easier to transport later if not serving it in my own kitchen? thanks!
It does sound like the issue isn't with the recipe itself, as like you say you succeeded on your first attempt, but rather with either the quality of your aquafaba (perhaps it was too weak/too watered down) or there was some hidden grease somewhere - even a trace amount stops aquafaba from foaming sufficiently so please do not give up - it really does work, I've done hunderds of recipes using this magic ingredient and never had any issues with reaching stiff peaks so you were really unlucky. Ania
It's definitely possible without it - I have made it many times without any issues - but that's a great work around, for sure. Thanks for sharing! x Ania
Ciao from your fan from Torino!
Susanna
Many thanks ;-)
I've never tried freezing and defrosting it, but I've frozen it and eaten as a vegan ice-cream and it was lovely. x Ania
I'm sorry to hear that but as I've explained in my instructions and notes, seizing is something that happens when working with dark chocolate. It takes some practice (I've detailed all my tips as well as I could) to be able to avoid it. Perhaps you want to try one of easier aquafaba mousses first to get the hang of it, like this peanut mousse or Nutella inspired one or this easier chocolate version as none of them will seize for sure. Ania
Cocoa powder is not going to work on its own, I'm afraid, as you some fat to stabilise the foam and give it body. Perhaps this recipe is more up your street. Hope this helps! x Ania
I'm sorry to hear that and don't worry, it happens. Chocolate is a very sensitive ingredient and it takes some practice to get this right sometimes. It could have been overheated, for example. x Ania
I found that it just takes a bit of practise to nail this. Yes, you can do that but sometimes it does seize anyway and if you add too much, it may affect the final texture. I would try to make sure aquafaba is room temperature (not from the fridge) next time. Ania