Homemade aquafaba – vegan egg replacer
Homemade aquafaba – vegan egg replacer
If you’ve visited my blog a few times, the chances are that you’ve heard of aquafaba – a miraculous plant-based egg replacer – as I’m in love with its amazing properties and use it often. If this is the first time you hear about it, here goes: aquafaba is a legume cooking liquid that has been discovered to emulate egg whites.
If you would like to read up more about this discovery and the science behind it, check out this informative website set up by the people who discovered that what we all used to chuck down the drain is, in fact, an invaluable cooking ingredient.
People report success with many varieties of legumes (cannellini, black beans and lima beans to name just a few), but I myself love chickpeas and so chickpea aquafaba is the only type I’ve ever used. Below is full explanation on how to get this magic liquid out of dry chickpeas.
You can also use the brine from a tin of chickpeas, but there are a few problems with that. Firstly, most tins contain harmful BPA, which has been linked to many serious illnesses, so many people try to avoid it. Secondly, ideally you do not want any salt in your aquafaba and all tinned chickpea brands I am aware of add sodium. Thirdly, using tinned aquafaba is more expensive than making your own. Finally, people have reported issues with consistency with some brands – some brands work, some don’t. For all these reasons, I prefer to prepare aquafaba from scratch.
What can I use it for? I hear you ask. Pretty much anything you would use an egg white for…Here is a round-up of SOME of the foods aquafaba has helped me make or to make better. If you love experimenting in the kitchen, I recommended joining a group called Vegan Meringue – Hits and Misses on Facebook, where you’ll find plenty of encouragement, great tips and knowledge from a bunch of amazing vegan cooks.
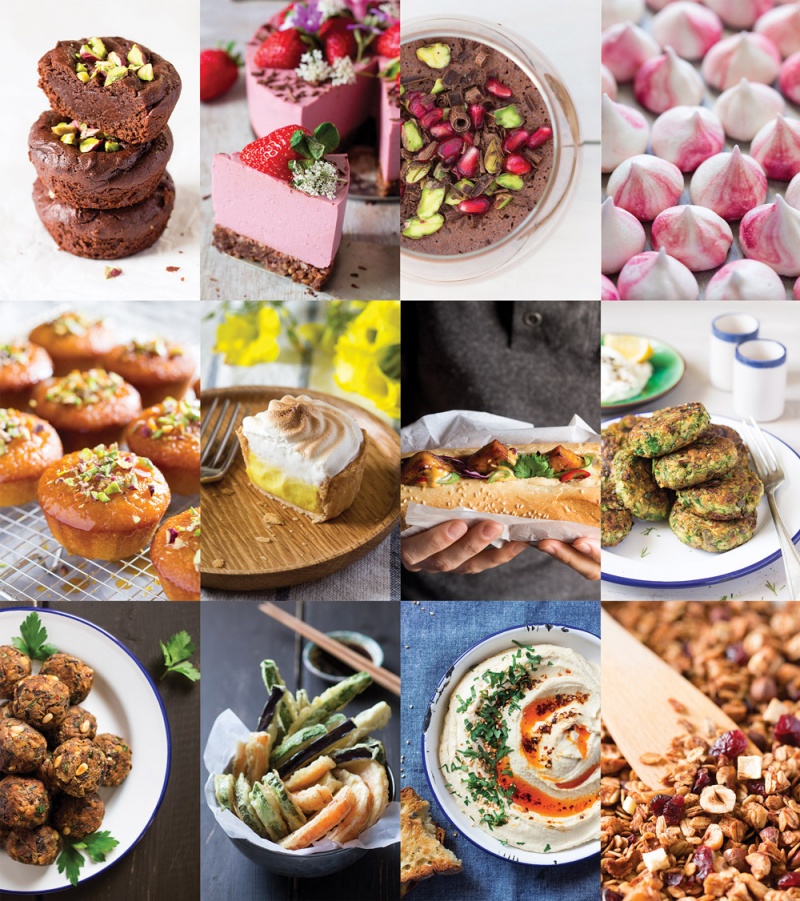
1. fudgy brownies
2. creamy strawberry cheesecake
3. airy chocolate mousse
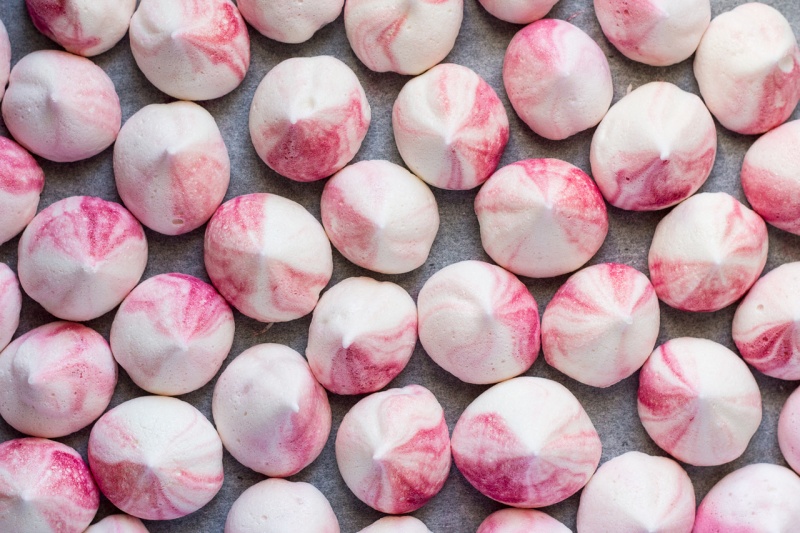
4. vegan meringues
5. moist orange semolina cakes
6. vegan lemon meringue pies
7. Sriracha vegan mayo
8. Greek zucchini fritters
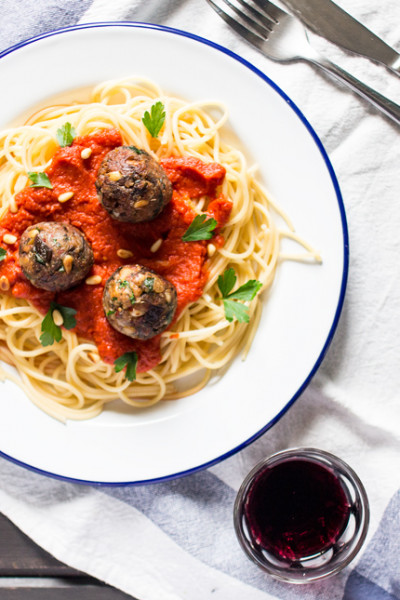
9. Mediterranean meatballs
10. crispy veggie tempura
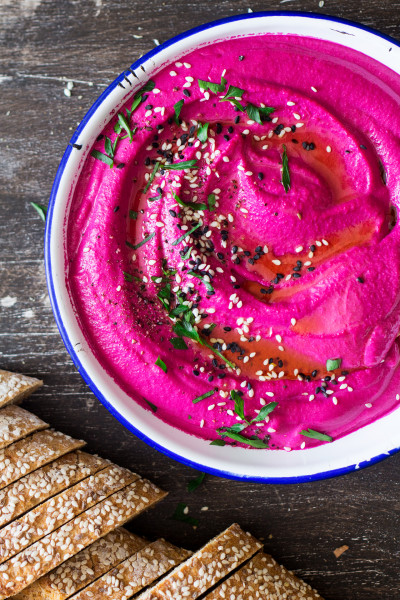
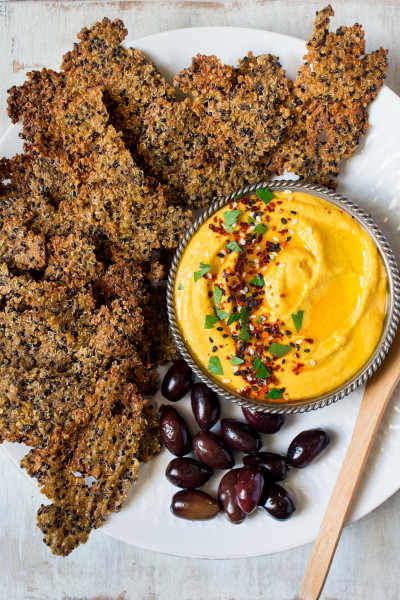
11. smooth, oil-free hummus
12. crispy low-fat granola
- 2 cups of dry chickpeas
- 8 cups of water
- Soak dry chickpeas in plenty of water (chickpeas should be well covered) for about 8 hours. I tend to leave them to soak overnight.
- Discard soaking water and rinse the chickpeas. Place them into a pot, which you have a lid for and cover with 8 cups of water. Do not add any salt or baking soda.
- Cover the pot with a lid and bring to the boil. Be careful as chickpeas like to boil over if the heat is too high so keep an eye on them until they come to boil. Skim the foam that has come to the top and discard.
- After the chickpeas come to boil, decrease the heat to low-medium and simmer the chickpeas (with a lid on) until tender. It takes about 60-75 minutes.
- Once the chickpeas are ready, turn the heat off and leave the chickpeas to cool down in its cooking water (this infuses the cooking water with more protein, which gives aquafaba its miraculous properties of an egg white).
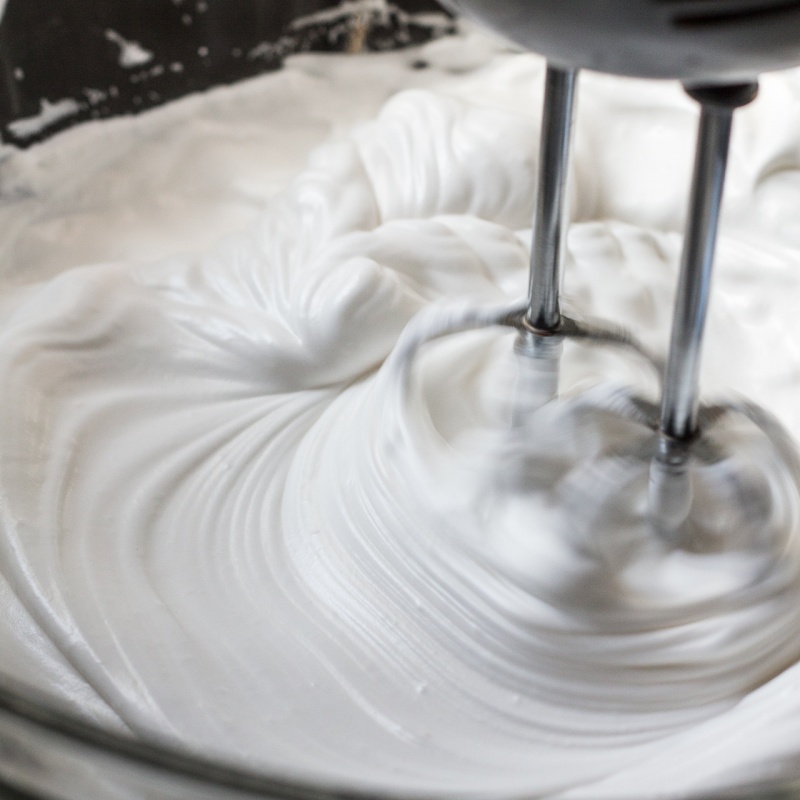
- Remove chickpeas from the cooking water with a slotted spoon. Make sure the spoon is clean and has no grease residue on it as even trace amounts of grease inhibit aquafaba’s foaming properties – this is especially important if you intend to whip your aquafaba into a meringue.
- Depending on the intended application of your aquafaba, you may want to reduce the liquid a little to make it more potent. I find that this is especially necessary for when you intent to use it as a binder, in vegan meatballs for example. Please remember also that the more reduced the liquid the more intense chickpea flavour will be so when you intent to use it for desserts, like meringues or chocolate mousse, you do not need to reduce as much or at all. To reduce aquafaba, return the remaining cooking water to the stove. Set the heat to low-medium and reduce aquafaba (without a lid) for about 30-45 minutes until some of the water evaporates and you are left with thick yellow liquid.
- Let the reduced liquid come to room temperature and then transfer to a clean container and store in the fridge – once chilled aquafaba will turn gelatinous and resemble an egg white. If you are not in a rush to use your aquafaba, pop cooked chickpeas back into the container with aquafaba and store them together overnight – this will make aquafaba even more gelatinous. Store in an air-tight container for 3-4 days.
Aquafaba is indeed wonderful BUT it can only be used in some contexts, mostly as a replace for egg whites. You can make wonderful meringues out of it or brownies or nougat with it, but it cannot be turned into a omelette, I am afraid. Sorry to disappoint. Ania
I used the cooking water that the chickpeas had been sitting in in the fridge for a few days.
My question is: is there an easy way to separate the thickened aquafaba from the chickpeas? It took me quite a while to get the 6 tbsp that I needed, just by taking out each spoonful of chickpeas and taking the jelly off them individually! There must be an easier way?
Would it work in future to cook the chick peas and drain most of them out of the cooking liquor, leaving only a few to exude protein?
Any thoughts much appreciated xx
I am so happy to hear that you are discovering the wonders of aquafaba. I use a slotted spoon to separate them, you could also leave them in a colander with a bowl underneath catching aquafaba. And yes, you can only leave a few chickpea in and then lift them out of the liquid with a fork/slotted spoon. Hope this helps! Ania
Yes, you can absolutely freeze it (I like to use ice-cube trays for that) and it will keep frozen for ages but I would say use up within 2 months to be on the safe side. Hope this helps! Ania
I don't own one unfortunately so I don't but I would simply follow your machine's instructions for cooking beans/legumes except for adding salt. There is nothing special about the way these are cooked - you simply want soak the beans overnight first and then use enough water to make sure that once the chickpeas are tender there is some liquid left in the pot. Hope this helps! Ania
Once thawed will it need further reduction?
You can safely freeze it (ice cube containers are great for that) for as long as you need but I would not reduce until you know what you are planning to use it for. There is no need to reduce it for most things, like chocolate mousse, meringues, biscuits, brownies. Hope this helps! Ania
Yes, absolutely, they can be used in the same way as you would use canned chickpeas - no need to do anything else. Hope this helps! x Ania
No, unfortunately not! It needs to be without baking soda. Hope this helps! Ania
Please help me on the taste.
I'll be honest I don't own a pressure cooker so I don't know how much water is needed. As for the sour taste of your macroons, I really don't know. Aquafaba should not taste sour at all. Sorry I don't really have any ideas. Ania
The only way to make it lighter is to reduce it less. You don't need it that reduced for meringue. I've made meringue with aquafaba straight from a can before. Hope this helps! Ania
Can I use this aquafaba in baking cakes?
Yes, but not in a way you would expect. You won't get good results by replacing, for example, 3 eggs with 3/4 cup of aquafaba as aquafaba have some of the properties of eggs but not all. You are best off following a recipe that already uses aquafaba or if you are converting a recipe yourself, use a mixture of aquafaba and other egg replacers (fruit / veg puree, flax egg, banana, tofu) to achieve the desired result. Ania
I am glad you found this post useful. If that happens, all you need to do is add a small amount of water to rinse that aquafaba off and catch that rinsing water of course, which sounds like what you did! You don't necessarily need to reduce it afterwards - it depends on the application and how much water you've used to rinse. In the future, I would perhaps test with adding more water to the instapot for chickpeas to cook in. Hope this helps! Ania
I just came across aquafaba in a meringue recipe n was wondering what it is. Hoping to try making it soon.
I never get white meringues no matter which recipe or temperature variation I try.
Is there a tip to getting them to look so bright?
Thank you so much for the idea!
Please forgive my silly question:
I was wondering.., if the liquid is yellow.. how It will be white at the end?
Yes, it's yellowish and it stays yellowish, not sure why you are expecting it to turn white? Unless you mean me saying it will end up like egg whites? I meant consistency, not colour. Hope this helps! Ania
I am so excited to try this. I wonder can we make Aquafaba with soya beans?
They seem so similar?
Thankyou.
I am not sure, it might though. Ania
I'm sorry to hear that you are not getting the results you were expecting. From what you describe it sounds like your aquafaba was really thin to begin with and it needed reducing even more, perhaps. Or maybe the chickpeas weren't the freshest (they sit around for a long time before being sold in shops so it is possible to get a dodgy batch even if you've just bought them). I'm sorry, I don't know what else to advise. I have never had any trouble with any of my aquafaba. I simply cook the beans, let them cool in the aquafaba and separate the two at the end. I tend to eat the beans and either use aquafaba straight away or freeze it for later. Ania
Unfortunately, I do not own one myself so I'm unable to help you. Ania
I have a question regarding to reducing the aquafaba as you say it’s better not to do it if you’re are using it for meringues. I’m planning to try this recipe to make macarons and I wanted to know if you recommend me to reduce it a little bit or not.
I’ve tried making meringues plenty of times with homemade aquafaba but succeeded only the first time haha :( so I hope that following this tips I’ll be able to make it right!
I think that reduced (more strength) aquafaba is better in terms of efficacy but the trade off is that it will have a stronger taste, which you obviously do not want in meringues. Having said that I never reduce mine (I tend to leave chickpeas in my aquafaba until it's cold and store them together to give it more protein) and I never have any issues with whipping it into a stiff foam. I would say don't reduce unless your aquafaba is really thin and watery. Ania
I assume so but I don't have an Instantpot myself so I cannot be sure, sorry. Ania
No, there aren't any special tricks really, but it's a good idea to freeze small amounts in an ice-cube tray or a similar container. Yes, it is likely to go off after 3-4 days in the fridge so best to use it fairly soon after making/thawing. Hope this helps! Ania
Traditional wisdom says that it's about 3 tbsp per egg, but unfortunately, it is not that simple - if you were to replace 4 eggs in a cake with 12 tbsp of aquafaba, it would be a mess. It's best to use recipes that already use aquafaba already as the recipe developer has gone through a lot of trial and error before they arrived at the final result. Hope this helps! Ania