No-knead Turkish bread
No-knead Turkish bread
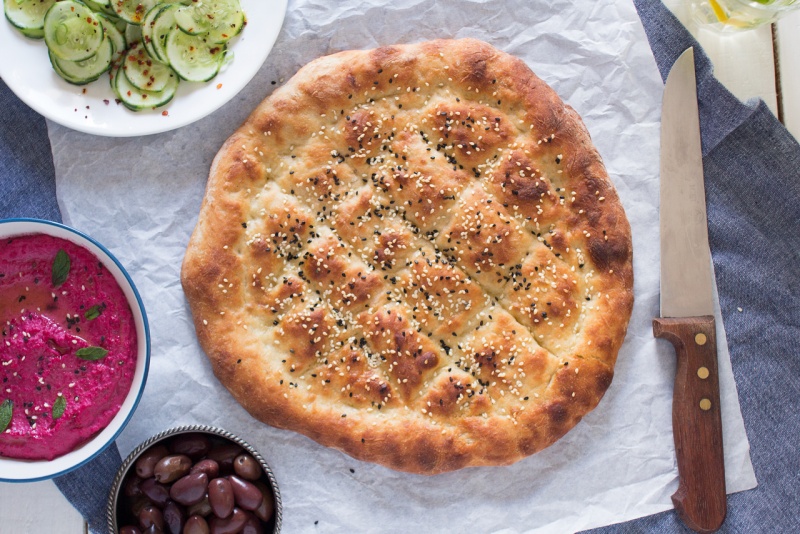
As I have mentioned before, both me and Duncan have a soft spot for a particular type of Turkish bread – flat, fluffy loaf traditionally eaten during Ramadan. Sometimes, it’s topped with sesame seeds, sometimes with pul biber (Turkish chilli), either way it is delicious.
We got hooked on it when we used to live in North-East London next door to a Turkish bakery. They sold these amazing Turkish breads, straight from the oven, for 80p each and their tantalising smell made it impossible to go past without buying some! It’s fabulous when it’s still warm and fresh, but even a day or two later it tastes delicious cut into thin strips, lightly toasted on a griddle pan and served with a selection of mezze dishes to dip it into.
Since we no longer live in London, now I have to twist Duncan’s arm to make us Turkish bread now and again. To be honest, he is not that resistant to it as this is one of the easiest breads you’ll make.
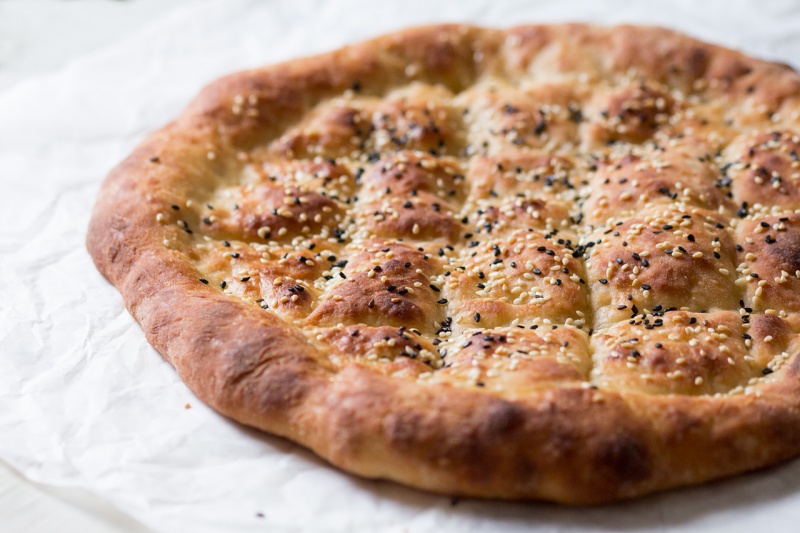
It requires no kneading! You cannot believe it? I was a bit sceptical too, but try it – proof is in the erm…bread. It’s light and airy, full of air pockets and so irresistible that you’ll wanna eat the whole loaf at one sitting. Just a word of warning, don’t do it if you intend to go running an hour later. This last bit of info is NOT BASED on personal experience at all:).

- 250 g / 2 cups bread flour
- 7 g / 0.25 oz / 2¼ tsp instant dried yeast
- 200 ml / ¾ cup + 4 tsp warm water
- 2 tsp caster/fine sugar
- 1 tsp fine salt
- 15 ml / 1 tbsp olive oil, for glazing
- handful of white and black sesame seeds
- Mix the flour, sugar and salt in a large mixing bowl.
- Create a small well in the middle of the flour and add the yeast. Pour the water into the well and mix everything together with your hands. At this stage the dough should be very wet and fairly hard to manage.
- Cover the mixing bowl with cling film and leave to prove for about one hour (or until it has doubled in size).
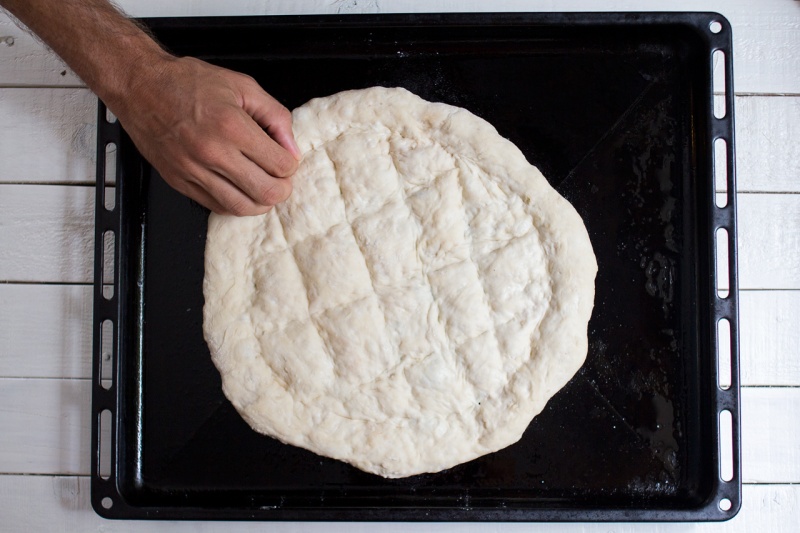
- Flour a work surface and tip the proven dough out on to the work surface making sure to add lots of flour to avoid sticking. Shape the dough into a flat circle (about 2-3 cm high).
- Place the dough on a olive oil-greased baking tray. Cover the dough with a tea towel and leave to prove for another 45 minutes. Preheat the oven to 250° C / 480° F in the last 20 minutes of this time.
- Dent the top of the dough by first drawing a rough inner circle (with your fingertips) of about 3 cm from the edge of the bread. Then fill in the centre of the inner circle with criss-crossed diagonal lines about 2-3 cm apart (see 2nd picture in this recipe to get the idea).
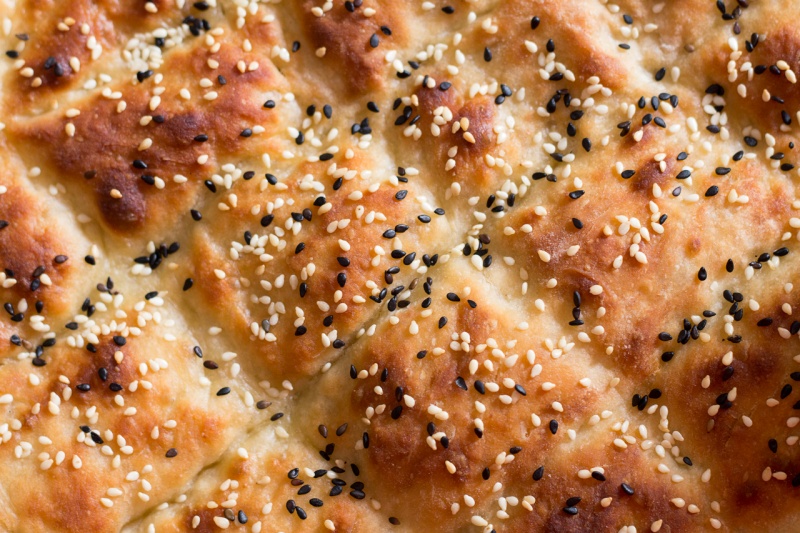
- Using a pastry brush, coat the top of the bread with olive oil. Sprinkle with black and white sesame seeds and press the seeds in as far as you can to make sure that they stay in the bread.
- Bake the bread for 8 minutes at 250° C / 480° F and then turn the oven down to 200° C / 390° F and bake for another 5 minutes (or until golden brown).


(on youtube) turkish bread so many times. It comes out hard and not great. Tried this today and it's come out perfect. Been trying so many turkush bread recipes. But this works. Thanks!
What is the role of the sugar? Is it just to lightly sweeten or is it somehow essential for the overall baking result—does the yeast need it to rise? Thank you.
I think so but I have not tried so not 100% sure. Sugar feeds the yeast and also contributes to the overall flavour. Ania