Vegan pretzel buns
Vegan pretzel buns
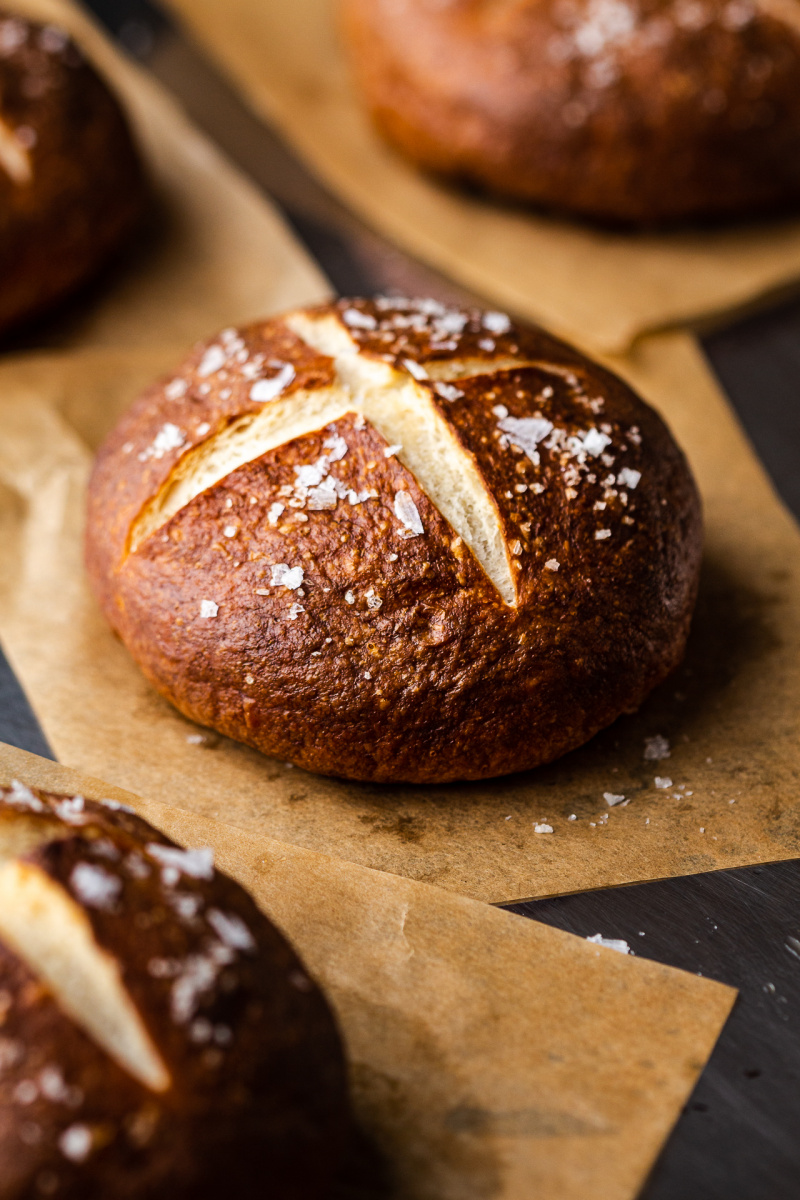
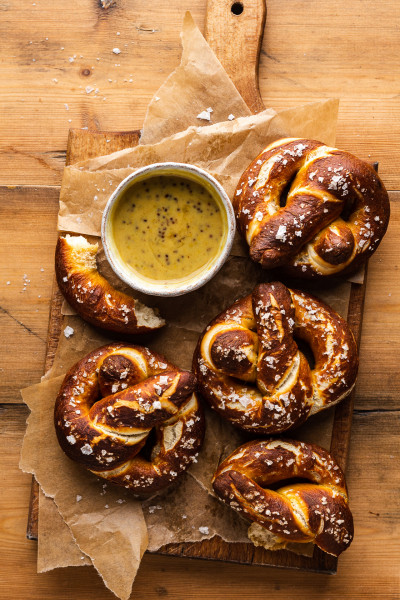
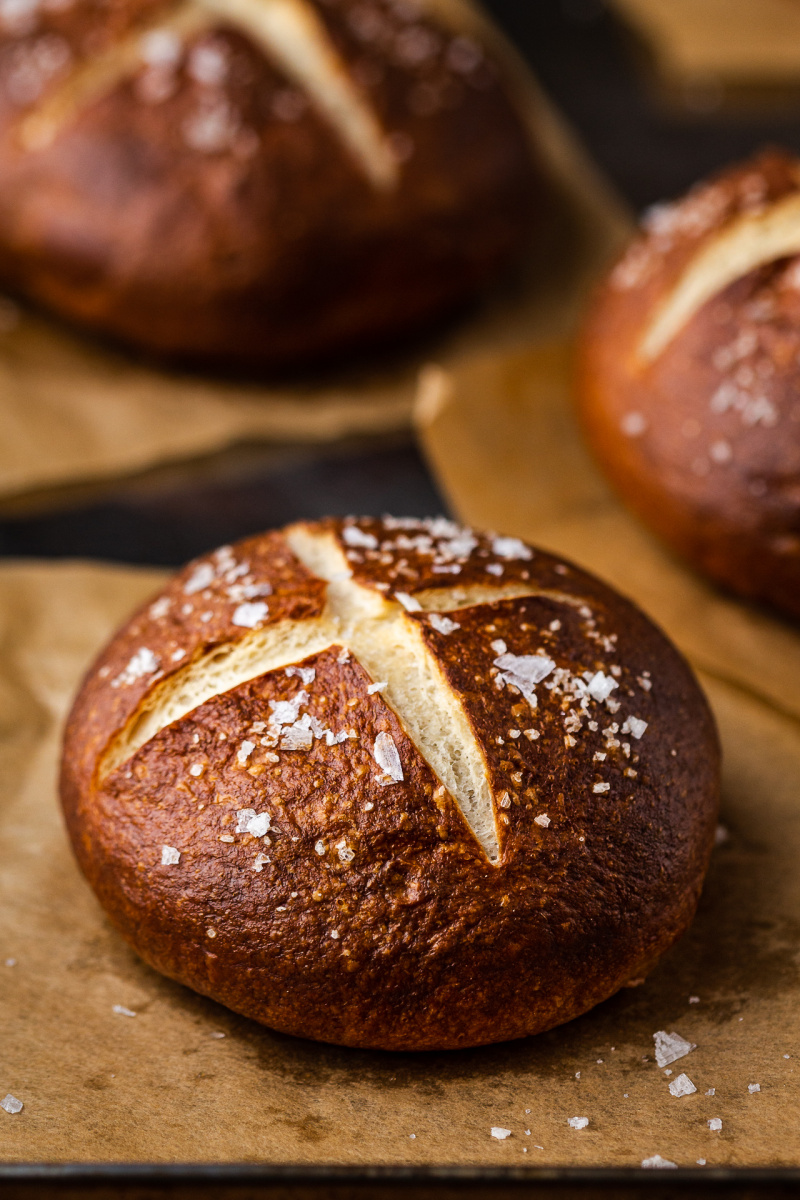
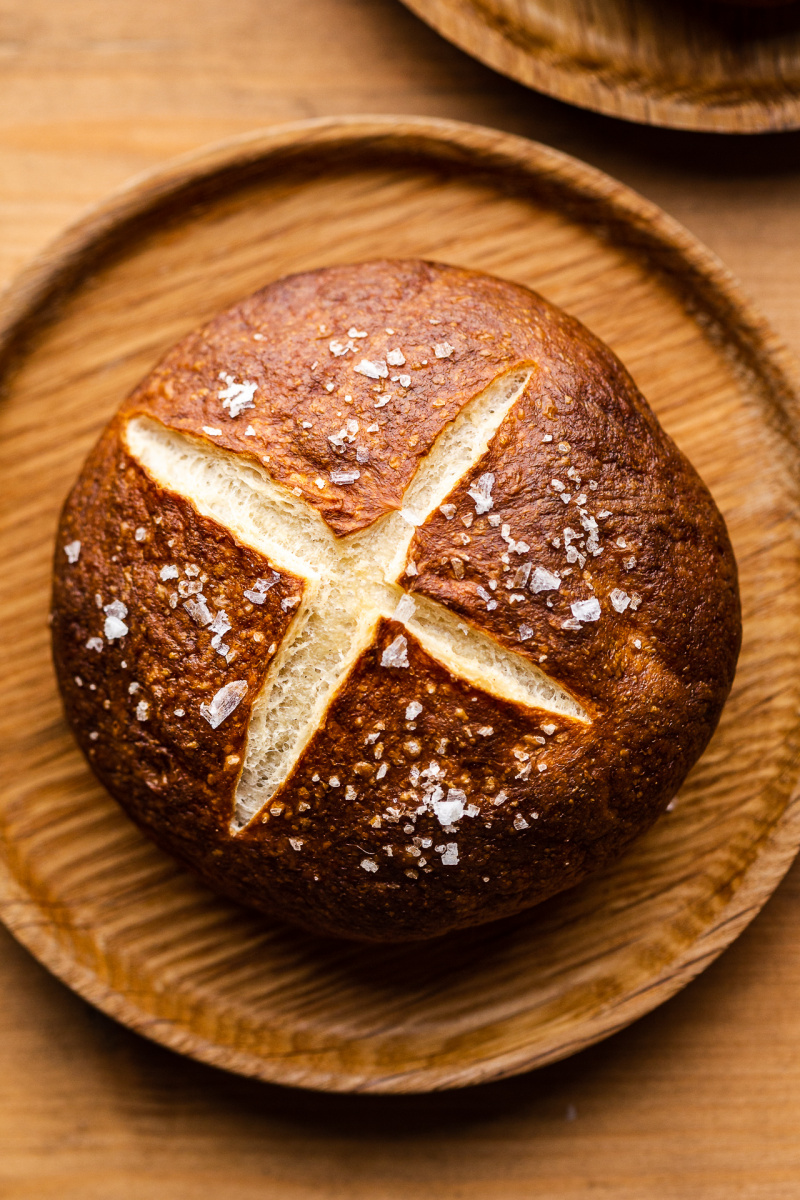
Happy Friday everyone and if case you were looking forward to some plant-based burgers this weekend, I bring you a recipe for vegan pretzel burger buns that quite a few of you expressed interest in after my vegan ‘pulled pork’ recipe last week. These buns are really hard to resist – crispy on the outside, chewy on the inside and with little pops of salt that melt on the tongue. They are not difficult to make but there are a few tips and tricks I gleaned from making them again and again so I thought I would share those, plus step by step photos below to give you the best chance of success, straight off the bat.
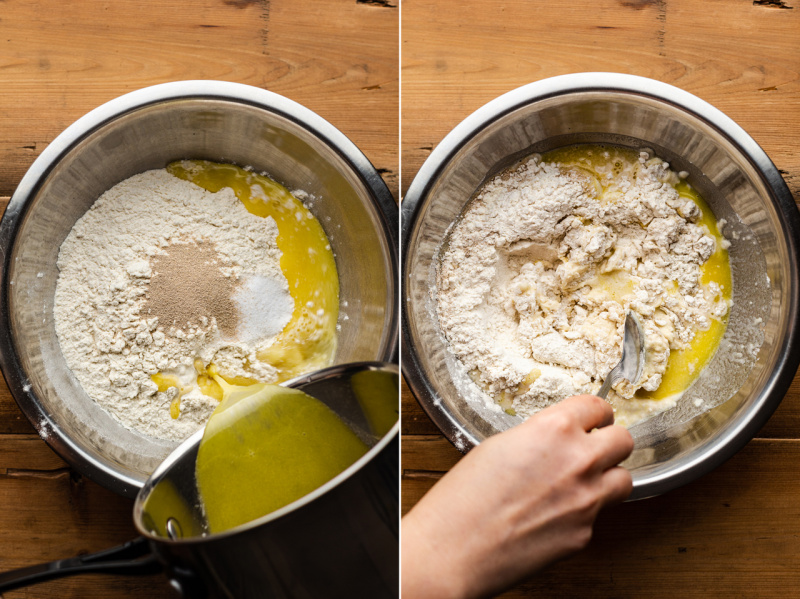
To create the dough, mix both flours (you can also use either of the flours on their own), yeast and salt with melted fat (I used vegan butter) and lukewarm water. Combine them to from a scraggly dough.
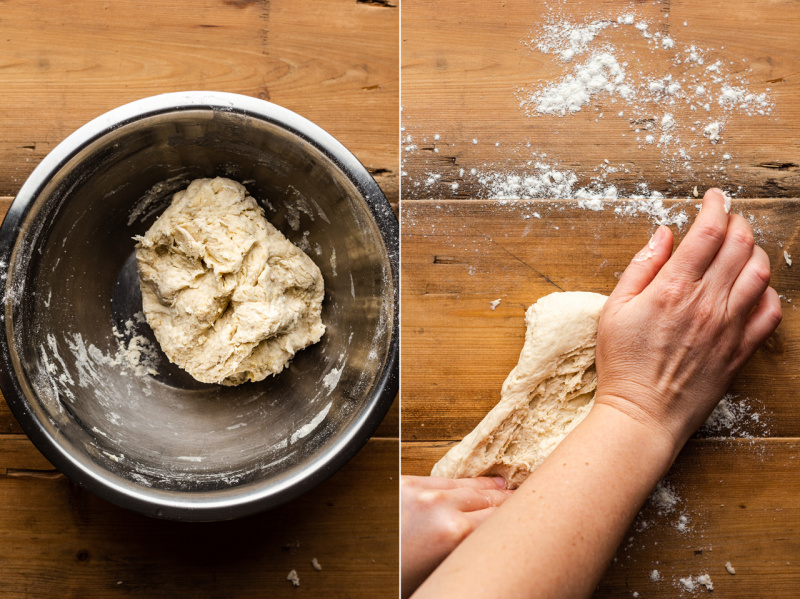
Once the dough is holding together, turn it out on to the work surface and knead by holding the dough in place with one hand and stretching it with the heel of another. Reform the dough and repeat, rotating the dough a little each time to make sure you stretch it in different directions. Carry on kneading for about 10 minutes. You can also use a machine if you have one.
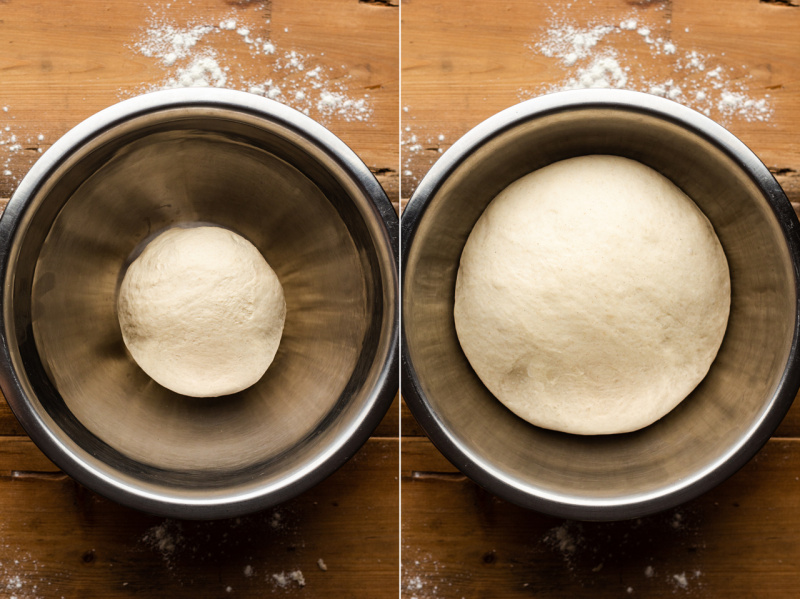
Once the dough is elastic and smooth, put it in a clean bowl, cover with a damp kitchen towel and place somewhere warm until it doubles in size. This will take – depending on the temperature – about 60-90 minutes. You may find it helpful to take a photo of the dough ball at the start so that you can be sure when it has risen enough.
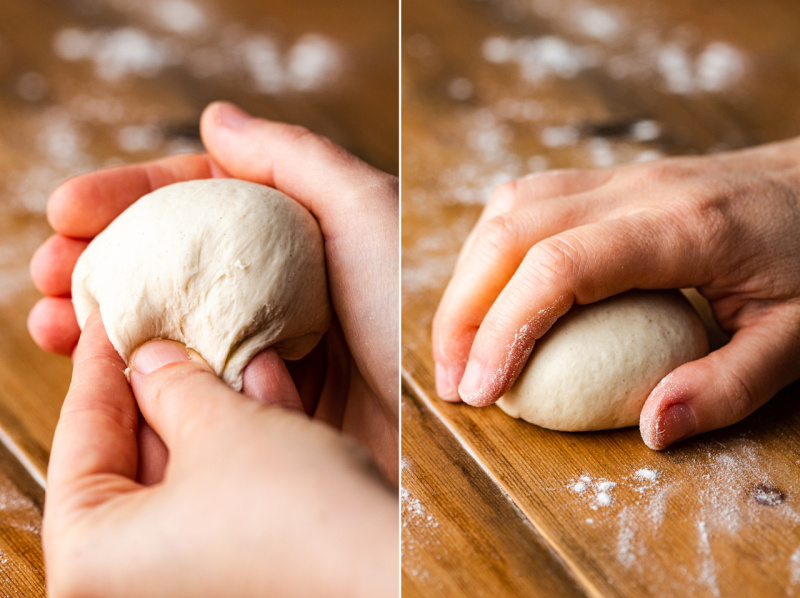
Punch the air out of the dough and divide into 8-10 portions, depending on how big you would like your buns to be. Shape each bun into a money sack and then place it on the work surface, seam down. Roll it against the work surface with a cupped hand to make its surface taut, smooth and perfectly round.
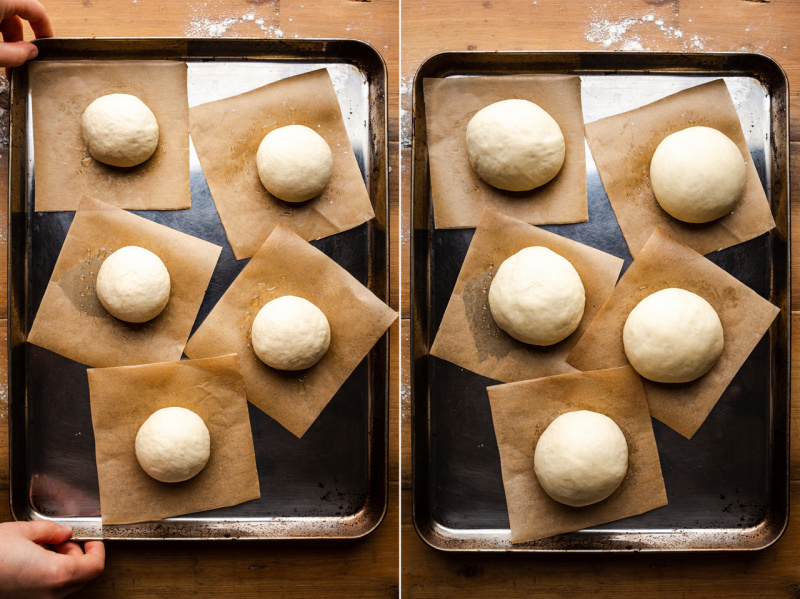
Instead of placing the buns on a single sheet of baking paper, I found it much better to use individual squares of baking paper as it makes the next step much easier to get right. Make sure to grease the baking paper with a little oil even if using non stick paper, as these buns have a tendency to stick after the second proofing.
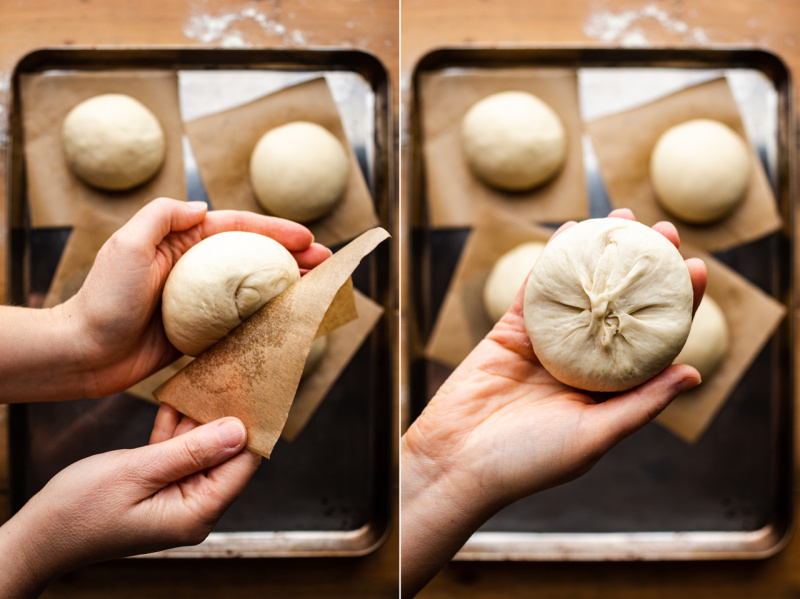
The next step is very important and small squares of paper come into their own here. Basically, we need to handle the buns a little before simmering them in baking soda solution but we need to be super careful not to knock any air out of them after they’ve grown nice and fluffy. The way to do this is to lift each bun with its paper square off the tray, gently flip it upside down so that the top of the buns sits in the palm of your non dominant hand and peel the paper off with your other hand. Now, go round the bun’s perimeter and really gently pinch the surface between your thumb and index finger creating a tight seal in the very middle. This step keeps the buns taut and perfectly round during baking soda bath that is to follow.
The baking soda bath is what gives pretzel buns their handsome tan colour and satisfyingly chewy interior. Bring water and baking soda mixture to a gentle simmer – ideally you want small bubbles as big ones will misshape the buns. Lower as many buns as you can fit into your pot into the water and simmer gently for about 60 seconds on each side. Don’t worry if the buns become dimply – that’s perfectly normal – but do handle them very carefully to retain their perfectly round shape. After 120 seconds is up, fish them out and place on a drying rack to cool off completely.

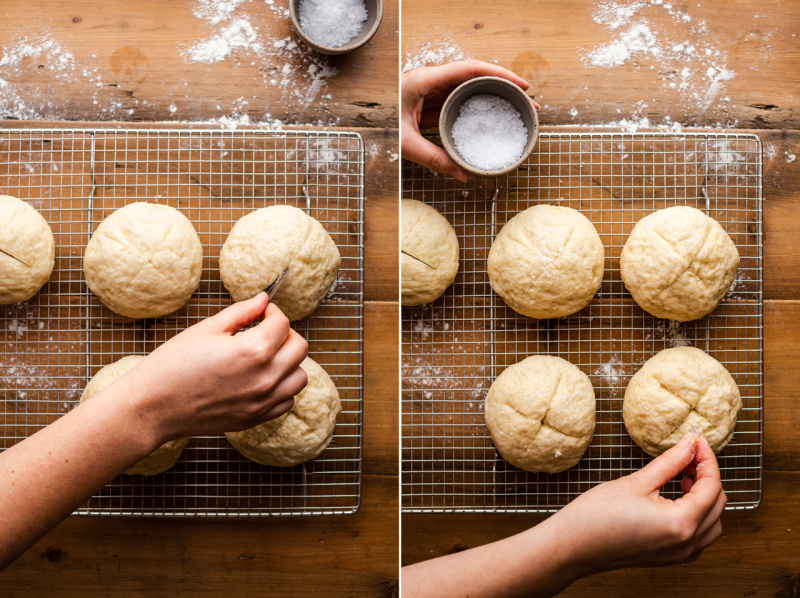
Once the buns dry out and cool off, score them with a razor or a sharp knife and sprinkle with flaky salt (or another topping of your choice). Bake and enjoy once they have a chance to cool.
- 250 g / 2 cups AP wheat flour, plus extra for dusting
- 250 g / 2 cups bread / strong flour*
- 2 tsp fine salt
- 8 g / 2 tsp instant dried yeast*
- 50 g / ¼ cup vegan butter or odourless coconut oil or liquid oil
- 35 g / slightly heaped 2 tbsp baking soda
- flaky salt, for topping
- Place both flours, salt and dried yeast in a large bowl. Mix well.
- Melt vegan butter (or coconut oil) over low heat. Combine it with 300 ml / 1 and ¼ cups of lukewarm water.
- Pour the liquids into the flours and mix with a spoon to combine roughly. Be aware that if you make any changes to the types of flours (or their ratios) used, you may need to adjust the amount of liquid a little. Also, your brand of flour may be slightly more or less absorbent than mine so be prepared to add (or hold back) a touch more liquid.
- When the dough starts looking scraggly and mostly stuck together, turn it out on to a work surface. If it feels dry, add a touch more water. The dough should not be too sticky and quite easy to work with.
- Knead the dough by holding one end of the dough in one hand and stretching it out by sliding the heel of the other hand into it. Reform the dough, rotate it a few degrees and start again. Repeat this for about 8-10 minutes, until the dough is elastic and smooth.
- Put the dough in a large clean bowl and cover the bowl with a clean kitchen towel. Set aside, in a warm place for 1-1½ hours, until the dough doubles in size. A very low (25°C / 77°F) oven works well too.
- While the dough is proofing, cut out eight or ten 10 cm / 4″ squares of baking paper, one for each bun.
- Once the dough has doubled in size, punch all the air out of it and divide it into 8-10 identical portions – depending how big you want your roll. I made 10 and each roll was 84 g / 2.95 oz.
- Shape into a money sack. Place it, seam down, on a lightly floured surface. Cover it with a cupped head and roll it against the surface for about 30-60 seconds until you start feeling the bun’s surface getting taut.
- Place each roll on a square of oiled (that’s important) baking paper. Cover with a kitchen towel and allow to proof until the dough balls double in size (second proofing) – about 20-30 minutes in a warm place.
- Just before the second proofing is finished, put a large pot (20 cm / 8″ dia is ideal) filled with 1 L / 4 cups of water and baking soda to the boil. Allow the mixture to come to a gentle simmer but keep an eye on it as it has a tendency to boil over.
- Meanwhile, heat up the oven to 225° C / 425° F.
- One by one, lift each roll on its paper square off the tray. Flip the ball in your hand very gently so that the seam is at the top. Be very gentle as you don’t want to knock any of the air out of the buns at this stage.
- Go around the perimeter of each ball and pinch the surface of the dough very gently between your thumb and index finger creating a seal in the middle of the bottom. This step helps the buns keep their shape during simmering.
- Place 2-3 (depending on the size of your pot) buns in the simmering baking soda solution. Allow them to simmer gently (low heat, small bubbles are preferable) for 60 seconds, then flip them gently to the other side using a large spoon. Simmer on the other side for a further 60 seconds. Fish them out and place them on a drying rack. Carry on with the remaining dough balls.
- Once the buns are completely dry, use a razor or a very sharp knife to make a shallow criss-cross incision at the top of each roll and sprinkle with salt (or sesame or poppy seeds).
- Bake for about 17-19 minutes, depending on the size of the buns. Consume on the day – they don’t keep that well.
*FLOUR: I like to use a mixture of AP flour and bread flour, but you can make these with 100% of either of these flours – just be aware that the exact amount of water needed may be a little different due to this change as different flours have different absorbency rates.
*YEAST: make sure you use the right kind of yeast. I used instant yeast (which gets added directly to the flour), but if you have dried active yeast, for example, it will need activating in the liquid (allocated for this recipe) first. Please follow the instructions on the packet.
My recipe is adapted from this recipe.