It’s Pancake Day tomorrow in the UK and inspired by my food hero Ottolenghi’s article in the Guardian about pancakes from all over the world, I felt compelled to create a vegan version of dorayaki (Japanese pancakes) to shake things up a little. I have a lot of, both sweet and savoury, pancake recipes on the blog already, but I haven’t tried veganising dorayaki yet and I got so excited that I spent my Sunday working on these.
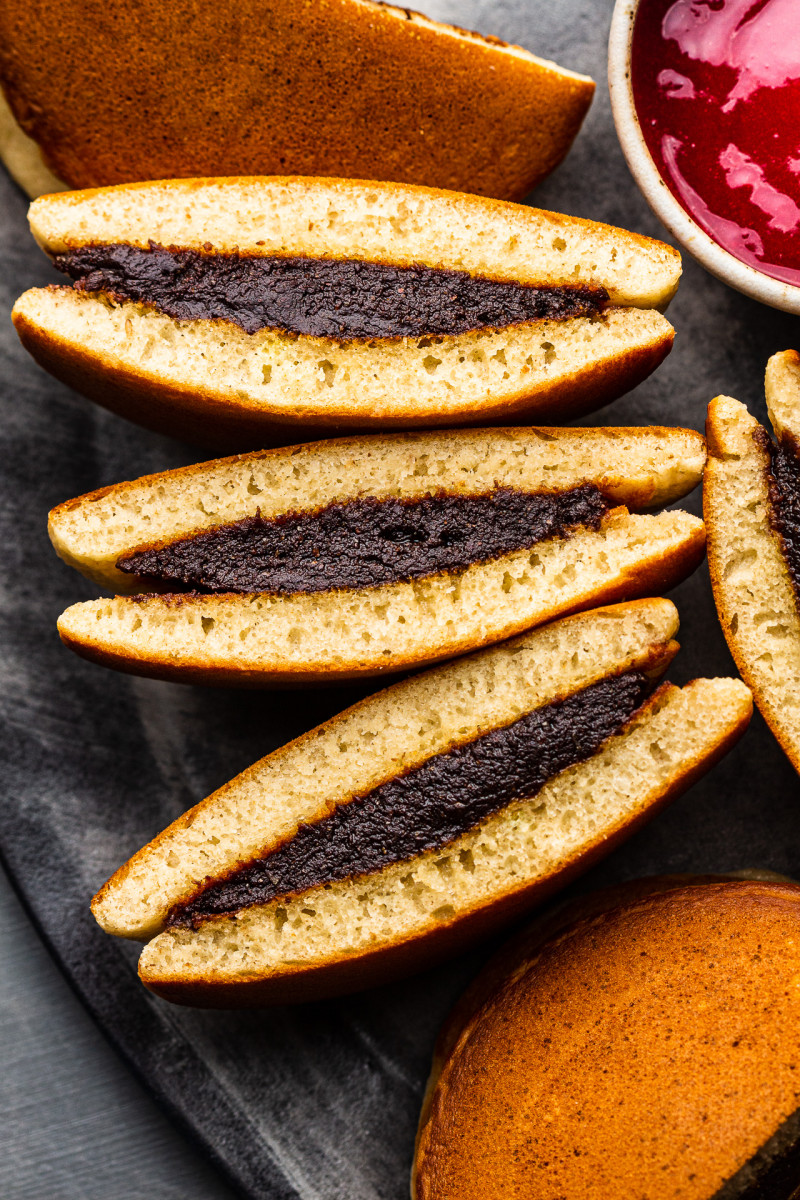
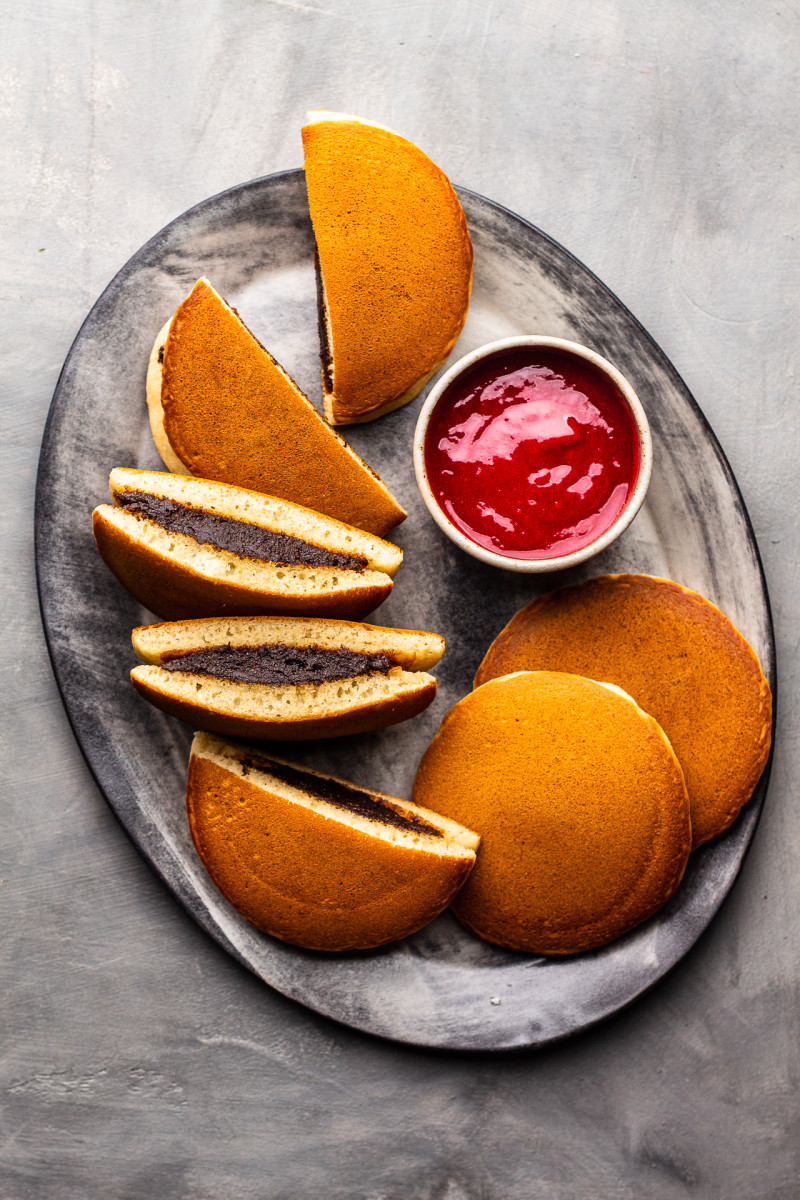
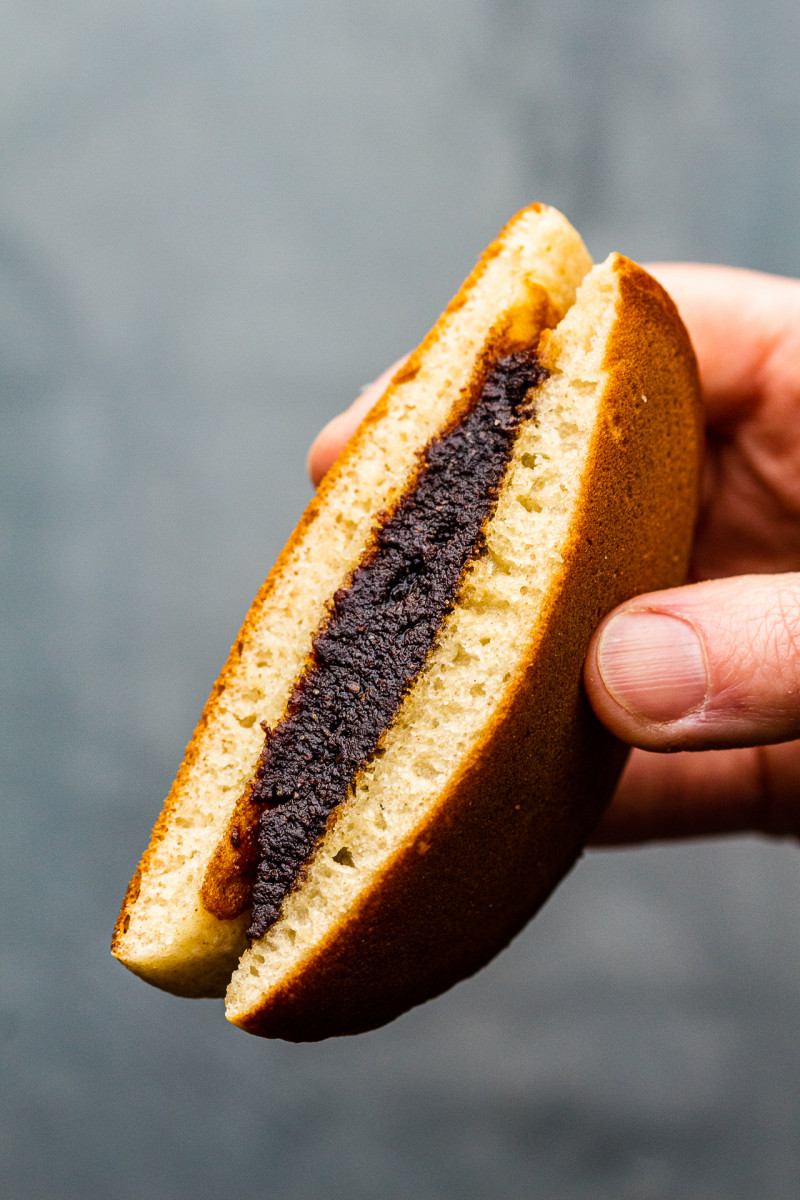
If you haven’t tried dorayaki yet, you are in for a real treat as they are simply divine. They are beautifully fluffy and sweet, filled with a sweet filling (traditionally sweet red bean paste or custard) and often paired up with a dipping sauce too. They are perfect with a mug of green tea or coffee and are definitely a dessert rather than a breakfast food! I had them a few times when I lived in London but not since going vegan as they are made with eggs. I knew I would not be able to have any again unless I come up with an alternative recipe, so here we go.
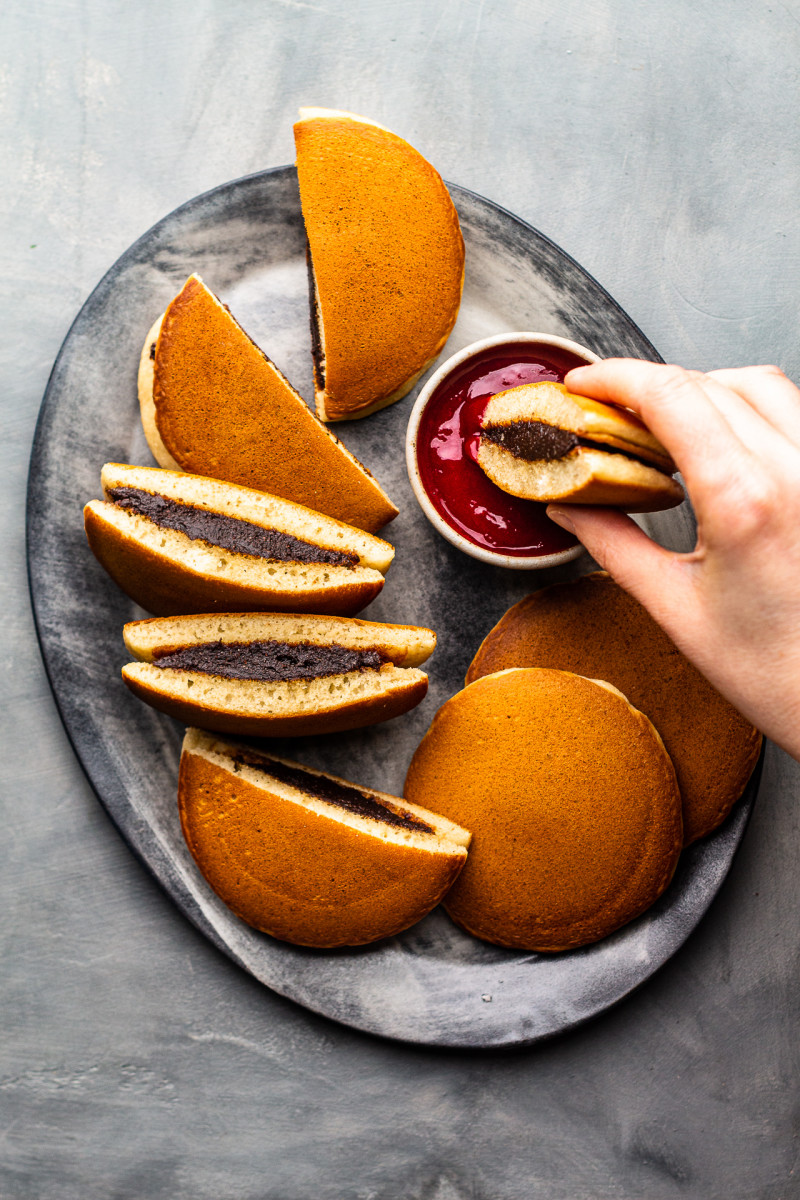
They are not hard to make, although it helps if you are a seasoned pancake maker 😉 and a good non-stick pan is a must! I went for a super easy Nutella-inspired filling and a tangy raspberry dipping sauce for contrast. Let me talk you through the ingredients, their possible swaps and the method behind getting these just right.
MORE ABOUT THE INGREDIENTS
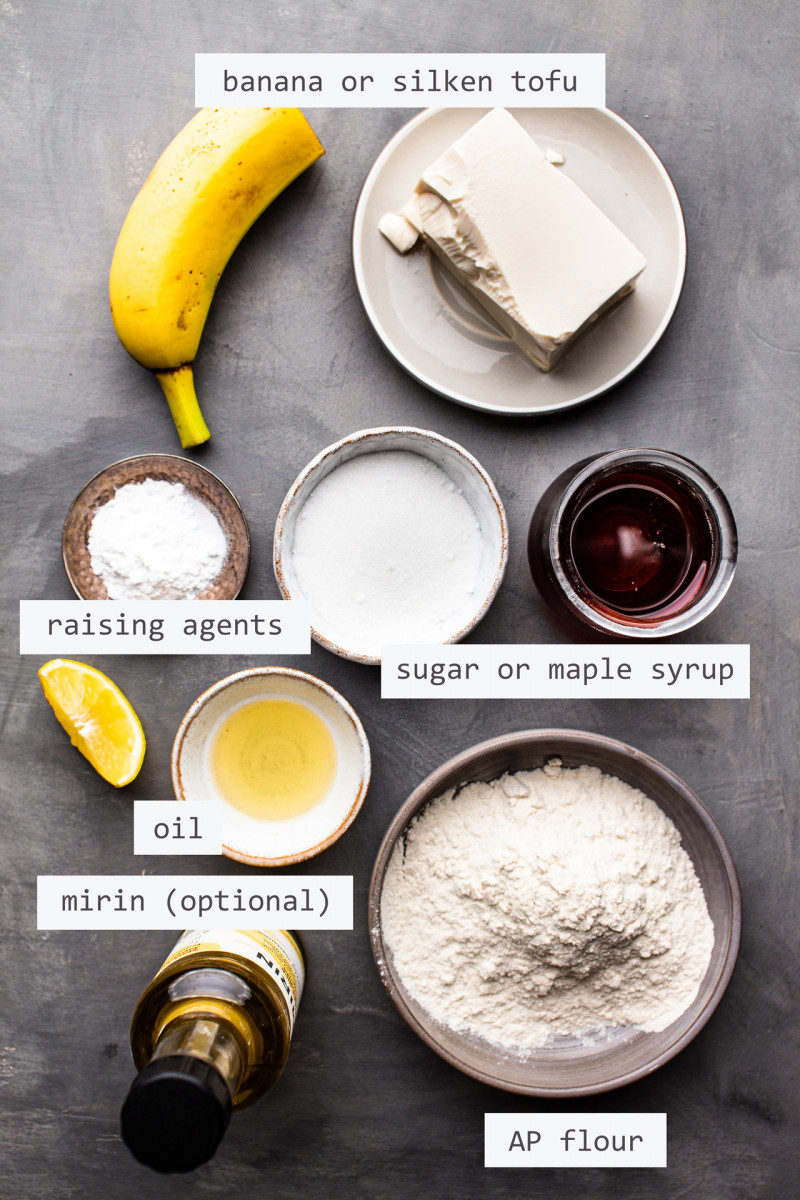
SILKEN TOFU / MASHED BANANA: I tested both of these to partially replace eggs and I was really happy with both versions. The banana version is a lot easier, as it does not require a blender and it does not contribute any banana flavour, especially that the filling takes over. Silken tofu version is a touch more involved but the pancakes are a little fluffier so that’s the version I prefer, but only marginally.
SUGAR / MAPLE SYRUP: Both work beautifully, but if using maple syrup, reduce the amount of water you add to the batter. The original Japanese recipes use a combination of sugar and honey, but I wanted to simplify the recipe so I tried two versions, one with maple syrup and one with just sugar and they are both banging! These are typically quite sweet (some original recipes use as much as 100 g / ½ cup of sugar for this amount of batter), but I reduced the amount of sugar quite a lot and I think they are still quite indulgent. If you prefer them sweeter, simply dial the sugar up a bit.
MIRIN: Mirin is a type of rice wine (similar to sake but sweeter and with less alcohol) that is often used in both sweet and savoury Japanese dishes. Don’t worry if you don’t have it though, water is just fine.
PLAIN FLOUR: A plain wheat flour is all you need for these. If you wanted to make them gluten-free, I am pretty confident that a good gluten-free flour mix (containing starches) will work just as well, but I have not had the time to test it in this recipe. I have, however, made a lot of other pancakes with this gluten-free mix and it has never let me down.
RAISING AGENTS: I used a little more baking agents compared to the traditional version in order to compensate for the lack of eggs, which apart from making things moist help to leaven these pancakes too. Lemon juice is also used to help this process – it comes into a reaction with baking soda and helps to achieve a fluffier pancake.
OIL: I added a small amount of oil to the batter (melted vegan block will work well too) in order to compensate for the fat lost due to not using egg yolks.
MORE ABOUT THE PROCESS
RESTING THE BATTER: Rest the batter for 15 minutes in the fridge before making these. After the rest time, you may need a little more water to get it runny enough so that the pancake forms perfectly round once the batter hits the pan.
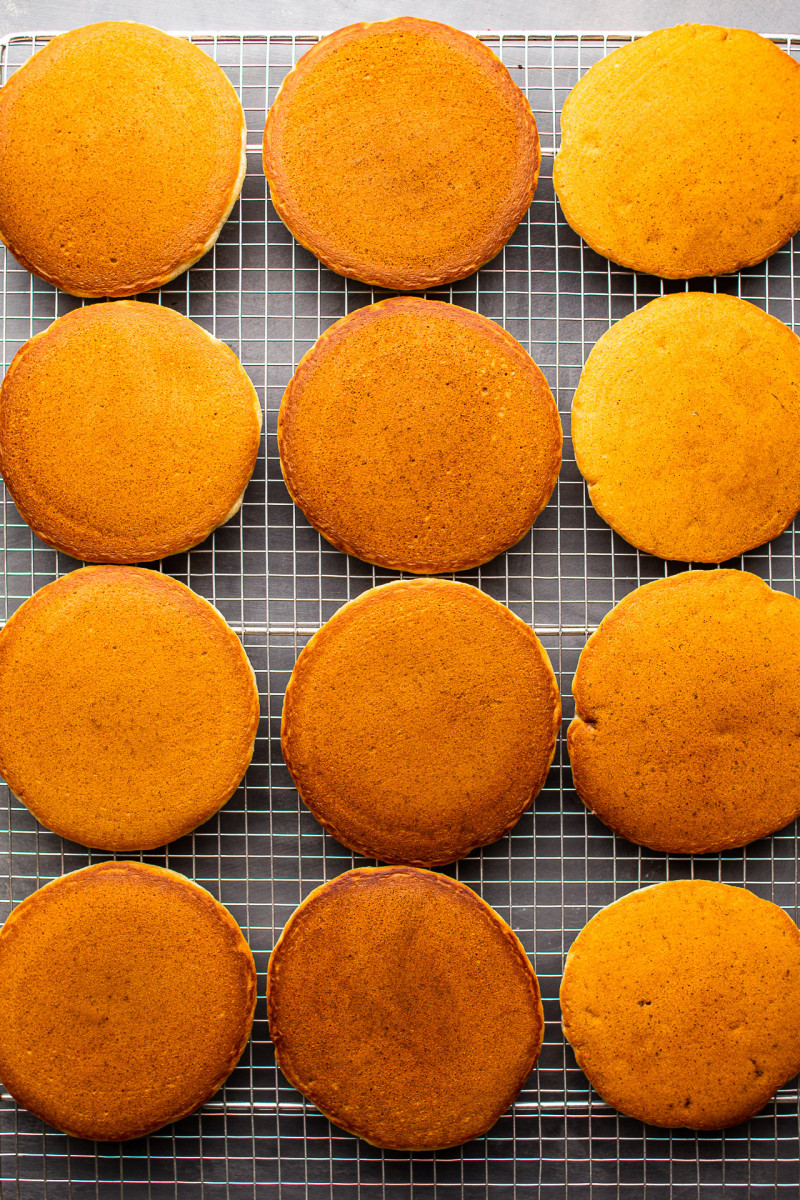
LOW HEAT: Make sure your pan is nicely warmed up before ladling your first pancake and keep the heat low-medium at all times to make sure the undersides are nicely golden and the pancakes are fully cooked through.
WIPE OIL OFF: This may seem counterintuitive but make sure to wipe off any droplets of oil before ladling the batter – this way the undersides of your pancakes will be uniformly golden without any hotspots. I used a paper towel folded up into a small rectangle and drenched in oil to grease the pan. This is how little oil you need but do make sure you use a tried and tested non-stick pan for this. I used a ceramic crepe pan that’s quite old and tired but still does good enough job.


- 80 g / 1/3 cup mashed banana OR 70 g / 1/3 cup silken tofu*
- 50 g / ¼ cup caster sugar OR maple syrup*
- 30 ml / 2 tbsp mirin (or water)
- 1 tsp lemon or lime juice
- 10 ml / 2 tsp vegetable oil, plus 5 ml / 1 tsp for frying
- 1 tsp vanilla extract
- 125 g / 1 cup plain flour
- 1½ tsp baking powder
- scant ½ tsp baking soda
- a pinch of kala namak (eggy salt) (optional)
FILLING
- 120 g / ½ cup hazelnut (or almond) butter
- 60 ml / ¼ cup maple syrup or icing sugar
- 12 g / 2 tbsp unsweetened cocoa powder
- ¼ tsp salt
DIPPING SAUCE (OPTIONAL)
- 200 / 2 cups frozen raspberries
- 1-2 tsp cornstarch / cornflour
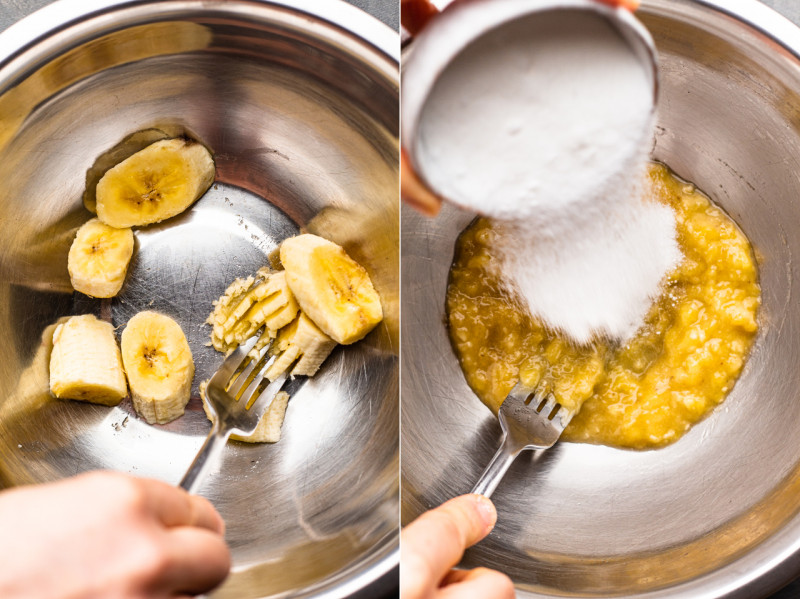
- If using TOFU, blend the first 6 ingredients with 120 ml / ½ cup of water until smooth (I use this blender). If using BANANA, mash it really well and combine with the next 5 ingredients and 120 ml / ½ cup of water. If using maple syrup, be sure to start off with half of the amount of water and add more if needed.
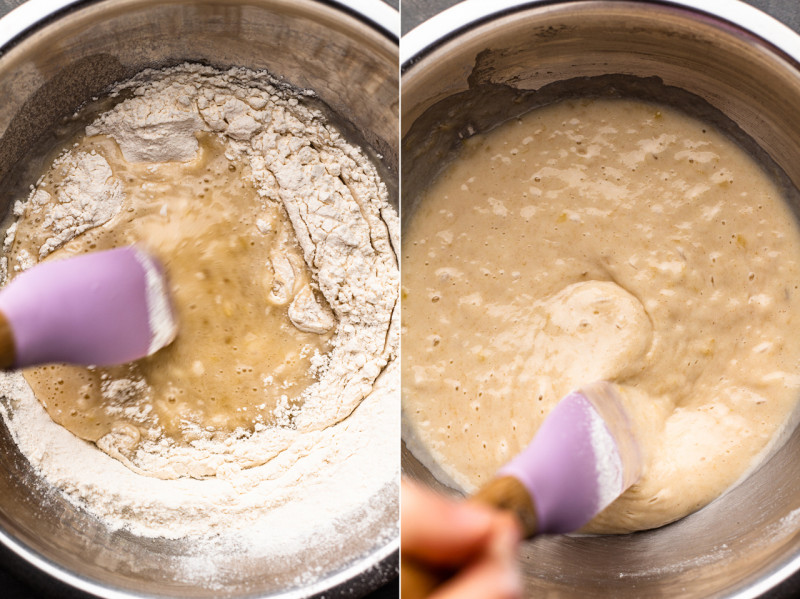
- Transfer the mixture to a medium sized mixing bowl and sift in flour, baking powder, baking soda and kala namak (if using). Using a spatula, make small circles in the middle of the batter to gradually fold in more and more flour in order to minimise lumps. Cover with a plate and set aside for 15 minutes in the fridge. Make the filling while you wait.
- After chilling time, the batter is likely to need a little more water (I added 15 ml / 1 tbsp) to make sure it’s runny enough to form perfectly round pancakes.
- Heat up a medium non-stick frying pan on the stove, but be careful not to get the pan too hot as the pancakes will burn before cooking in the middle. You want to use low-medium heat.
- Grease the pan with a bit of oil – I used a square of folded paper towel dipped in oil. Wipe off any excess oil – oil droplets will stop you from achieving perfectly uniform golden undersides – dorayaki’s signature look.
- Ladle a three quarter filled ¼ measuring cup of the pancake batter in the middle of the pan (it’s best to cook them one at a time). Leave undisturbed for about 3 minutes (until tiny bubbles appear on the surface and burst) on one side and then flip. Cook for 1 minute on the other side. Place on a drying rack to cool. As the pan gets hotter, the pancakes will cook quicker so keep an eye on the heat and lower if necessary.
- Spread heaped teaspoon of filling on top of a cold pancake and cover with another. You could wrap each sandwich in clingfilm to fuse them together better, but it’s not at all necessary. Serve cut, with a side of dipping sauce.
FILLING
- Combine all of the ingredients in a mixing bowl, mix well using a spatula. If using maple syrup, you will need 1-2 tbsp of water (or plant milk) to loosen. If using icing sugar, you’ll need more.
DIPPING SAUCE (OPTIONAL)
- Place frozen raspberries in a small pot with 1-2 tbsp of water so that they don’t catch at the bottom.
- Allow them to simmer for a few minutes until completely thawed and falling apart, make sure to give them a stir now and then.
- If you don’t like the seeds, press the mixture through a sieve and return to the pot. If you don’t mind the seeds, skip this step.
- Dissolve cornstarch (use 1 tsp only if deseeding) in 2 tsp of water and whisk it into the raspberries while simmering on low heat. Allow the mixture to simmer for 1 minute to thicken. Cool and serve in a small bowl with the pancakes.
*SUGAR: You can replace it with maple syrup if you wish but if you do that reduce the amount of water or else the batter will be too thin. These are traditionally quite sweet, I reduced the sugar (by 30-50% depending on the recipe) as I think that’s enough but these are meant to be a dessert so don’t reduce further. If you have a sweet tooth, feel free to add more.