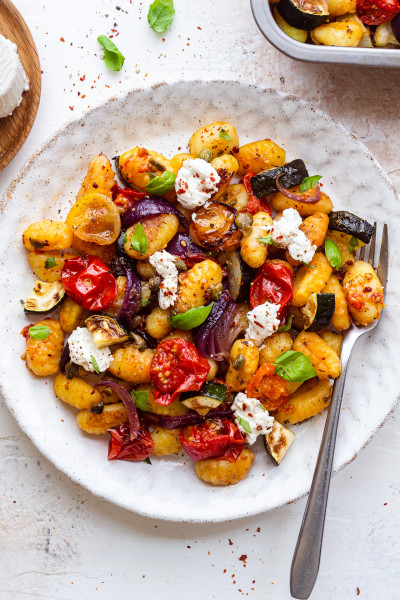
Vegan gnocchi
Vegan gnocchi
Although I am no Italian, I happen to have grown up on gnocchi, so they are my ultimate comfort food. In Poland, they are called ‘kopytka’ (something that translates as ‘little hoofs’) and apart from the nutmeg, they are very much the same as gnocchi, yet bigger and less cute looking as they aren’t typically ridged. My Gran used to make them all the time when I was a kid and I loved them, especially the pan-fried sort, basted in butter…(yup! not vegan!) and fried onion.
In fact, if not for my mum who was obsessed with getting vegetables into my brother and I (I’m forever grateful to her that she did that), I would say that as I was under my Gran’s watch after school until my parents finished work, my diet was predominately made up of potatoes and white flour (pasta, gnocchi, pierogi, yeast buns with savoury potato filling, you name it!)
I was a skinny little kid so I got away with that for a while, but when I hit puberty I suddenly started filling out. Unfortunately, it did not escape the attention of my especially mean male classmate who felt compelled to comment on the size of my hips (what an a**hole!) and gave me a complex for life. Teenage boys like him should be home schooled!
While vegan gnocchi is no health food, it is the ultimate comfort food and in this miserable weather (it’s been raining so much here that the local river has burst its banks), it is exactly what I feel like eating. Plus, gnocchi itself isn’t actually bad for you at all as it’s mostly made up of potatoes, so if you want to make them as healthy as possible, skip the pan-frying and serve them with a light tomato sauce instead.
While the instructions may seem a bit daunting at first, please don’t be put off. The process is actually really quite simple, especially if you skip the ridging part. The reason the instructions are a bit verbose is that there is a bit of know-how to making vegan gnocchi and I wanted you to be aware of all the pitfalls so that you have the best chance of success off the bat. The key to light, pillowy vegan gnocchi is using as little flour as you can possibly get away with and just the right amount of kneading – not like bread kneading, more like folding the dough gently onto itself.
If you do not work the dough enough the gnocchi will be too soft and fray at the edges during cooking, but if you overwork it too much, gluten will develop in the flour and the end product will be unpleasantly gummy. This is why I suggest you incorporate half of the flour with a knife using a cutting motion, like you would when making pastry, and only then use your hands and add the rest of the flour as needed. Work the dough very gently until it’s uniform, not sticky, not dry and of medium firmness (yet pliable). Either boil them or boil, cool and pan-fry them, coat them in a light sauce and the dinner has been served.
- 1 kg / 2 lb same size starchy potatoes like Maris Piper, King Edward or Russet*
- 1 tsp salt
- 1/8 tsp nutmeg
- approx. 125 g / 1 cup all purpose white flour (or ’00’ flour if you can get it) or gluten-free all purpose flour
SAGE AND GARLIC OLIVE OIL (for boiled gnocchi)
- 3 tbsp olive oil
- a few fresh sage leaves
- 2 garlic cloves, chopped finely
- 2 tbsp nutritional yeast (optional)
- salt and black pepper, to taste
- mild chilli flakes (optional)
- toasted hazelnuts, crushed (optional)
- Set the oven to 200° C / 390° F (no fan).
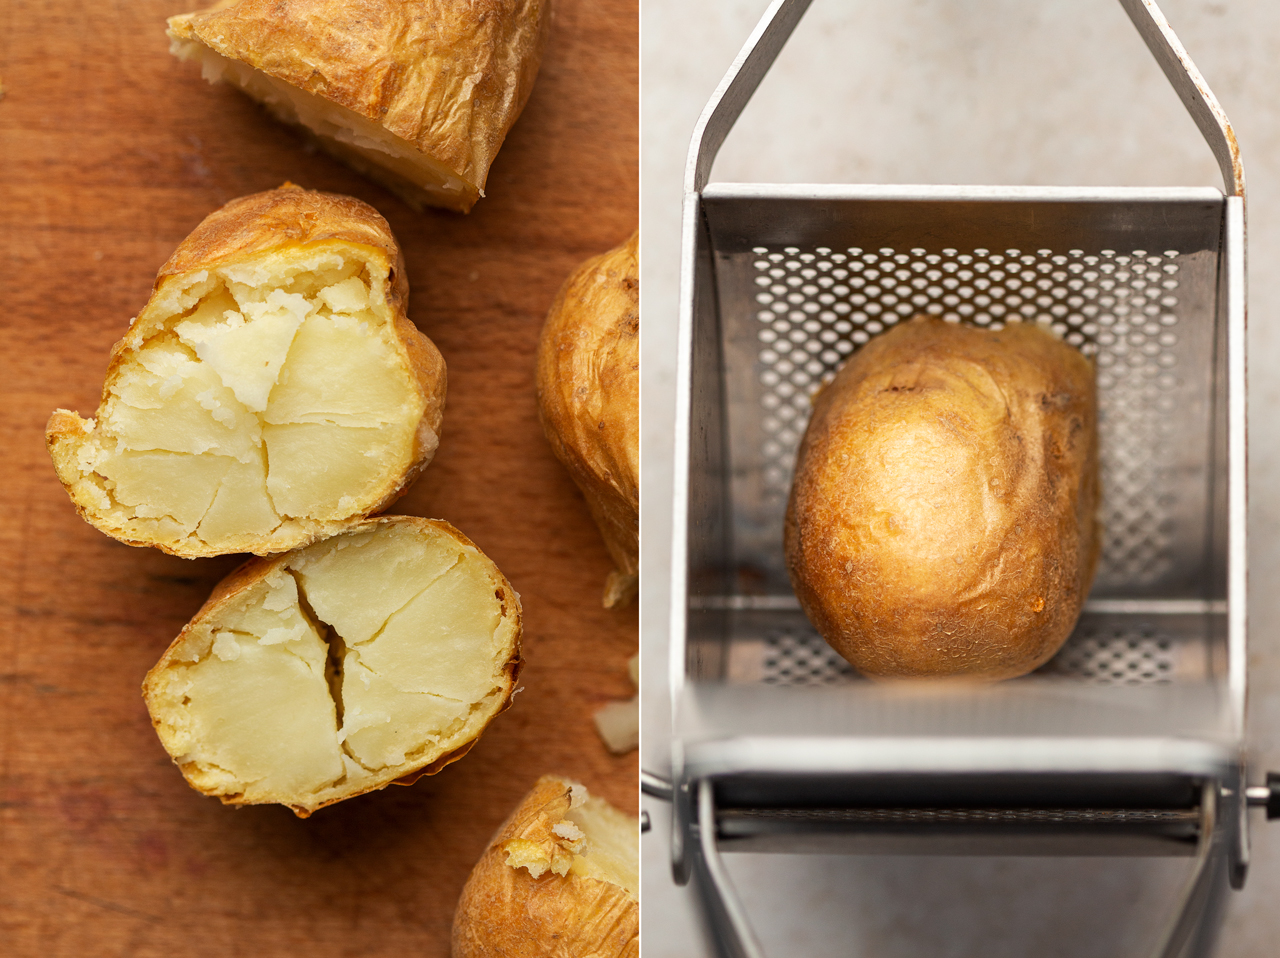
- Pierce the clean potatoes all over with a skewer or a sharp knife. Place on a baking tray and bake for about 60 minutes (for medium size potatoes), turning to the other side halfway through (be sure to use kitchen gloves or kitchen tongs). They are ready as soon as a sharp knife slides in easily.
- While the potatoes are baking, prepare your work bench by cleaning it and sprinkling with a generous amount of flour.
- As soon as the potatoes come out of the oven, cut them in half. Put each half (skin on) into a potato ricer so that the cut side is right against the mesh. Rice the potatoes all over the prepared work bench area, spreading them a little (instead of placing all the flesh in one massive heap) so that more steam can escape as they cool.
- Once you are done with all the potatoes, you may want to go over the skins with a spoon, scooping the rest of the flesh and ricing it – I find that there is always a generous layer of potato flesh left.
- Sprinkle riced potatoes evenly with salt, nutmeg and half of the flour and then using a large knife (a pastry cutter or a bench scraper) cut the flour into the potatoes using a chopping motion.
- Next use your hands to knead the dough very gently as you do want a uniform dough to form, but you do not want to knead it too much as that will develop gluten in the flour and your gnocchi will be chewy. Keep on adding a little bit of flour at a time until the dough isn’t sticky anymore. The less flour the better (produces lighter gnocchi) but too little flour will make them fall apart in cooking so don’t go crazy. A good guide is about 10-15% flour compared to the weight of uncooked potatoes.
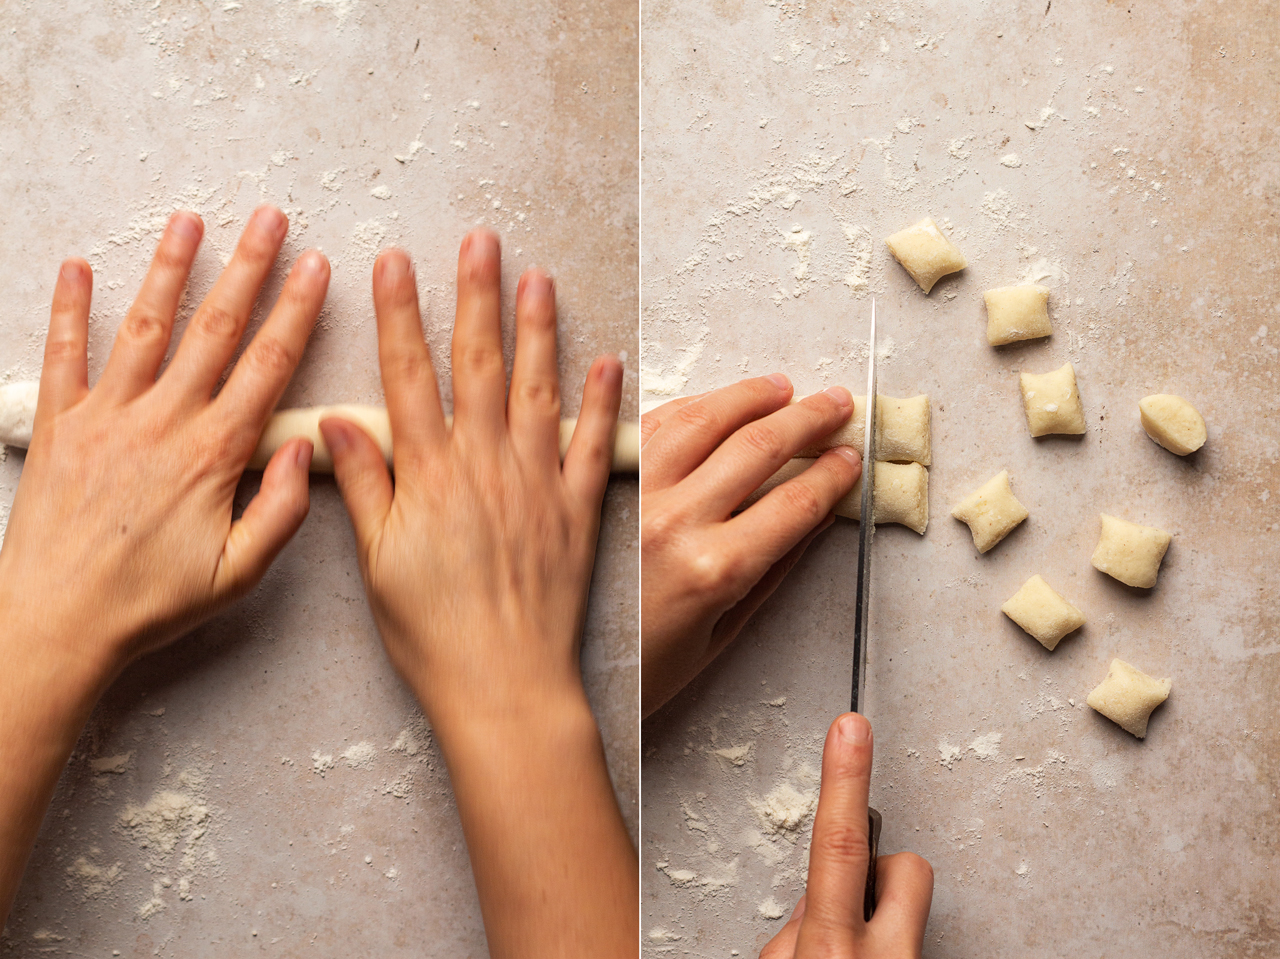
- Once you have a uniform dough that holds together well yet it is still very pliable, divide it into quarters. Roll each quarter into a long thin snake. Using a knife, cut the snake into same size pieces. Coat them lightly in flour.
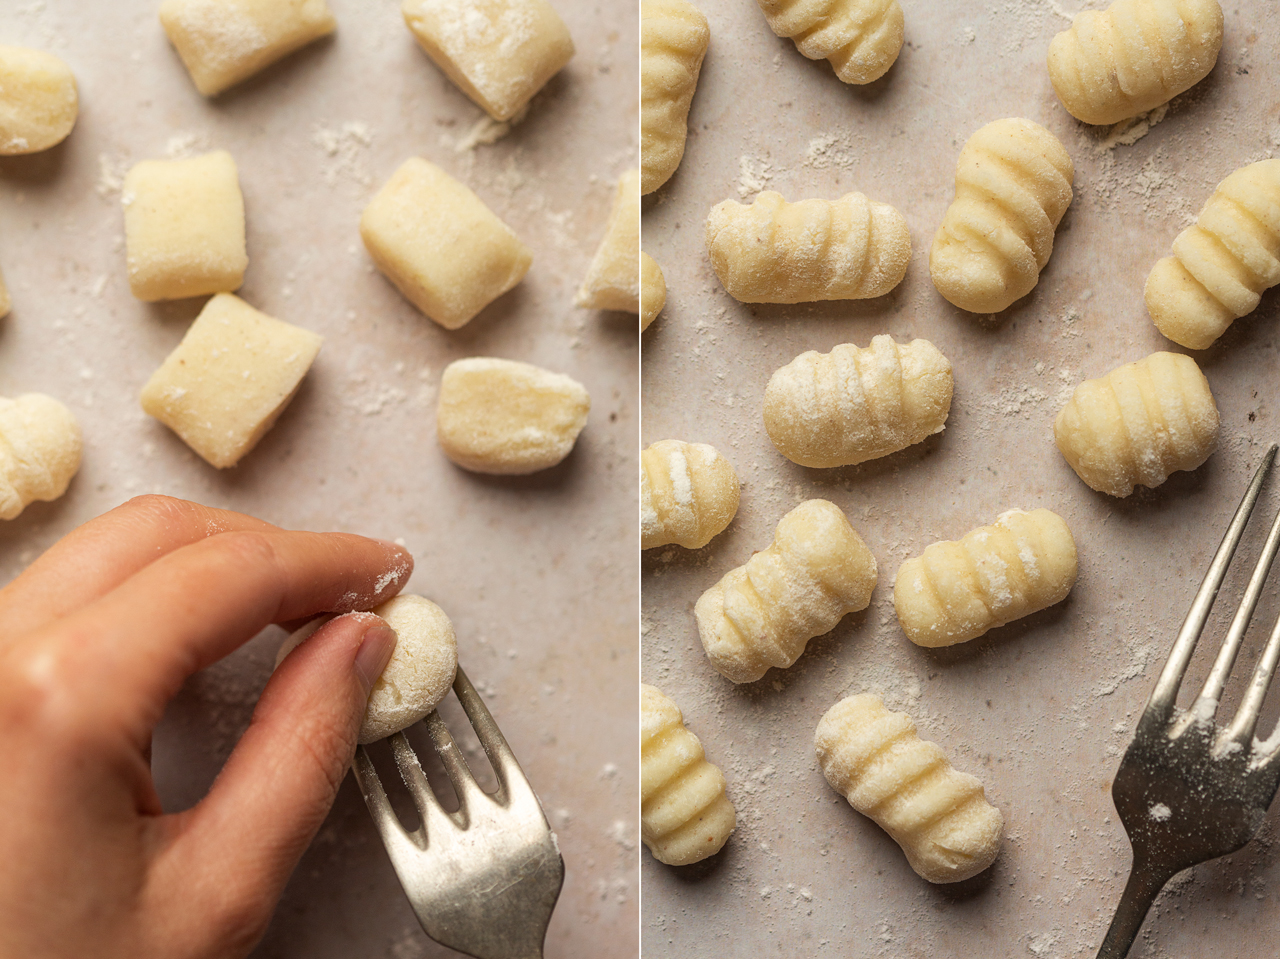
- OPTIONALLY, you may want to ridge your gnocchi using the tines of a fork (or a gnocchi board if you own one), but that part is fairly time consuming, takes a while to get the hang of and it’s not necessary, especially if you intend to serve them simply, in sage and garlic-flavoured olive oil. The idea is that the ridges help the gnocchi to hold more sauce, so if you are serving yours with a ragù, for example, you may want to spend the extra time. To ridge the gnocchi, roll each piece into a ball and then gently roll it against the back of the fork.
- Bring a large pot of salted water to a rolling boil. Put a batch (say 20 – depends on the size of your pot) into the boiling water. Give the water a gentle stir and wait for the gnocchi to resurface (1-2 minutes). As soon as they come to the surface, scoop them up with a slotted spoon. Allow the excess water to drain away over the pot and place on a clean plate. Continue with the rest of your gnocchi.
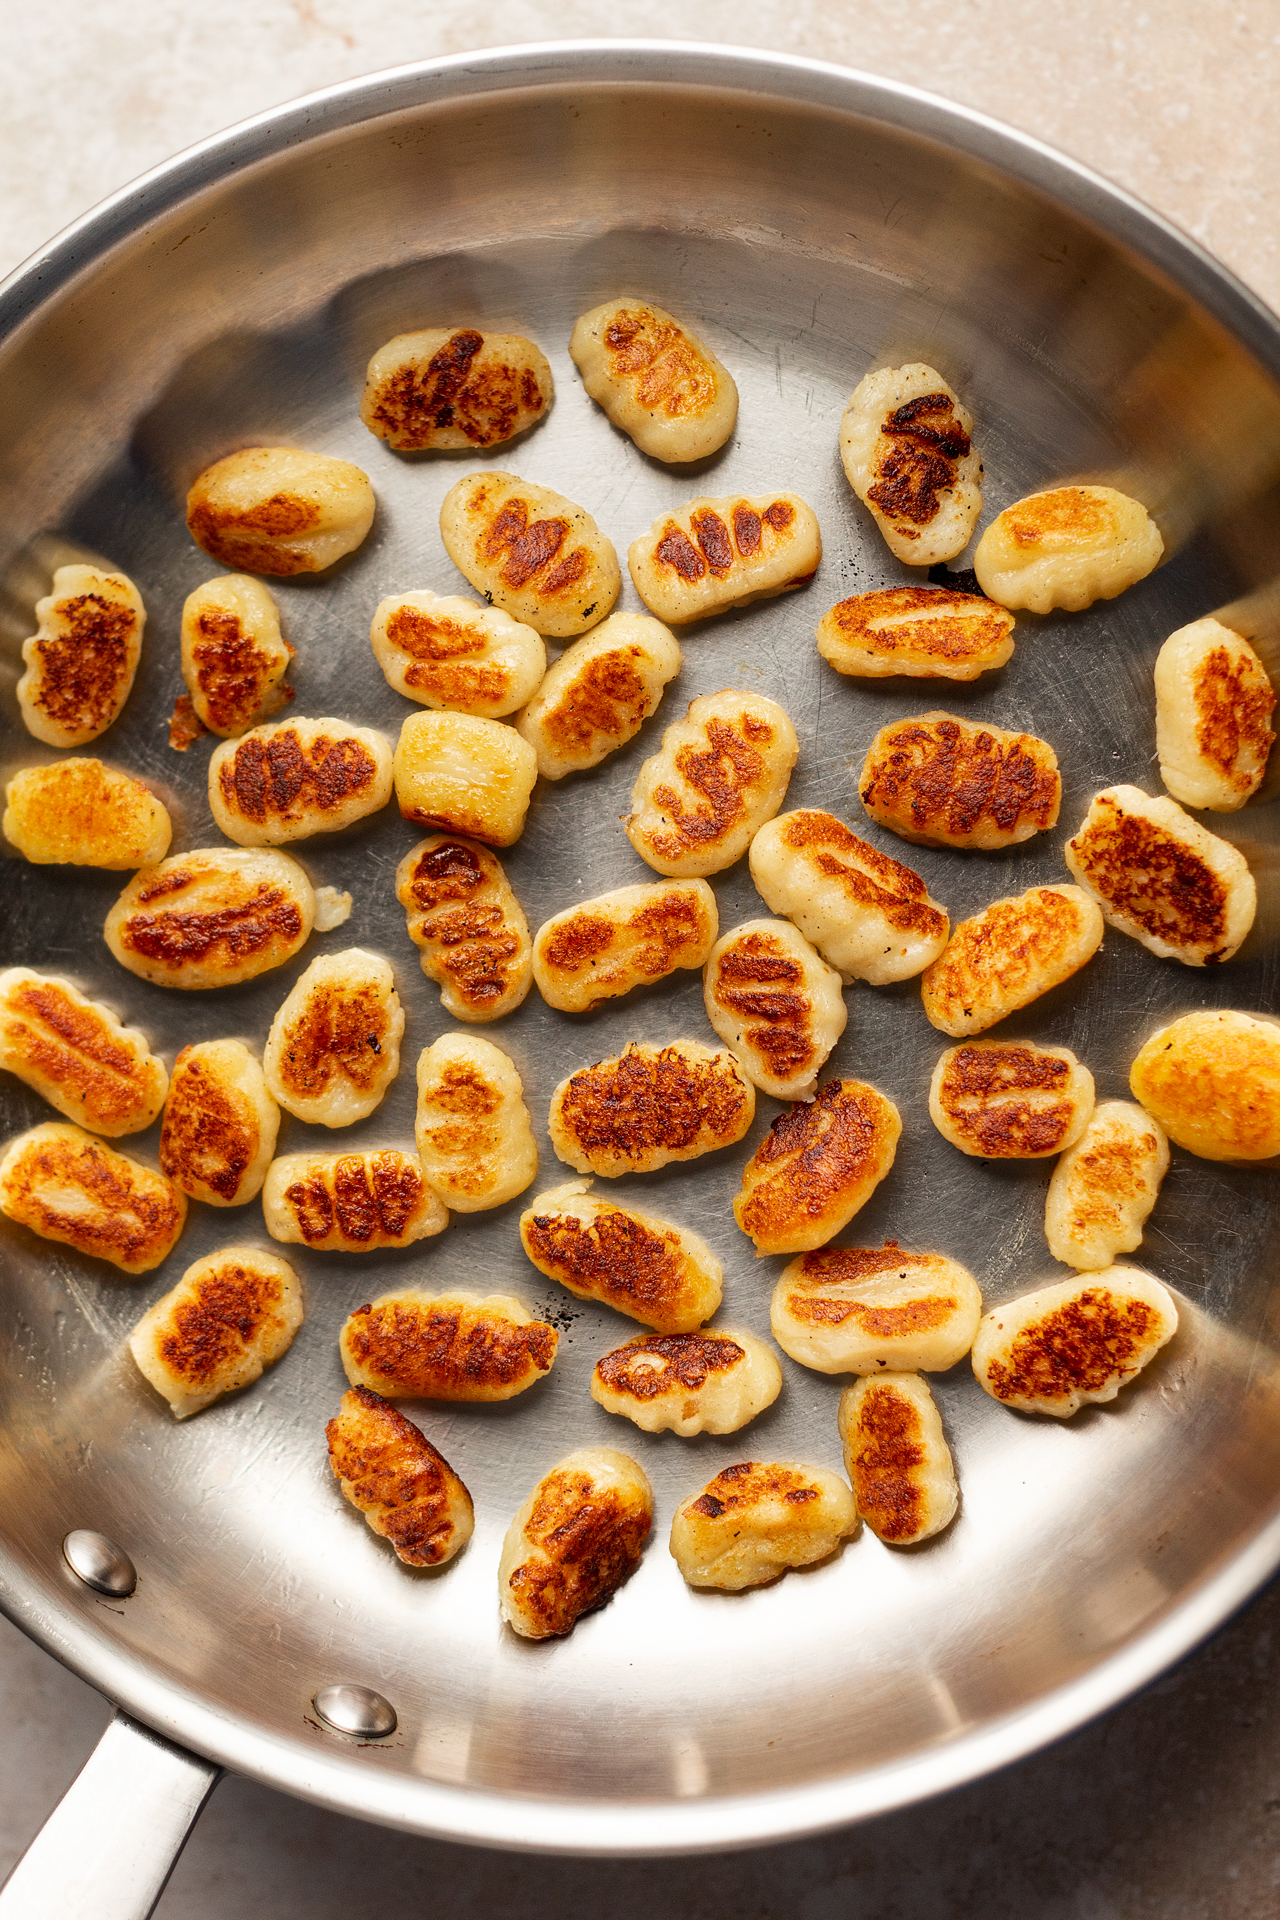
- If you like your gnocchi pan-fried, allow them to cool down completely before frying or, even better, store them in the fridge overnight or else they will fall apart and turn into mush. I’ve also tried frying them from raw (i.e. no prior boiling) and it does work but you need to fry them on a low heat and for a longer period of time to make sure the flour inside is fully cooked.
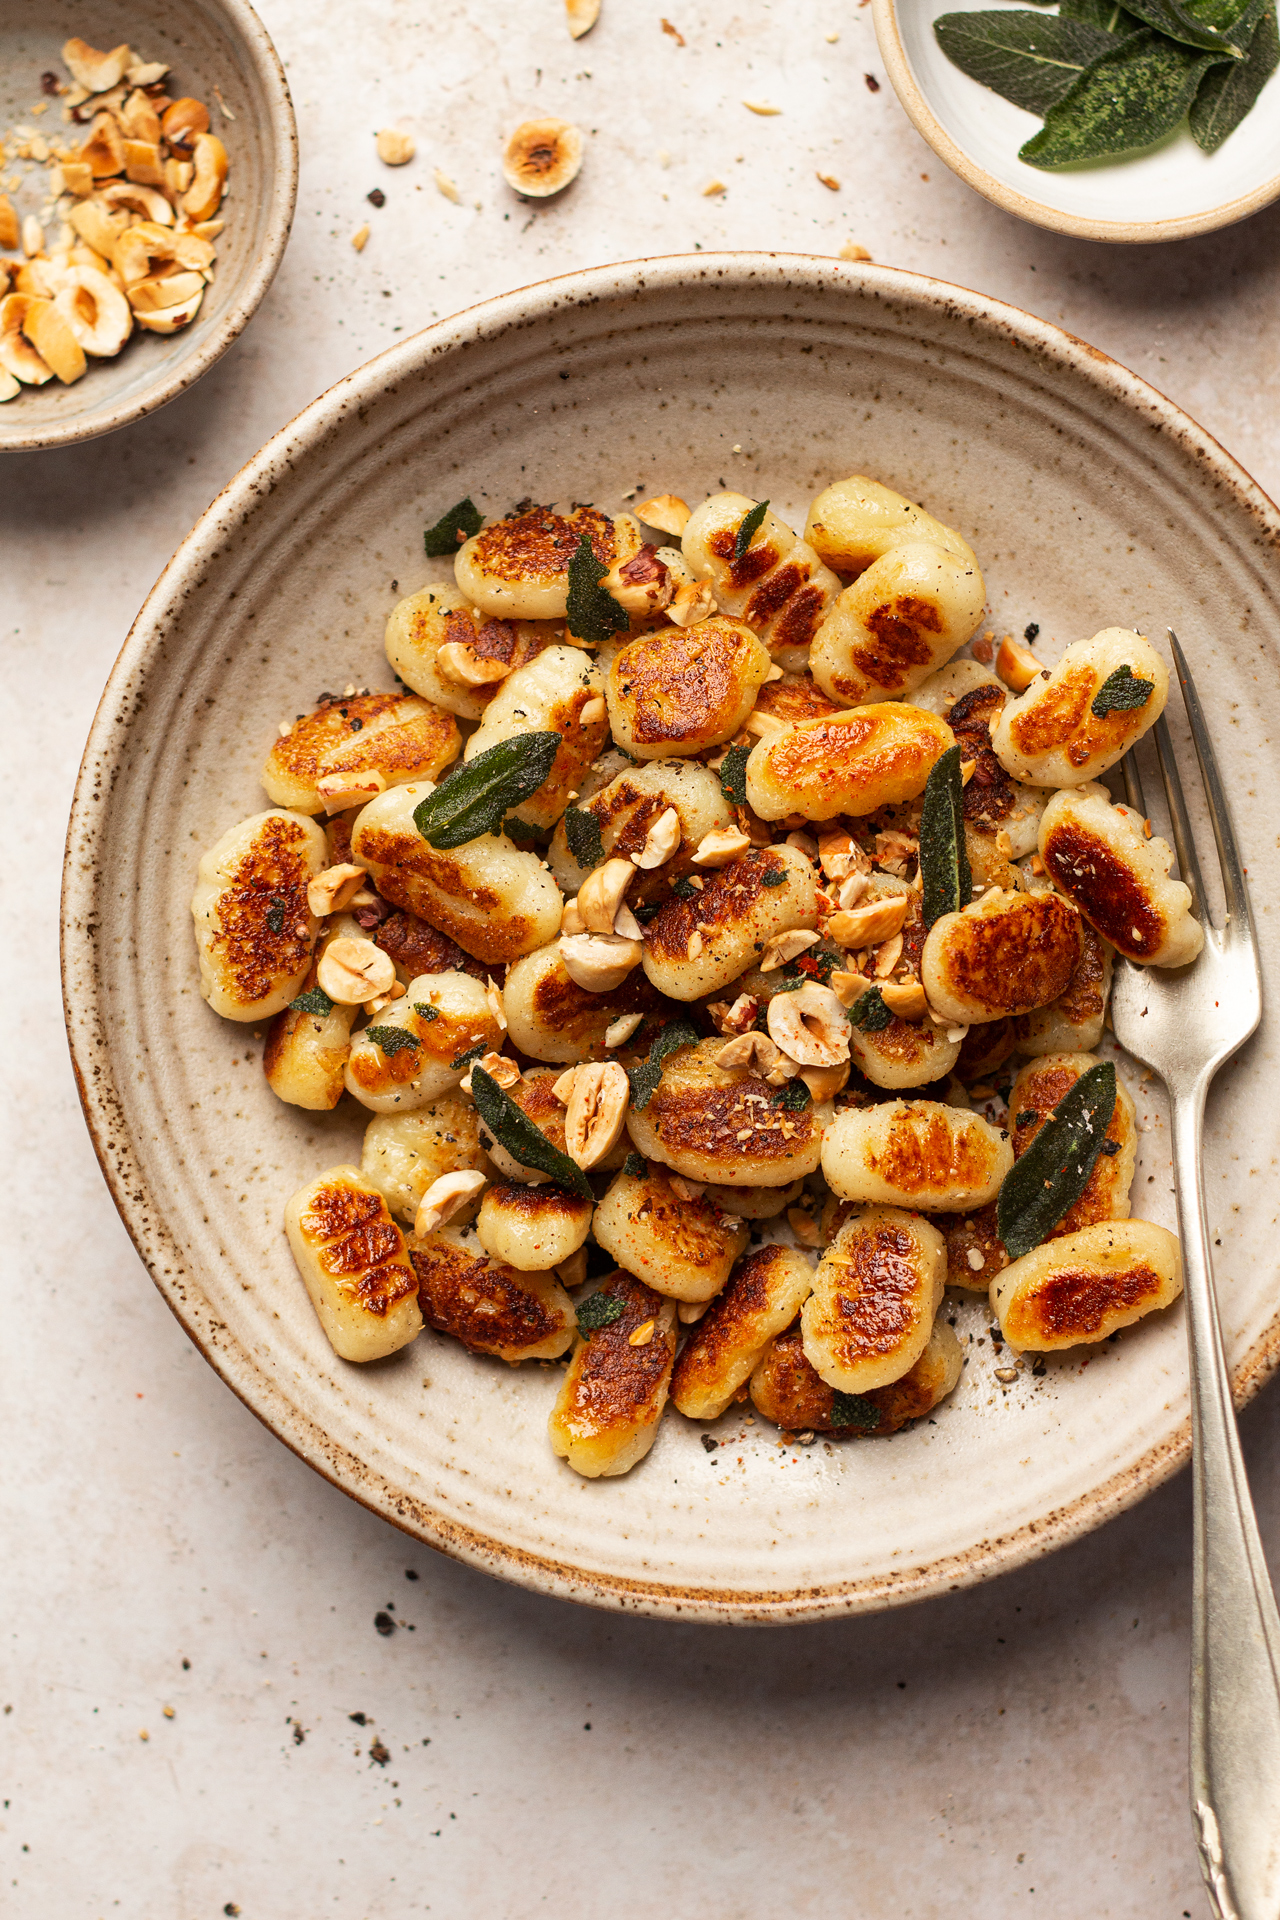
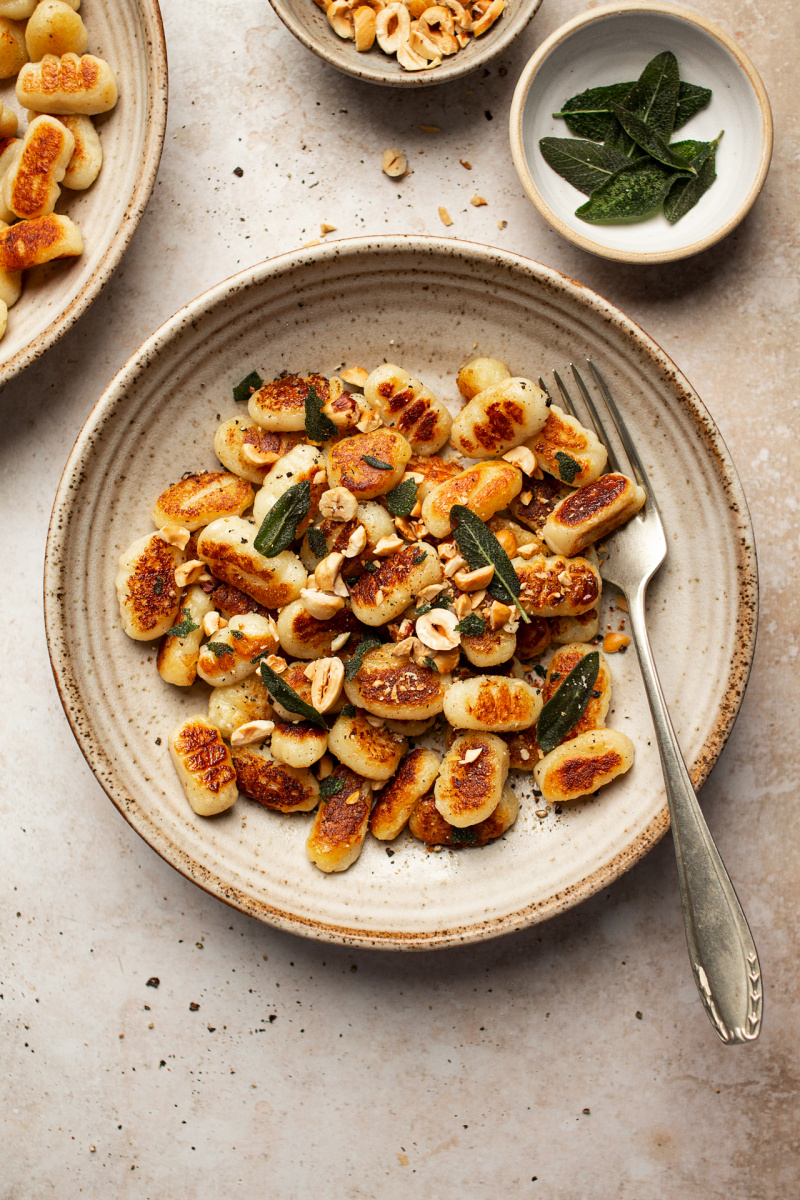
- To pan-fry your gnocchi, bring a non-stick pan to temperature, cover the bottom of the pan with olive oil, let the oil get hot and then throw cold gnocchi into the oil. Shake the pan to coat the gnocchi in oil and then leave undisturbed for 2-3 minutes until the bottoms of the gnocchi get caramelised. Toss the pan again and continue in the same manner until the gnocchi is golden on both sides. Serve with a sprinkle of salt and pepper, crushed hazelnuts and fried sage leaves (see below).
SAGE AND GARLIC OLIVE OIL (for boiled gnocchi)
- Heat up a heavy bottom frying pan on a low heat. Once hot, add sage leaves. Allow them to fry for a few minutes (until stiff), then gently lift them out of the pan and place on a piece of paper towel. Sprinkle with salt and allow them to cool (they will crisp up).
- Add chopped garlic to the sage flavoured oil. Gently cook the garlic for about 2 minutes, stirring the whole time, but do not allow it to brown as it will taste bitter. If the garlic is sizzling too aggressively, turn the heat off (or take the pan off the heat if not using gas) and allow it to cook in the residual heat.
- Add nutritional yeast to the garlicky oil, a good pinch of salt and a splash of gnocchi cooking water and whisk until emulsified. If the sauce is too thin, allow the excess water to cook out until it reaches the desired consistency.
- Toss the drained gnocchi in the sauce well, season with salt and pepper, sprinkle with mild chilli (if using).
- Divide between plates, sprinkle with toasted hazelnuts and crushed sage leaves.
If you want to freeze your gnocchi, boil them, cool and then freeze. Reheat by pan-frying them gently once thawed.

Thanks for the recipe! 🙏
In that case it is most certainly the type of potatoes you used - I looked them up online an they appear to be the waxy kind, which is the exact opposite to what is needed. You need a starchy variety for good gnocchi so Maris Piper will be a game changer. Good luck! Ania
I'm glad to hear that they turned out tasty and sorry to hear about the issues you were having in the process, but that's completely normal. Gnocchi is one of these things where technique is important and you get better as you gain experience so please don't give up - my first batch wasn't great either! Try again and again and you'll master it in no time. x Ania
Thank you so much!