This is my first cheese recipe, but there will be more, promise! Before I went vegan, cheese was something I didn’t think I would be able to live without, but it turns out I was wrong.
I craved it a bit for the first week but within 3 weeks or so I forgot all about it! My body must have appreciated this decision as I started noticing that a handful of minor health complaints I used to have were no longer there, along with a few extra kilos, which I gained in my stressful London life. I found the weight loss astonishing as I was hardly starving myself. Quite the opposite, in fact.
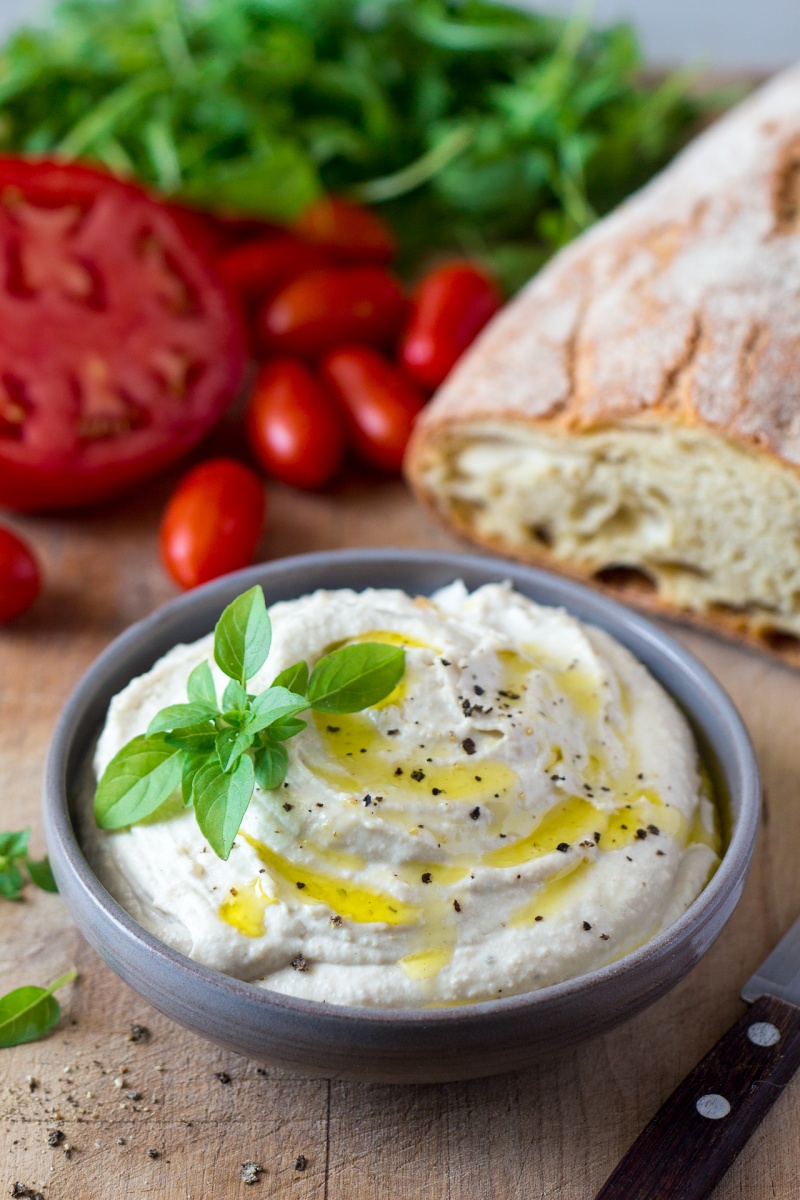
All in all, I don’t miss cheese very much, but there are some dishes where having a vegan equivalent would have been handy. While I’m waiting for these amazing vegan cheeses to reach Europe, I’ve decided to take matters in my own hands and make my own vegan ricotta for the upcoming recipe.
It was inspired by my numerous cheesecake experiments. Once I found the texture I liked, I decided to go for savoury instead of sweet flavouring and it turned out to be right on the money. As usual, my initial mention of this undertaking saw Duncan pulling faces while (he thought) I wasn’t looking 😉 .
Once I was done with my experiment, however, and presented it to him on a piece of toasted sourdough bread with a slice of tomato, a handful of rocket and a few olives, he could not believe that this ricotta-like thing is made from cashews. He was crying out for seconds and marvelling about it all day. Nothing makes me happier than when the taste of my food converts a sceptic.
PS: If you try out this vegan ricotta cheese, don’t forget to tag me on Instagram (#lazycatkitchen). Next week, I’ll be publishing a new recipe that uses this cheese as an ingredient 🙂
- 140 g / 1 cup raw cashews, soaked overnight
- ¼ cup / 60 ml coconut cream (optional)*
- 3-4 tbsp lemon juice
- 3 tsp white miso paste**
- 2 tbsp nutritional yeast
- 1 roasted (for milder flavour) or raw garlic clove
- ¼ tsp salt
- good pinch of white (or black) pepper
- 2 pinches of dry oregano
- a pinch of dry thyme
- 3 tsp agar flakes (optional, see INSTRUCTIONS)
- Rinse the cashews and chop them roughly to help the blender process them. Divide them roughly into 3 portions.
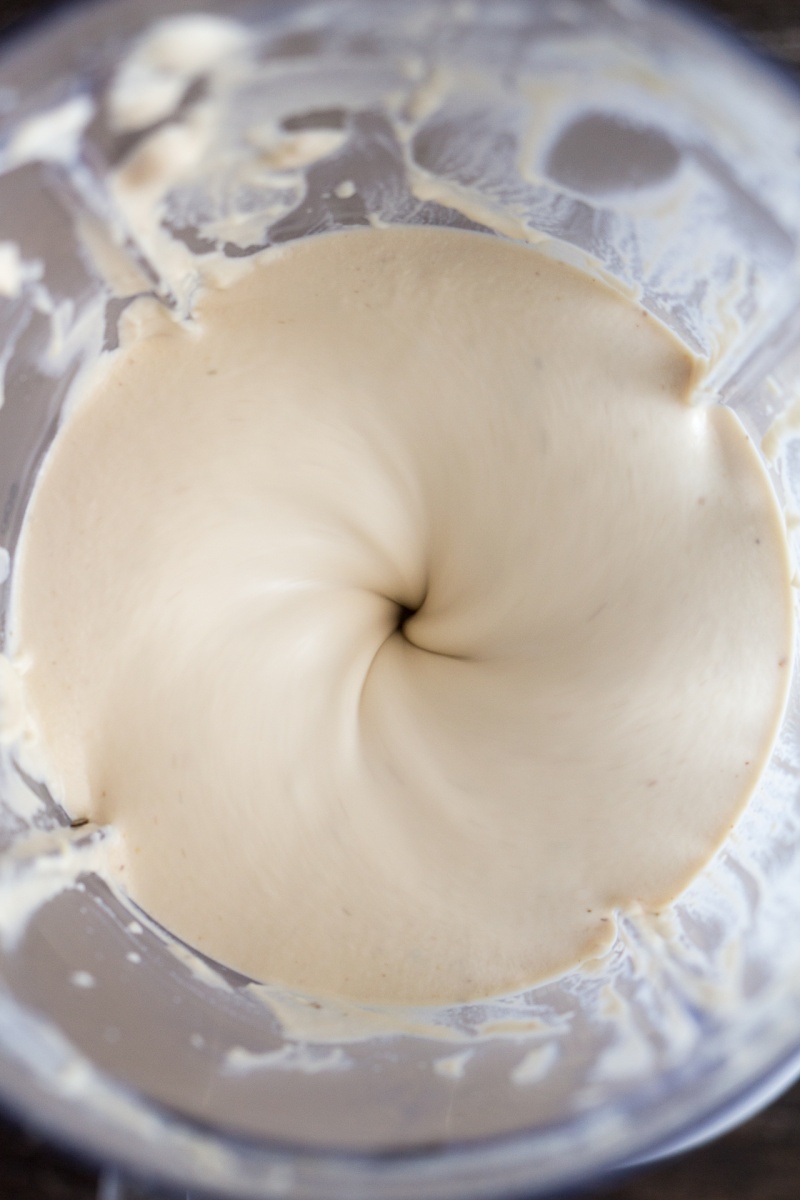
- Place all the liquids – coconut cream, lemon juice and 2 tbsp of water – at the bottom of your blender. Follow by the first portion of chopped cashews. Process until fairly smooth. You will need to use a spatula initially to scrape down the mixture that stays on the walls of the blender. Once the first portion of the cashews is fairly smooth, slowly start adding the remaining cashews, blending well after each addition. If you want the cheese to have a ricotta-like texture, be careful not to over process it. If you want your cheese to be completely smooth, process until the mixture is silky smooth (like my 2nd photo – this cheese was super smooth like a cream cheese).
- Season with miso (see notes), nutritional yeast, salt and pepper, dry herbs, garlic and more lemon if you like your cheese on the tangy side.
- Put agar flakes and 60 ml / ¼ cup of water into a very small pot and set on the lowest heat. Let the mixture come to the boil and then let it simmer for another 10 min to activate. Make sure you stir it the whole time.
- Pour activated agar mixture into the blender and blend well. Pour the cheese into a small dish to cool down and set. It tastes better the next day once the flavours have had a chance to mingle but it will be ready to eat after 15-20 min. Store in the fridge for 3-4 days.
- NO AGAR METHOD Place the liquids – coconut cream (or water) and lemon juice – at the bottom of your blender. Follow by the first portion of chopped cashews. Process until fairly smooth. You will need to use a spatula initially to scrape down the mixture that stays on the walls of the blender. Once the first portion of the cashews is fairly smooth, slowly start adding the remaining cashews, blending well after each addition.
- Since you are not using agar, you simply need to add minimum amount of liquid (that includes coconut cream or/and water) to the cashews in order to retain thick consistency without the need for a thickener. At some point your blender will struggle to process the mixture as it will be very thick and heavy. To remedy this, take blender’s lid off and make small circles (in the direction of the turning blades), with a spatula, a few millimetres below the surface of the cheese mixture to help the blades turn. Please be very careful not to dip the spatula too deep or too close to the blades as it will damage them.
- Season with miso (see notes), nutritional yeast, salt and pepper, dry herbs, garlic and more lemon if you like your cheese on the tangy side. Transfer it to a jar and place in the fridge. It will become thicker and spreadable by the next day.
** While white miso (which in reality is orange-brown) gives this cheese a nice umami flavour, it does change its colour. If you want your ricotta to be white, skip this ingredient or use only a small amount.