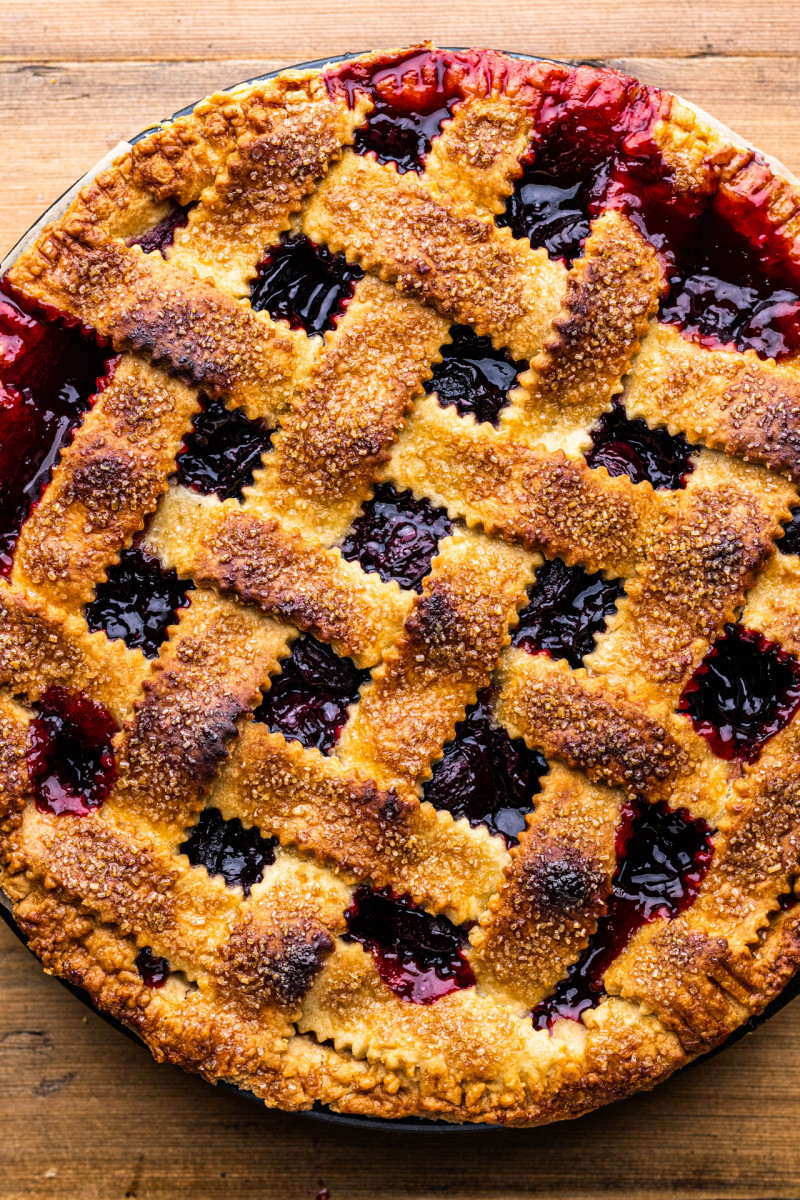
After a long and hot (worryingly hot, let me add) summer, there is now a perceptible feel of autumn in the air. Before cooler days move in fully though, I decided to make use of late summer cherries and bake a vegan cherry pie! Cherry pie is such a classic and making it vegan is a walk in the park!
This vegan cherry pie is easy to make, but absolutely irresistible to eat. Both me and Duncan have enjoyed it a little bit too much (I have not baked in a while…) and so we decided to share with neighbours and friends as having this much pie in the house was just too testing.
While you may expect a pie like this to be a complicated affair, it really isn’t. The pastry for this vegan cherry pie comes together in a food processor, in a matter of minutes. You can, of course, make it by hand if you want but food processor makes the process so much easier and much less messy too.
The cherry filling is even easier. As opposed to an apple pie filling, cherry filling does not need any precooking at all as cherries are less hardy than apples, plus you want chunks of whole (well half, but you get my point) cherries in your filling for that generous homemade feel. All you do to make this filling is mix the cherries with the remaining filling ingredients and set it aside for 30 minutes or so for the tapioca to do its thing.
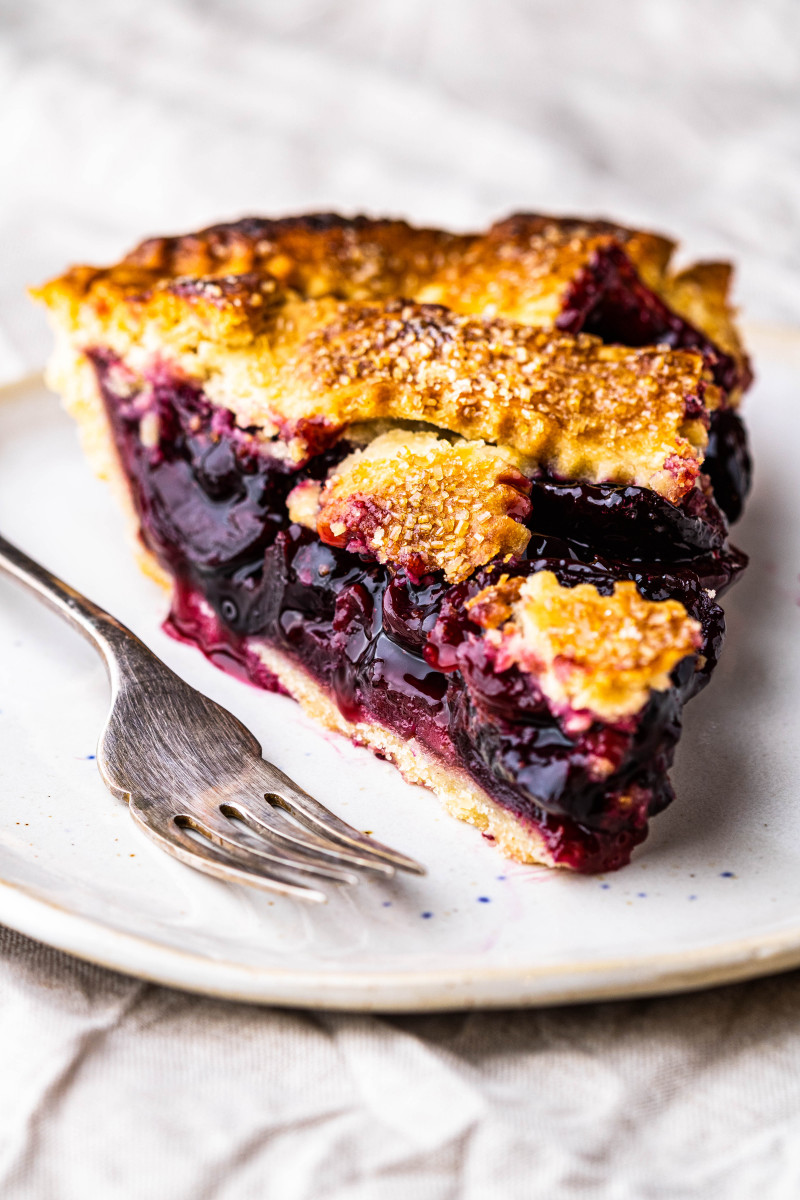
This is one of those things where the result is greater than the sum of its parts – crispy shortcrust pastry with a sweet and juicy filling packed with whole cherries – dreamy…I hope you’ll give this vegan cherry pie a try and if you do, enjoy it as much as we do!
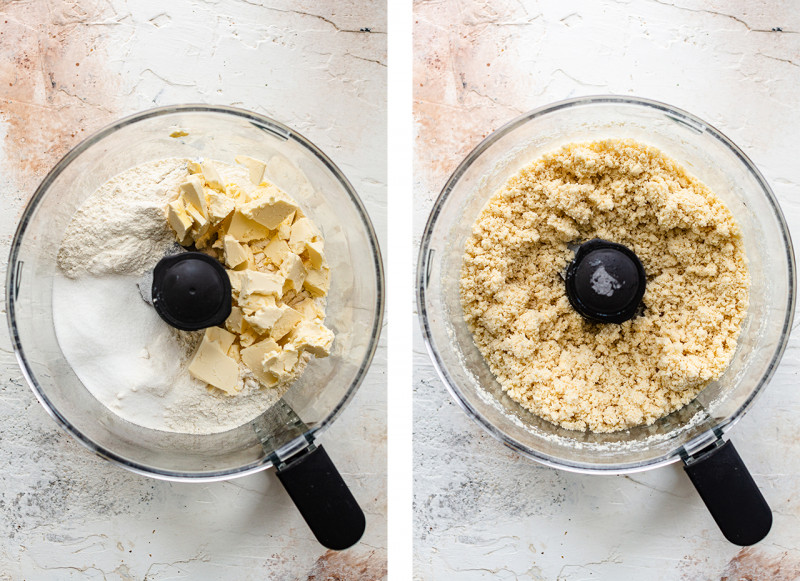
Pulse all pastry ingredients (apart from water) a couple of times until the mixture looks pebbly, i.e. there are no big chunks of butter left. Next, pulse the mixture whilst trickling in ice cold water (mixed with vodka if using) until the mixture starts to resemble breadcrumbs – add as little water as you can get away with, the less water the better your pastry will be. The exact amount of water needed varies as it depends on many things (how finely you cut the butter, how absorbent is your flour, ambient temperature and humidity) so be sure to add the liquid gradually and to stop the food processor to touch the mixture with your hands to make sure you don’t add too much. The photo on the right was taken after water has been added.
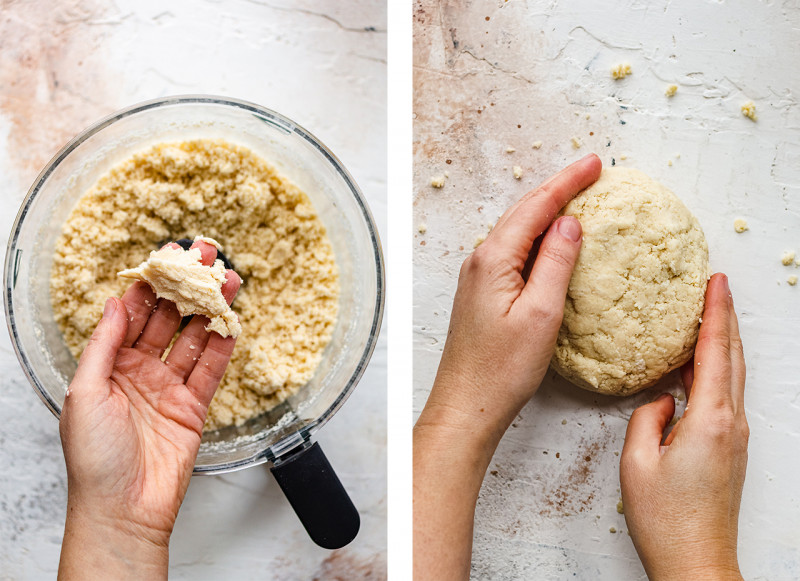
Once the mixture is just moist enough (without feeling wet) to clump up in your palm, transfer it to the counter and gently bring it together with your hands into a disc – do not knead! Refrigerate for at least 60 minutes to relax the gluten and keep the pastry tender.
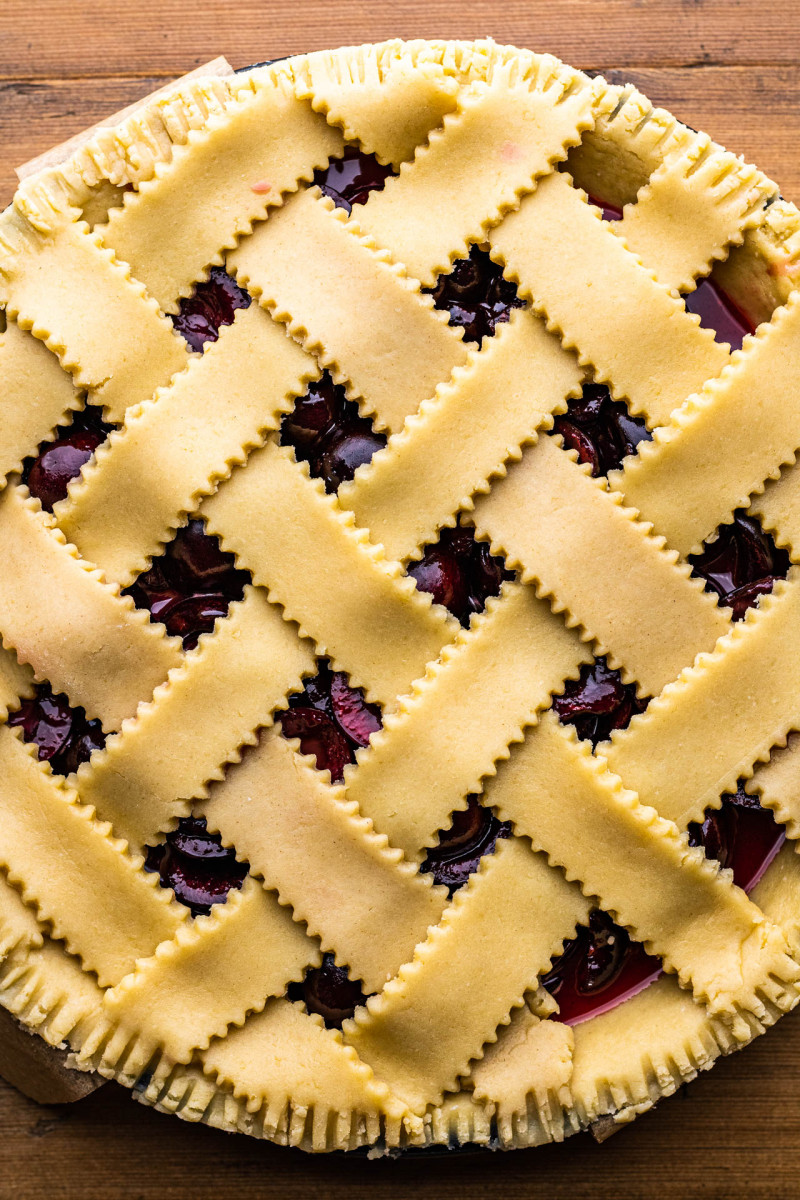
Roll 2/3 of the pastry into a round slightly bigger than your pie dish. Add the filling and its juices and use pastry cut offs and then pastry you set aside to make the lattice top.
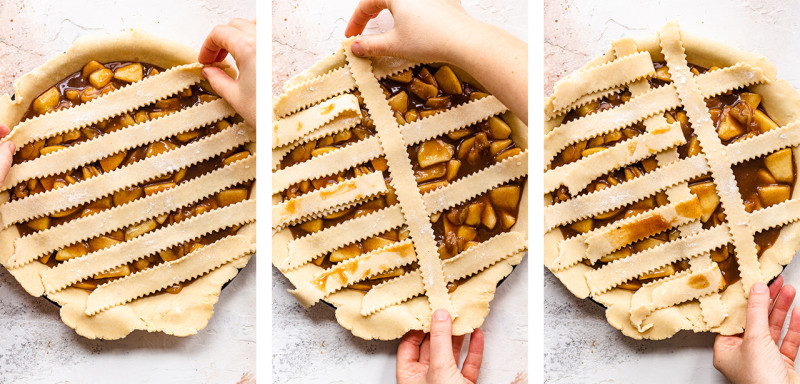
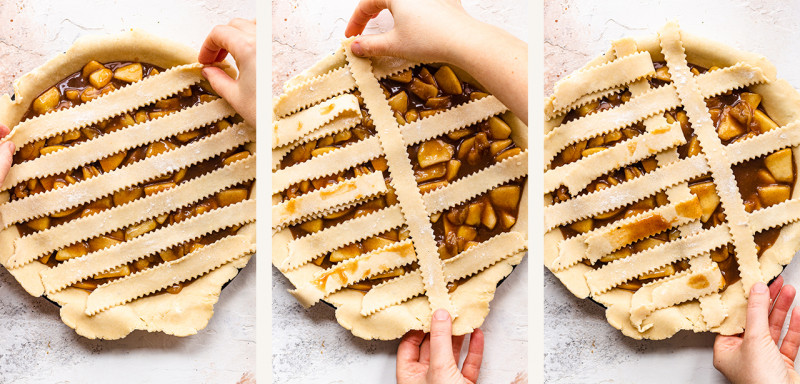
Roll of the remaining pastry and cut ten 2 cm / 0.75″ wide strips out of it. Arrange the first five on top of the pie the weave the remaining five between them – see the photos below on how to do that. First, lay down all the strips in one direction. Next, pull every second strip back. Place a strip of pastry perpendicular to the ones you placed first. Put the pulled back strips down. Do the same again, but this time lifting off the strips that stayed down last time. Soon you’ll see a nice basket weave emerge…
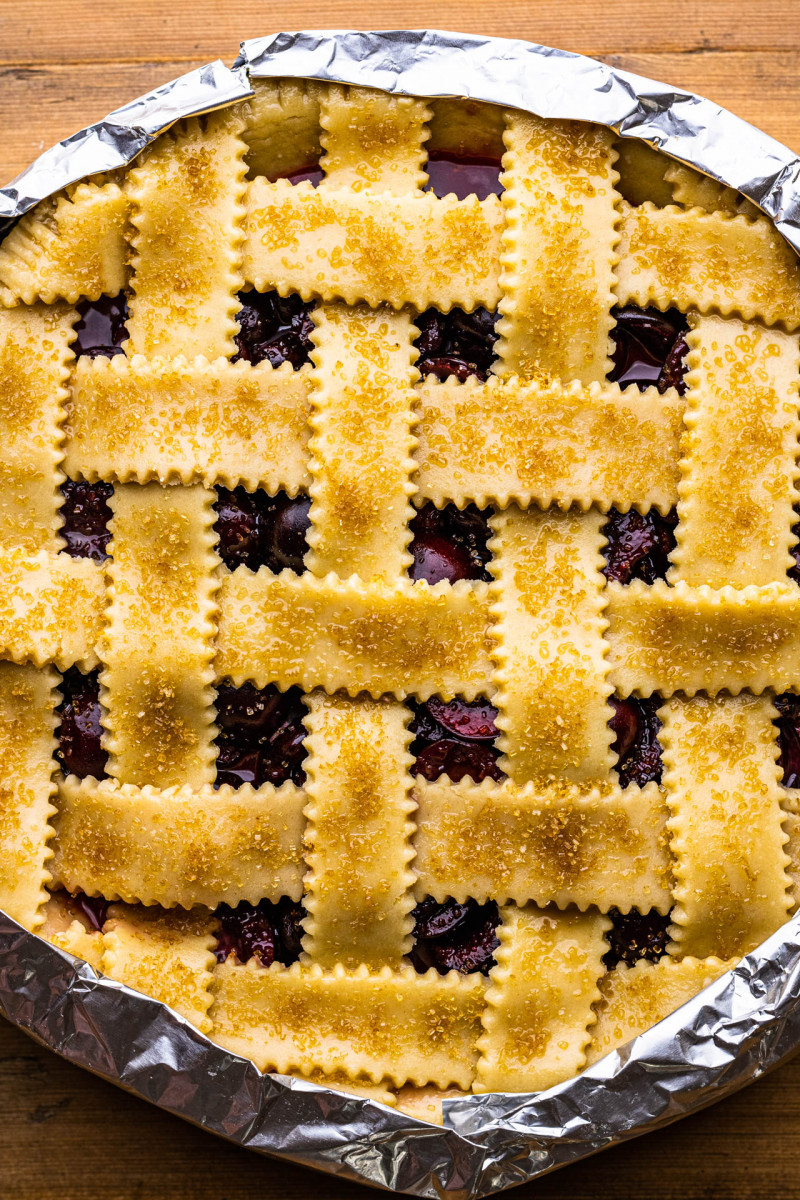
Glaze the lattice top and sprinkle with demerara sugar for an extra crunch, protect the edges with a strip of tin foil and bake until the pastry is golden and the cherry filling is bubbling.
CHERRY PIE FILLING
- 750 g / 26.5 oz cherries (5 cups, pitted and halved)
- 30 ml / 2 tbsp lemon juice + optionally zest 1 lemon
- 40 g / 5 tbsp tapioca starch*
- a good pinch of salt
- 175 g / heaped ¾ cup caster sugar
- 10 ml / 2 tsp vanilla extract (optional)
SHORTCRUST PASTRY
- 375 g / 3 cups all purpose flour or GF flour mix
- 2½ tsp xanthan gum (only if using GF flour mix)
- ¾ tsp fine salt
- 50 g / ¼ cup caster (superfine) sugar
- 200 g / 7 oz (1 cup) vegan butter, I use Naturli
- 15 ml / 1 tbsp cold vodka (optional)
- approx. 75 ml / 5 tbsp ice cold water
- GLAZE: 4 g / 1 tsp sugar dissolved in 15 ml / 1 tbsp plant milk & 5 ml / 1 tsp oil
- 2 tbsp demerara sugar, to sprinkle
PASTRY
- Combine the flour, icing sugar, salt and xanthan gum (if making GF pastry) in the food processor bowl. Alternatively, you can make the pastry by hand – see photos here.
- Chop vegan butter into small pieces and add it to the dry ingredients. Pulse the machine a few times to cut the fat into the flour.
- If using vodka, mix it with approx. 5 tbsp of ice cold water. Gradually trickle in ice cold water while pulsing the mixture. You’ve added enough water when the mixture starts to resemble breadcrumbs and clumps together in your hand when squeezed but does not feel wet – you want to add as little water as possible.
- Transfer the pastry mixture out of the food processor. Gently press the dough together with your hands into a disc, but do not knead – handle as little as you can or else your pastry will be tough.
- Wrap the pastry in a piece of cling film and chill in the fridge for at least 60 minutes.
- Remove the dough from the fridge, cut one third of the dough off and return to the fridge.
CHERRY PIE FILLING
- Halve and pit the cherries, I use my ¼ tsp measuring spoon to get the stone out.
- Place cherry halves with a large mixing bowl, add sugar, salt, tapioca starch, vanilla extract and lemon juice (and zest if liked). Mix really well and set aside for 30 minutes to activate tapioca.
ASSEMBLY & BAKING
- Pre-heat the oven to 200° C / 390° F and place a pizza stone or an old-fashioned metal tin in the middle of the oven – this helps the bottom of the pastry cook properly despite a wet filling.
- Prepare a long double strip of kitchen foil to wrap around the edges of the pie to prevent them from browning too quickly.
- Roll bigger portion of the pastry out on a lightly floured surface until the pastry is about 3-4 mm / 1/8″ in thickness and slightly larger then your pie pan. Line the pan with the rolled pastry, cut off any excess and place in the fridge. Pierce the pastry at the bottom of the pie dish with a fork all over.
- Fill the pie with the filling.
- Roll out the remaining pastry and any cut offs on a lightly floured surface, using a knife or a pastry cutter cut ten strips.
- Arrange the five strips of pastry on top of the filling in one direction. Make sure the strips aren’t stretched to allow the filling to rise and fall (during and after baking).
- Pull back every second strip half way and place one strip perpendicular to the rest. Return the pulled back strips to where they were.
- Pull back alternating strips (the ones that stayed down last time) and place one strip perpendicular to the rest. Return the pulled back strips to where they were. Continue in this manner until you’ve covered the entire pie.
- Press the lattice strips to the edges of the pastry with your fingers or a fork and trim the excess pastry with a sharp knife – leave a teeny tiny overhang over the edge of the dish as pastry will shrink a little during baking.
- Combine glaze ingredients in a small bowl and glaze the lattice with a pastry brush, then sprinkle the lattice with demerara sugar. Wrap kitchen foil loosely around the edges to prevent them from browning too fast.
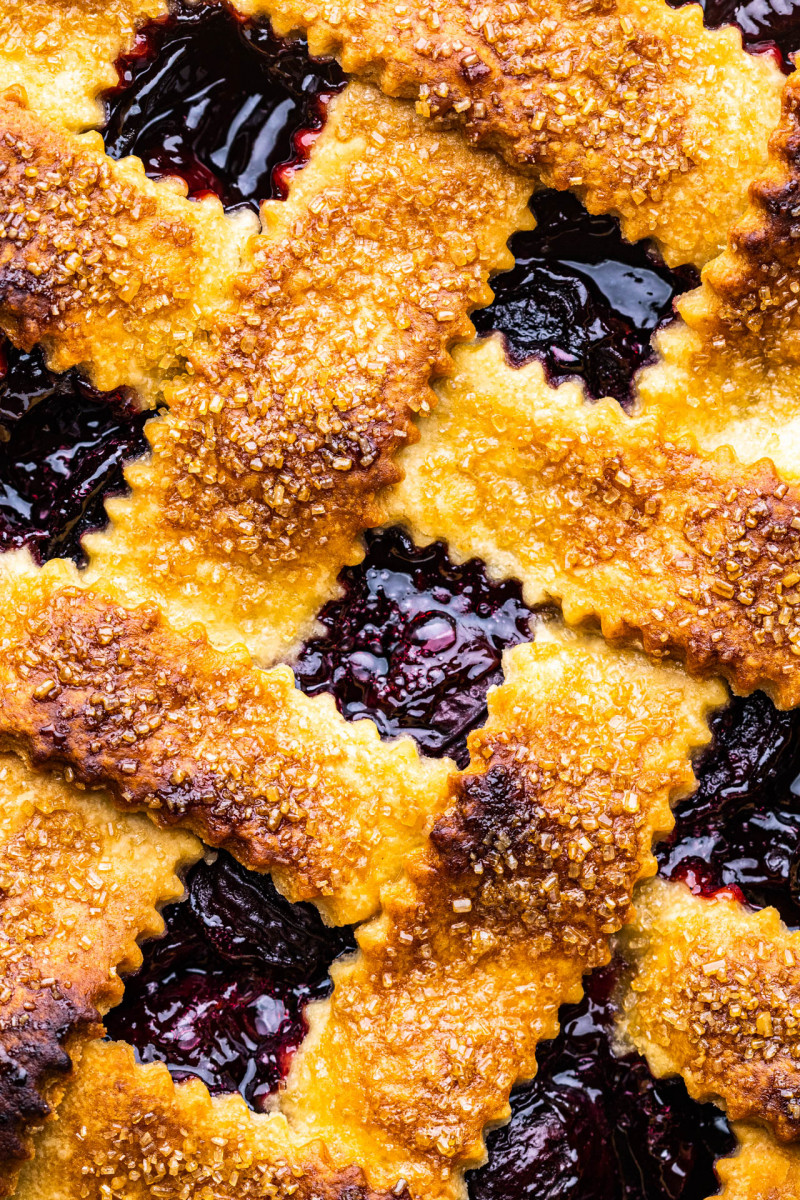
- Bake for 20 minutes, then decrease the temperature to 190° C / 375° F and carry on baking until the pastry is golden and the filling is bubbling – approximately another 30 minutes.
- Allow the pie to settle for at least 3 hrs before cutting, overnight is best. Consume on the day ideally or store in an air-tight container out of the fridge (at cool temperature) for up to 2 days if needed.
*PIE PAN: I used 23 cm / 9″ pie pan that is 3 cm / 1.2″ deep. If using a deep pie pan, you will need to double the amount of filling.
*FREEZING: This vegan cherry pie freezes well. I recommend cutting it up into slices and freezing the slices in an air-tight box. Defrost, covered in kitchen foil, in a 160° C / 320° F oven until fully thawed and warmed through, about 20 minutes.