I hope you have a relaxing weekend planned? We certainly do as the last three weeks have been really quite stressful for us due to all the building work we are having done, and the constant mess and chores resulting from it. On Friday, we were supposed to have our living room plastered, which we were looking forward to being done as that was the last task to be done this side of Xmas before we can move on with a proper clean-up and redecorate. Unfortunately, a Victorian house always throws one kind of curve ball or another. Once we ripped out the original skirting, which after 120 years has seen better days, we exposed a serious crack in the masonry wall behind it.
As the wall behind a skirting board that old is never really going to look ‘pretty’, I didn’t even notice there was a crack until my builder pointed it out. I really appreciated him bringing it to my attention and offering to fill it, as he could have just asked the plasterer to plaster over it and then just ignore my calls when the wall inevitably cracked at some point. He really came through for us in the end.
He reckons that the crack was caused by either an old or an ongoing leak in that area of the house, which also explains the massively saggy floorboards. What a pickle!! I really fear what our floor restoration expert will find when he lifts the floorboards in January. As he is a very busy man, all we can do is wait and hope that the leak isn’t a live one and a few new joists will resolve the situation. I do hope so! Man, Victorian houses do keep you on your toes, don’t they?
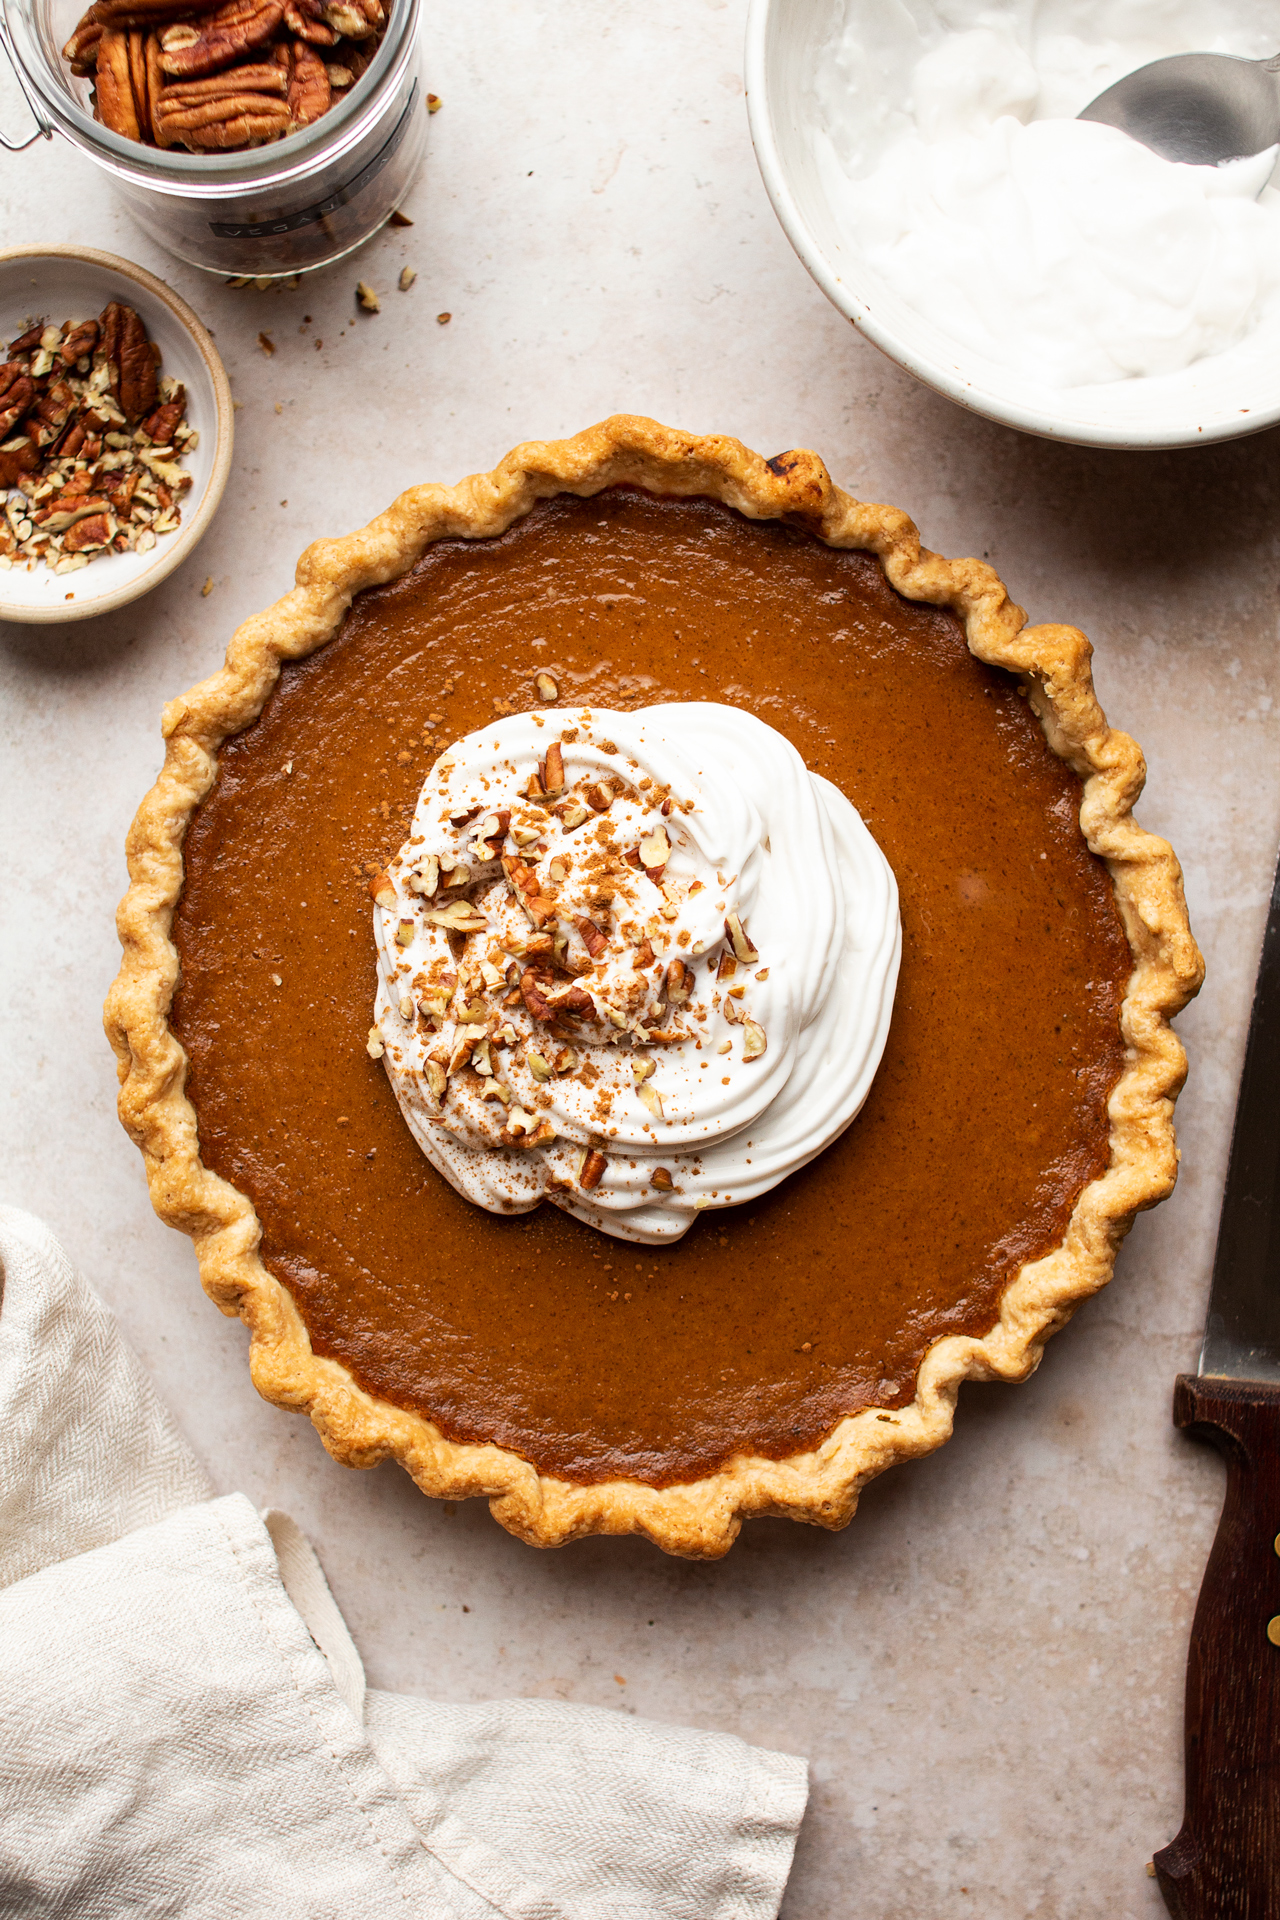
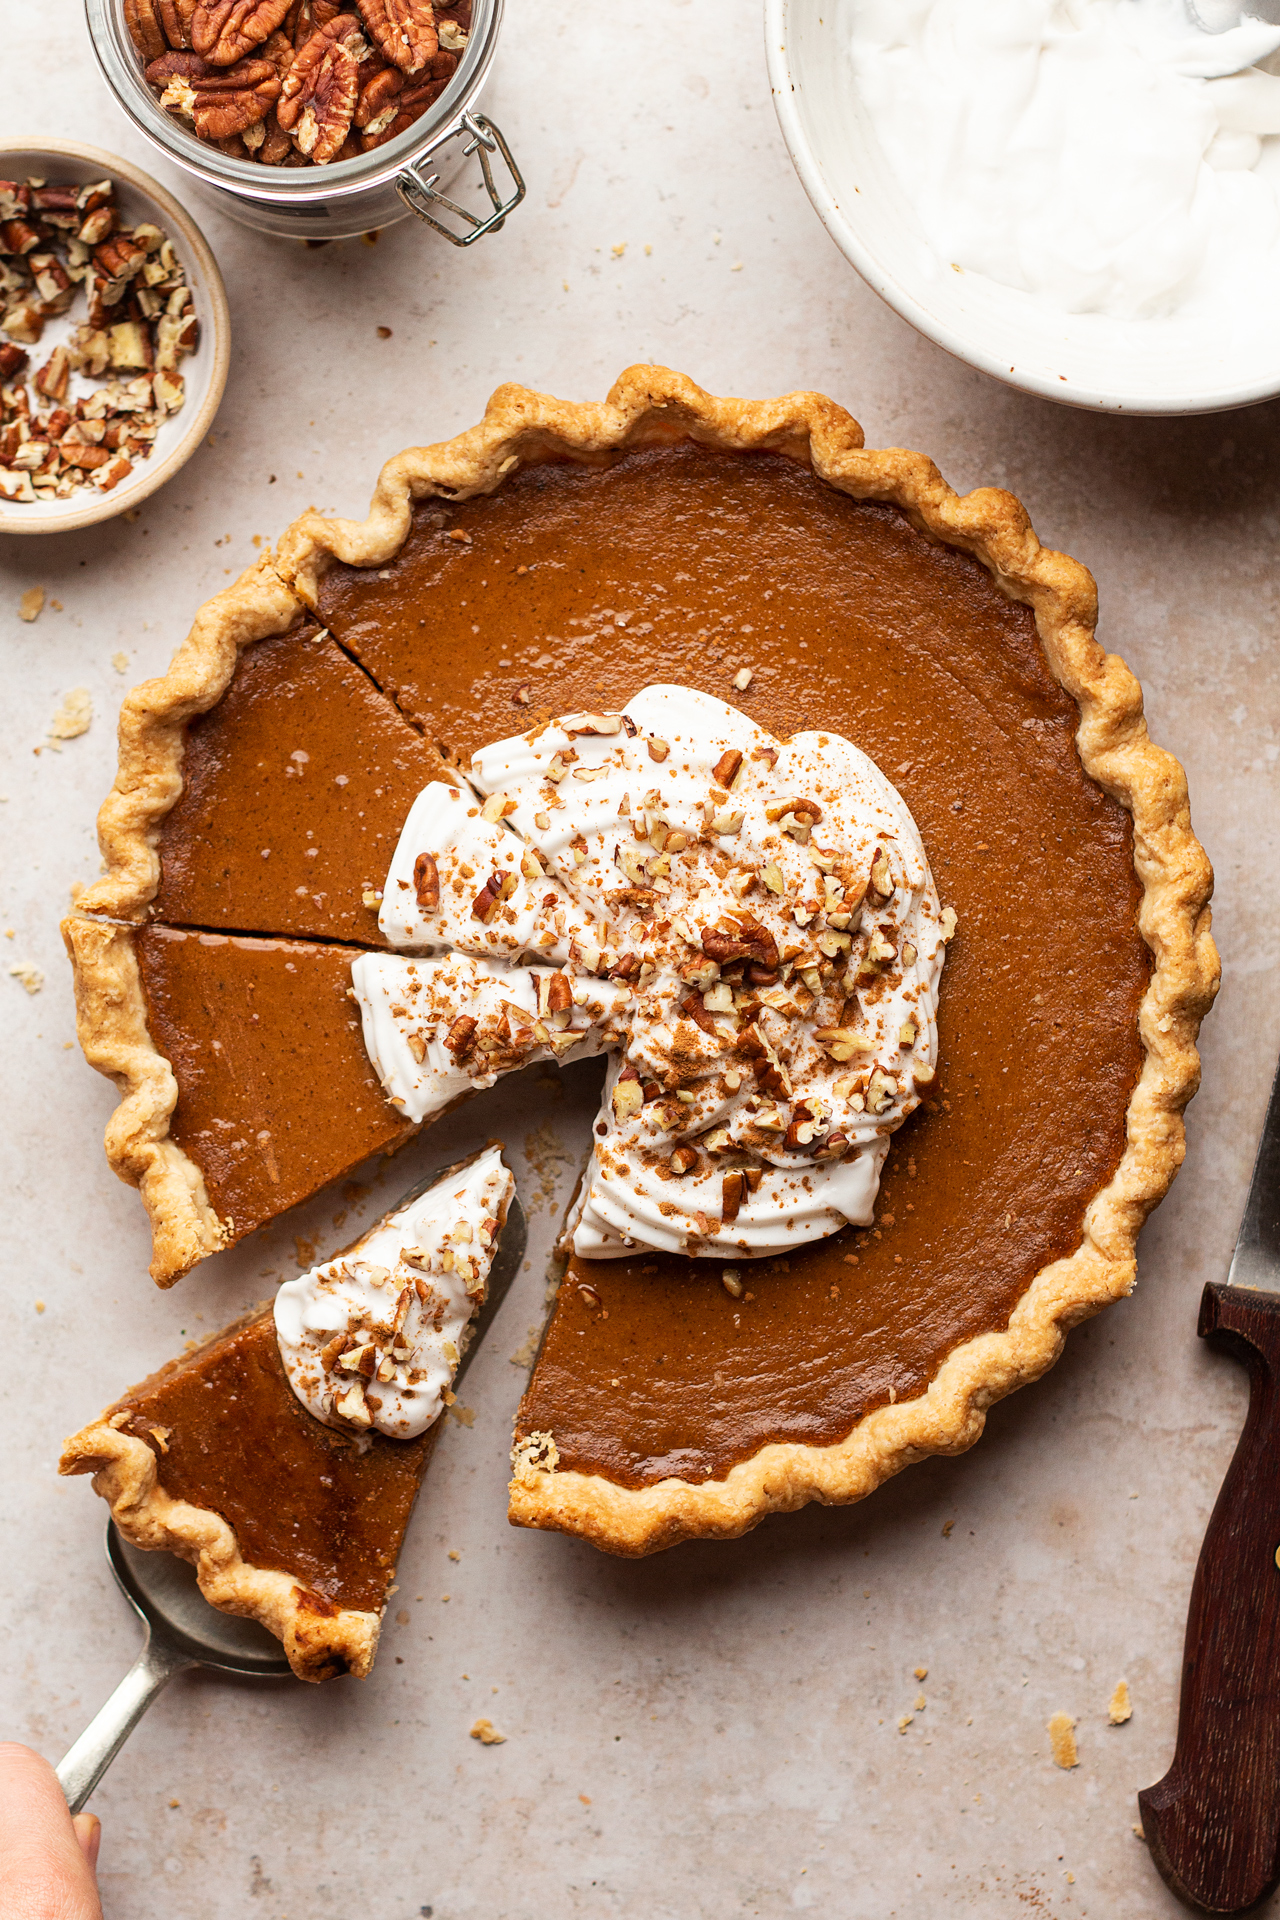
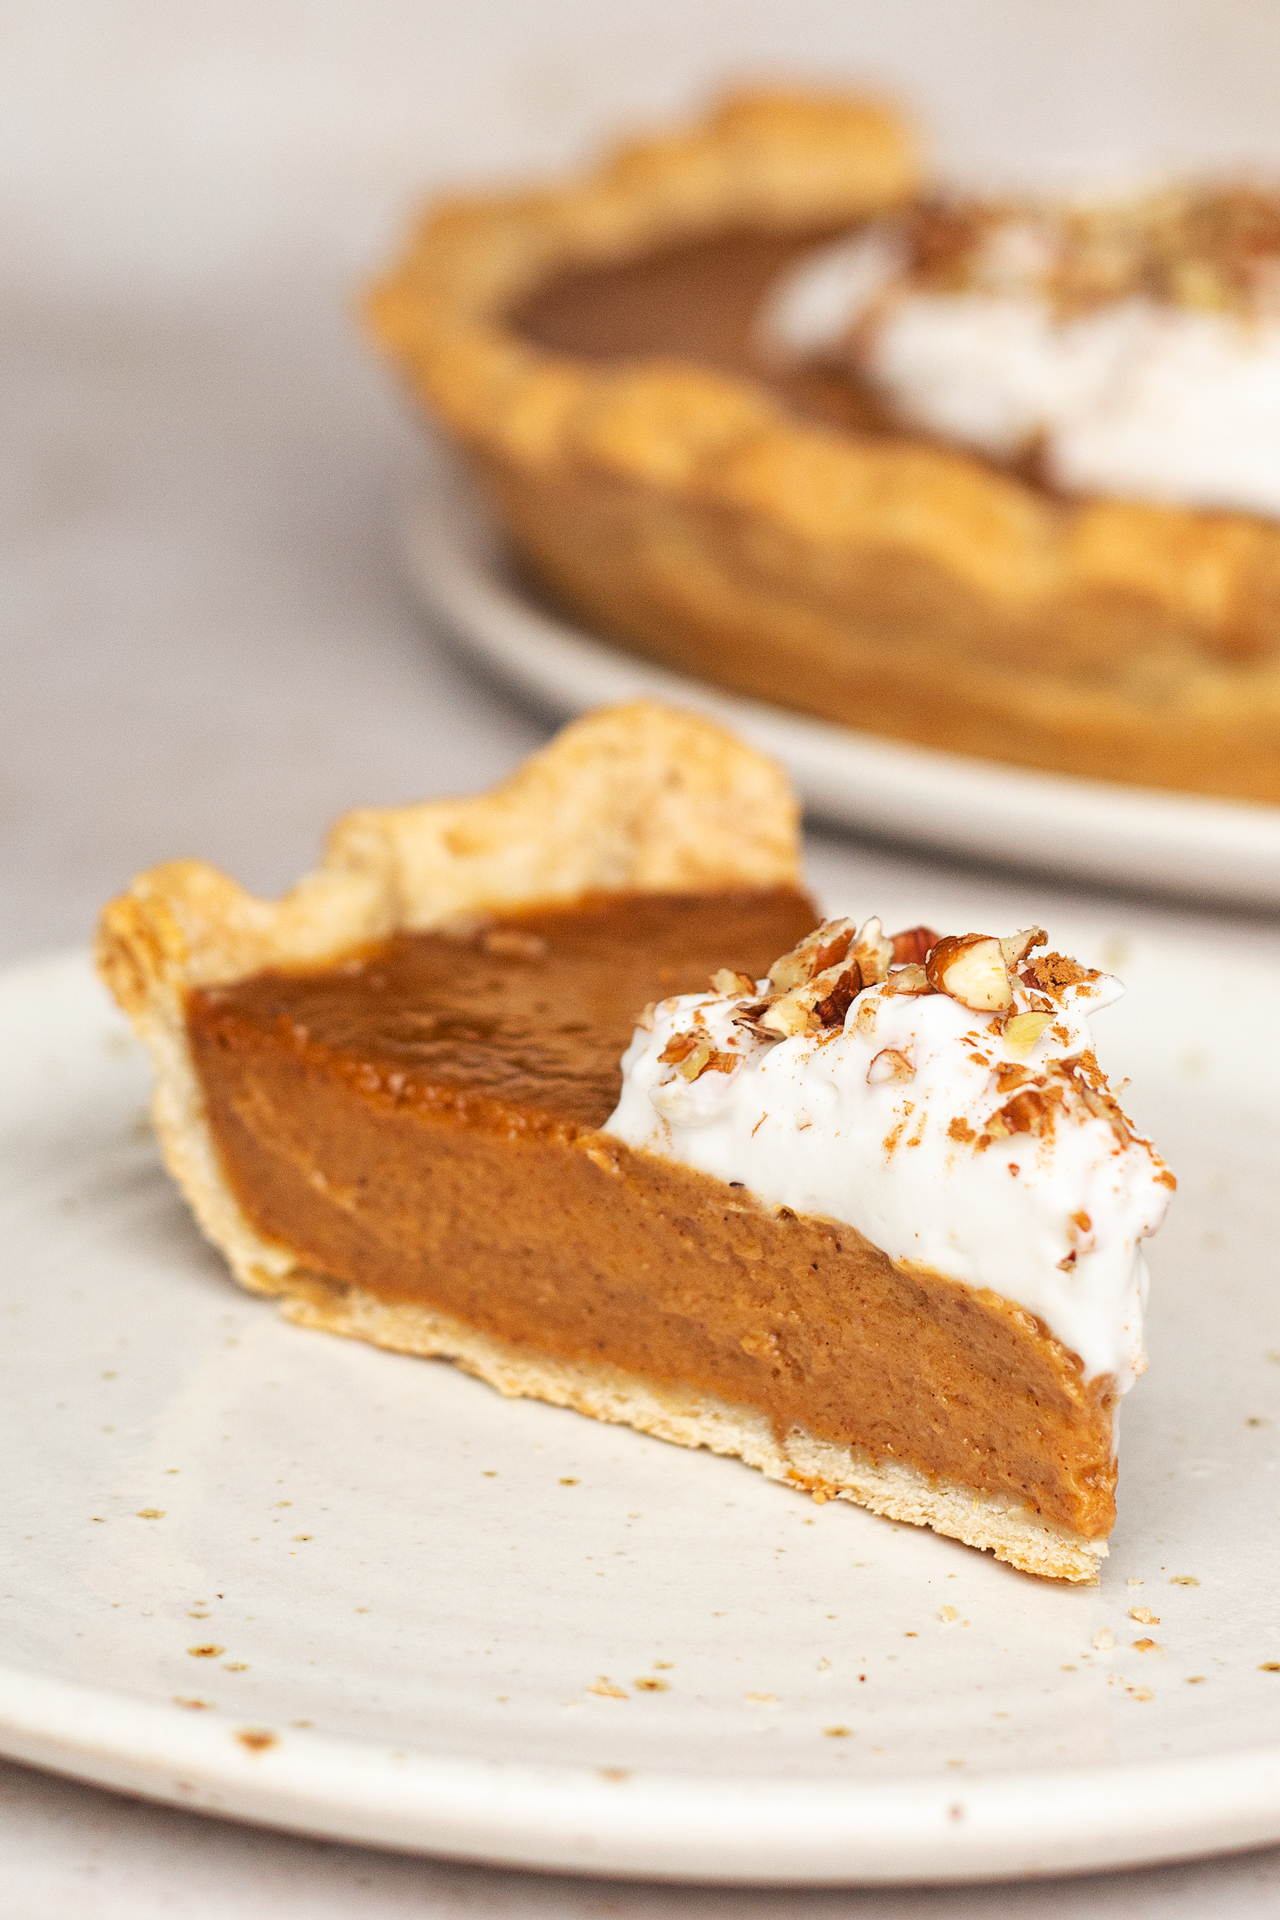
So as I am aware that a lot of you are probably anxiously prepping for Thanksgiving I’ve decided to do my own take on a Thanksgiving classic – pumpkin pie. While not being American and not having grown up in the pumpkin pie eating tradition, I am no expert, but I am really pleased with the taste and texture of what came out of the oven. The pastry is deliciously light and flaky and the filling rich, custardy and fragrant of spices. It’s such an autumn treat, I can totally see why it’s so popular! As the traditional pie of this type uses eggs to get that set custard quality, I’ve used silken tofu as it sets beautifully when baked, giving the pie that custard-like texture and its flavour isn’t detectable at all so don’t worry.
- 180 g / 1½ cups all purpose flour OR GF all purpose flour mix (I used Dove’s Farm)
- ½ tsp sea salt
- ½ tsp xantham gum (for GF version only)
- 100 g / ½ cup solid (not melted) mild coconut oil, chopped up small
FILLING
- 360 ml / 1½ cups pumpkin puree
- 90 ml / ¼ cup + 2 tbsp smooth almond butter
- 150 g / 5.3 oz firm silken tofu (I used Clearspring)
- 180 ml / ¾ cup maple syrup
- 2 tbsp tapioca starch (or cornstarch)
- 1¼ tsp cinnamon
- 1 tsp ground ginger
- 1/3 tsp ground nutmeg
- 1/8 tsp ground cloves or all spice
- 1 tsp vanilla extract
- ¼ tsp sea salt
DECORATION
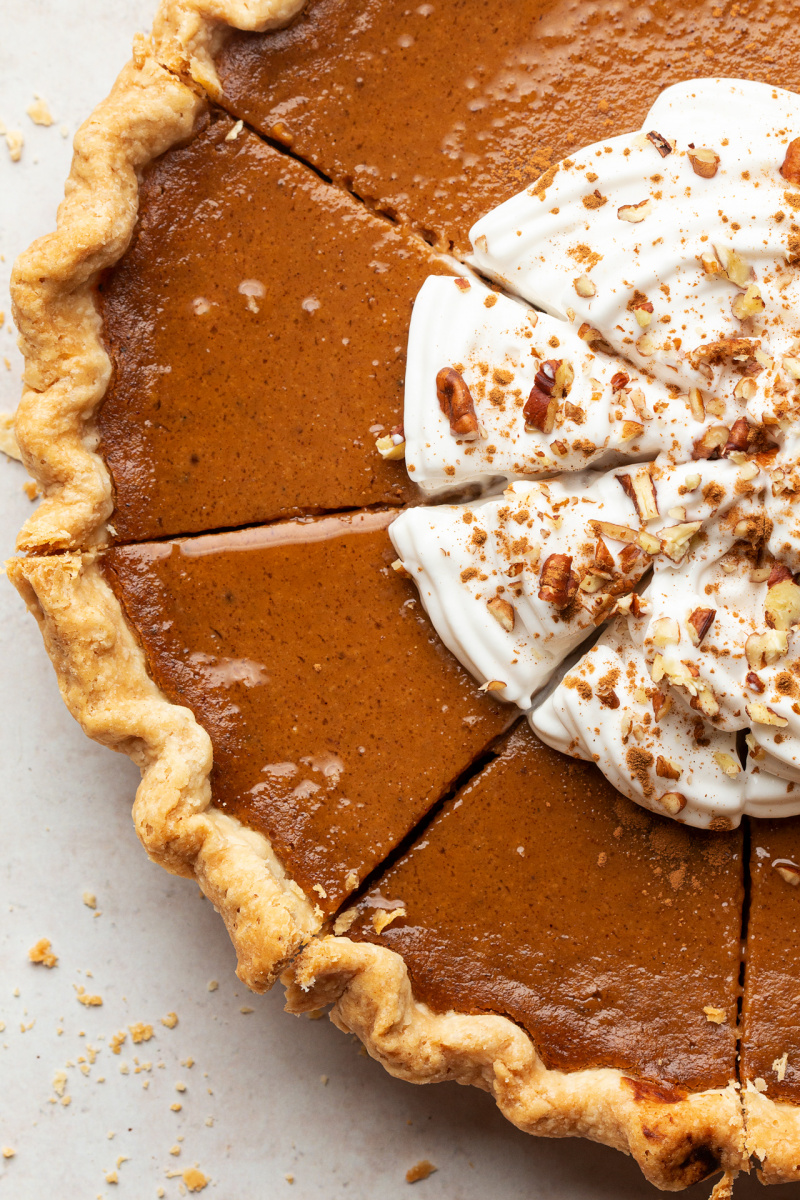
- thick dairy-free yoghurt or whipped coconut cream
- chopped pecans
- cinnamon
- Mix the flour, salt and xantham gum (if using a gluten-free flour mix instead of an all purpose flour containing gluten) in a large bowl or a food processor.
- Add chopped coconut oil and cut it into the flour using a pastry cutter (or two knives) or pulse in a food processor until you obtain a sandy texture that clumps together when you grab a handful, with no large lumps of fat left. To check for large lumps, shake the bowl or the food processor bowl – it will bring large bits of oil to the surface.
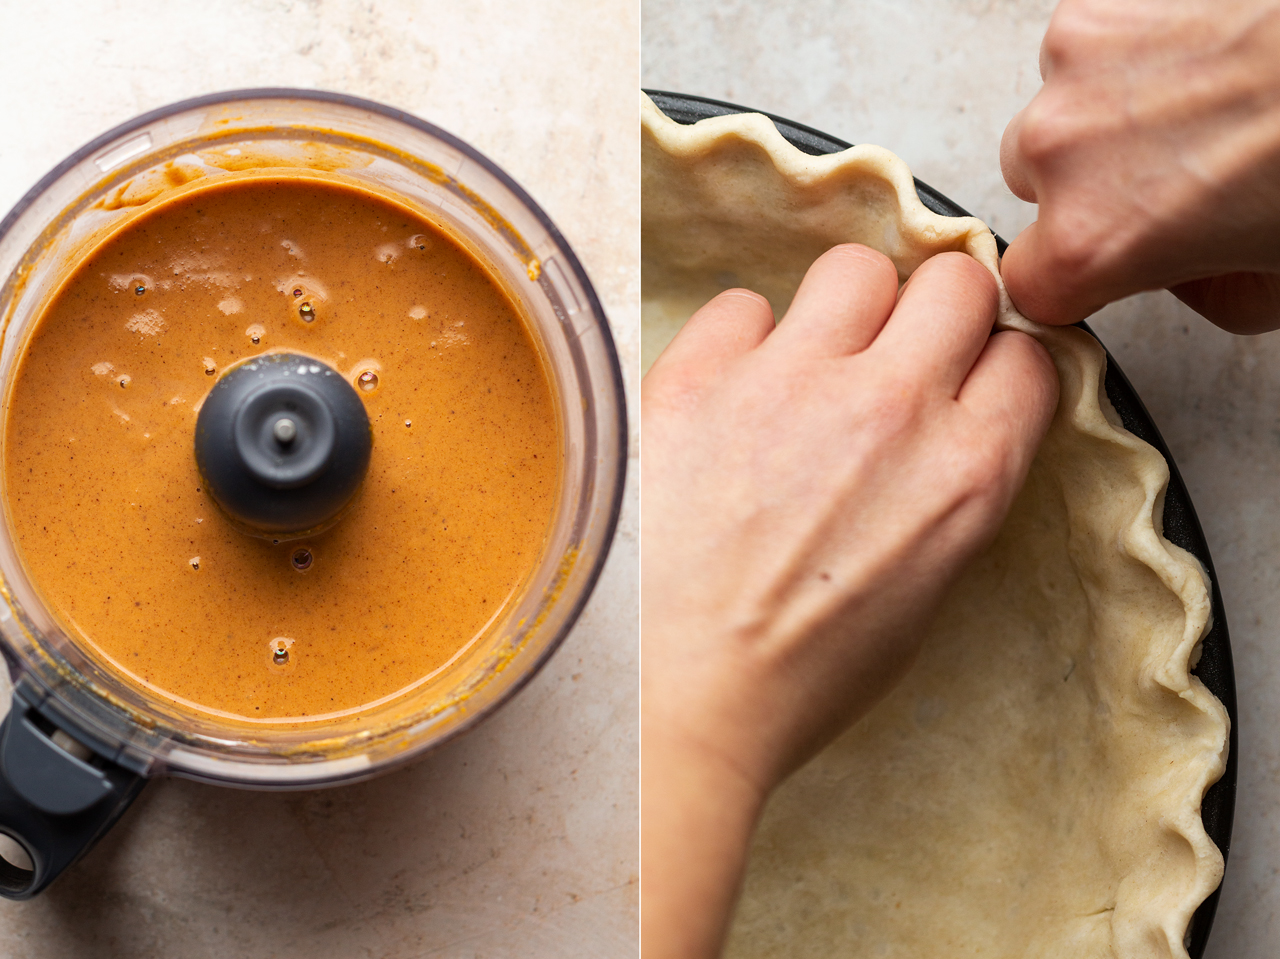
- While you can do this step in the food processor, I strongly suggest you transfer the mixture to a large bowl at this point and do this manually as then you have a greater amount of control. Slowly and very gradually trickle in some ice cold water incorporating it into the flour using a fork. Keep going until the dough is moist enough that it can be brought together by hand – clump a bit of mixture with your hand, if it sticks together (without being wet!) you’ve added enough water. I ended up using ¼ cup plus 2 tsp of water, but please go through the process as I described above instead of just adding the amount I added as different flours have different absorbency levels.
- Empty your bowl (or a food processor bowl) onto a work surface and bring all the dough together using your hands, but do not knead if you are working with gluten flour (overworking the dough will make the pastry tough). Form the dough into a flattened disc and refrigerate for at least 30-45 minutes.
- Gently and slowly roll the dough out on a lightly floured surface. You may want to do it between two sheets of baking paper as it stops the dough sticking to the bench. When it comes to gluten-free dough, you may find it easier (I did) to simply mould it to the inside of the tart tins with your fingers.
- Roll the dough into a large circle 2 cm / 1 inch bigger than the pie dish (I used a 24 cm / 9.5″ diameter pie dish). Roll the dough sheet over the rolling pin, place the rolling pin over the pie dish and unroll it gently. Line the dish and fold any excess you get at the edges under so that you end up with thick edges. Then go over the edge and crimp the edges by interlocking your index and middle finger on one hand against the index finger of your other hand (see photo). Pierce the bottom in several places with a fork.
- Heat up the oven to 160° C / 320° F fan forced (180° C / 355° F no fan) and place your pie in the freezer (or fridge, but freezer is better) for another 15 minutes or so.
- Remove the pie dish from the freezer, place a piece of baking paper (scrunch it up first to make it more flexible) at the bottom of the dish and fill with baking beads (or dry beans). Blind bake for 10-15 minutes.
- Carefully remove the beads and the baking paper insert and return the pie to the oven for another 10 minutes. Remove it from the oven and set aside while you make your filling.
FILLING
- Place all the filling ingredients in a food processor and blend until super smooth.
ASSEMBLY
- Fill the pre-baked pie crust with the filling.
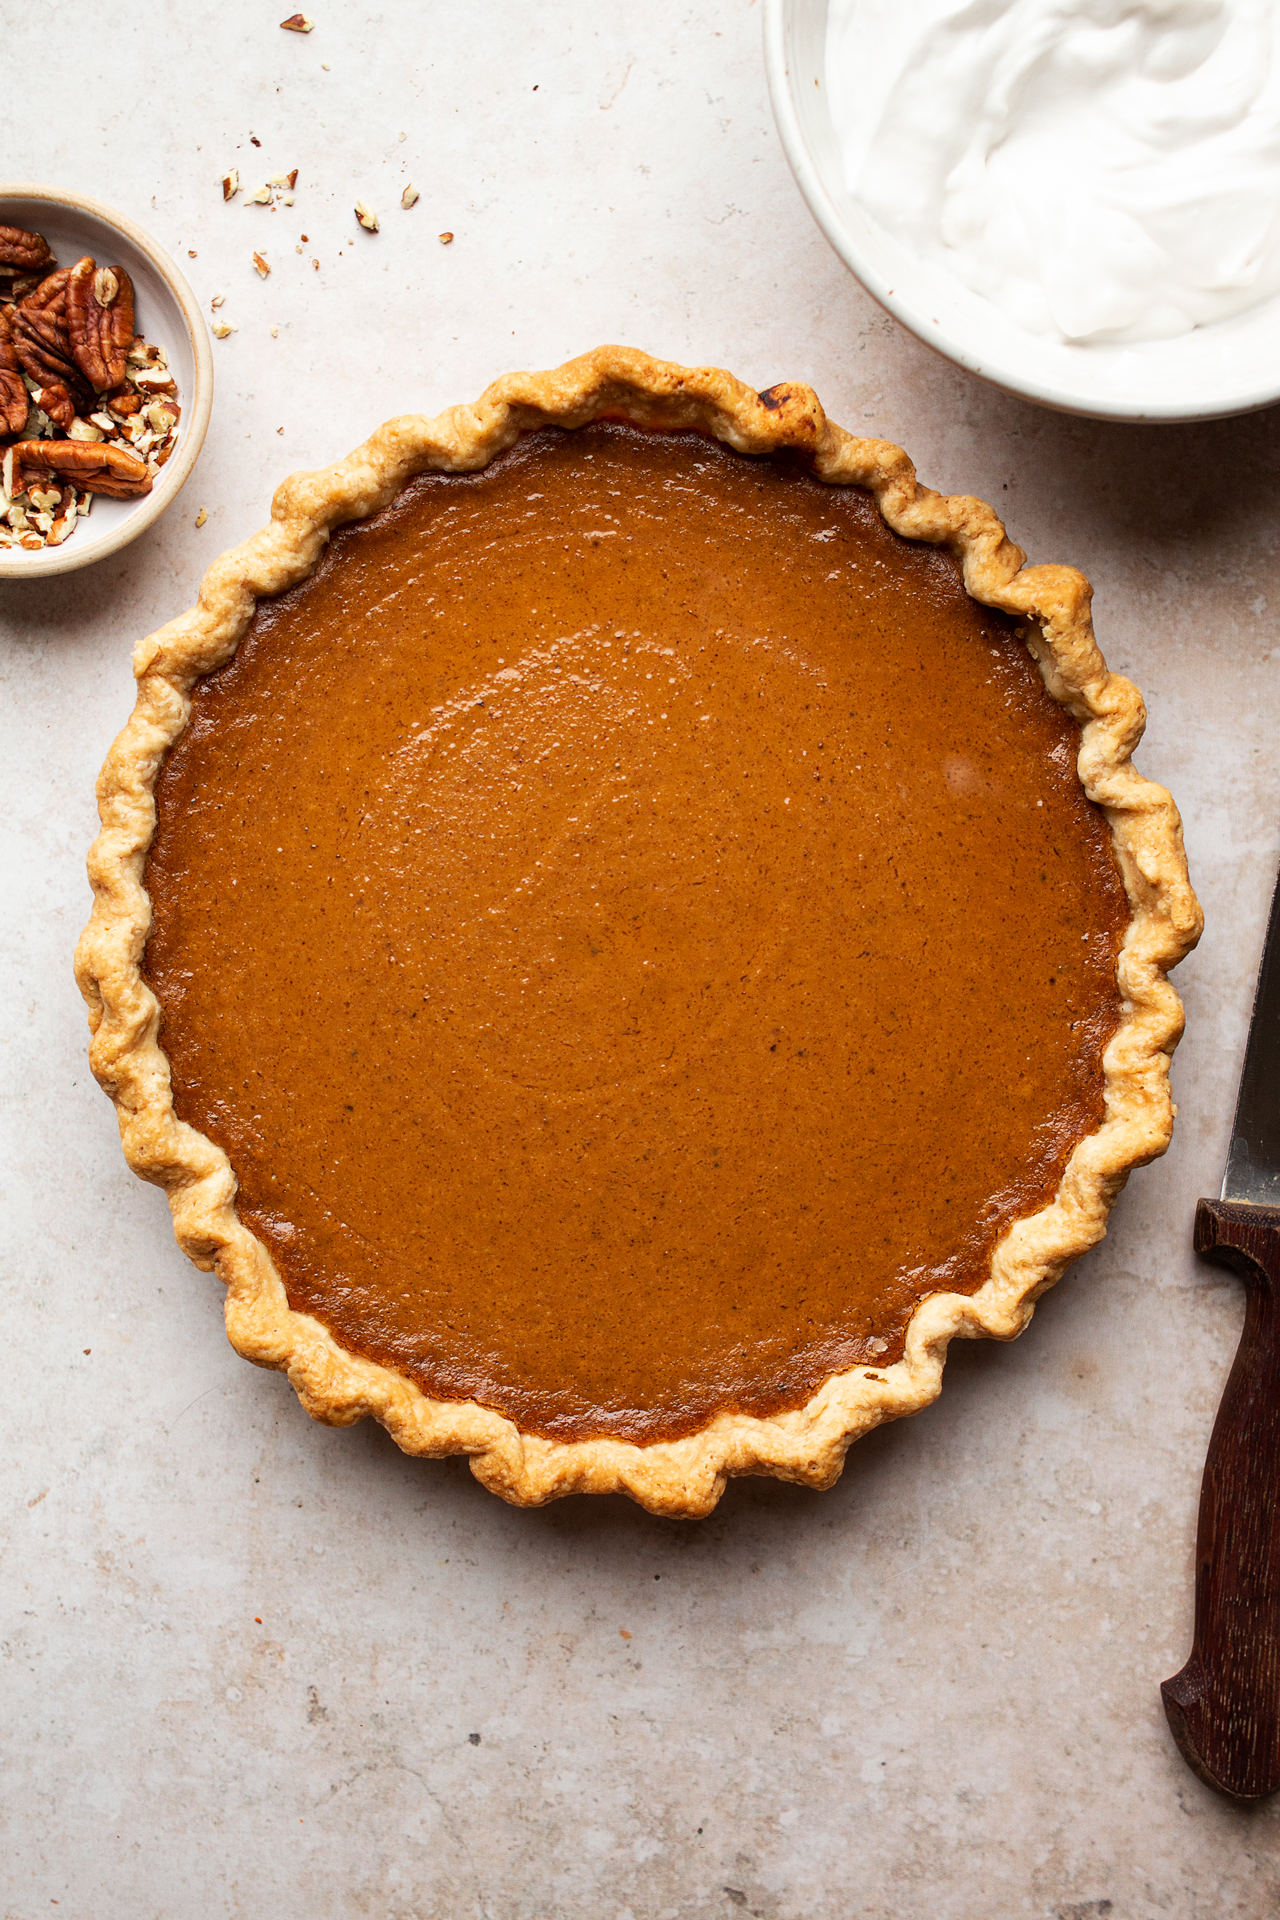
- Bake at 160° C / 320° F fan forced (180° C / 355° F no fan) for about 35-40 minutes, until the edges look set but the centre can still be a little soft. Cool the pie completely before cutting or decorating.
- Once cool, dot with thick dairy-free yoghurt or whipped coconut cream and dust with cinnamon.